The bathroom belongs to the category of technical premises. High-quality toilet repairs to a large extent ensure the comfort of residents, therefore, the design and implementation of work should be approached thoroughly: replace outdated systems and plumbing equipment, update the flooring, ceilings and walls, and in some cases even carry out reconstruction. This article will help you avoid possible mistakes when performing all these operations.

Repair of a toilet in an apartment should be not only of high quality, but also beautiful
Content
- 1 Features and benefits of turnkey bathroom and toilet repair
- 2 How to develop a beautiful bathroom design, taking into account its size
- 3 How to make repairs in the toilet yourself: useful information
- 3.1 Preparation for repair in the toilet: photo and process of dismantling the sink
- 3.2 Repair work in the toilet: photo and process of dismantling the toilet
- 3.3 Preparing surfaces for renovation in the toilet: dismantling the finish
- 3.4 The final stage of preparation for the renovation of the bathroom and toilet: waterproofing work
- 3.5 Overhaul of the bathroom: replacement of the pipeline
- 3.6 Repair of a toilet after piping: masking communications
- 4 Small bathroom design: photos and finishing options
- 5 How much will it cost to repair a toilet: the price of consumables
Features and benefits of turnkey bathroom and toilet repair
When ordering a turnkey repair, the apartment owner receives a comprehensive service, which involves dismantling and replacing all communication systems and finishing materials, as well as installing plumbing. Thus, you do not have to look for different contractors for each type of work. In addition, the time is cut and the cost of repairing the bathroom and toilet is reduced, and there is no need to solve problems with inconsistencies that arise between different performers in the process.

Turnkey works can significantly reduce repair time
The advantages of a turnkey toilet and bathroom renovation:
- compliance with all GOSTs and SNiPs;
- a high level of qualifications and professionalism allows specialists to carry out high-quality installation of important elements of the bathroom (mixers, bathtubs, plumbing fixtures, shower cubicles, heated towel rails, sinks, etc.);
- absence of violations during dismantling and laying of water supply and sewerage systems;
- many companies offer a guarantee for the work performed;
- exact adherence to deadlines;
- delivery (unloading and lifting to the floor) of rough and finishing materials, and in some cases plumbing and other things.
Note! Some companies offering turnkey renovations with materials tend to save on plumbing and tiles. Therefore, you need to carefully select a contractor.
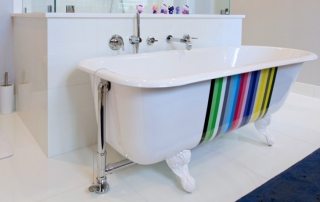
Turnkey toilets repair options: interior photos
Experts recommend thinking over the interior for a small toilet very carefully. If you can still make some changes to the design of a spacious bathroom at a certain stage, then you will have to redo everything in a compact room. Moreover, such events will entail additional costs.

It is necessary to think over the interior of the toilet in detail and carefully, especially if the room is small
Before proceeding with the repair of a toilet in a panel house or in a small-sized apartment of an old construction, it is imperative to assess the technical condition of the bathroom. As for apartments with modern layouts, there are much more possibilities in terms of design.
Bathroom and toilet repair options:
- cosmetic;
- capital;
- renovation.
Redecoration (budget) repairs do not affect meters, walls, and piping. It includes the following operations:
- replacement and installation of mirrors;
- replacement of failed valves;
- installation of suspended or suspended ceilings.
Toilet replacement can also be classified as a budget service. However, it is far from always possible to obtain a high-quality and reliable result. Every year, as a result of errors in the installation process, there are many cases when the system completely fails, creating inconvenience, or floods neighbors with floors below.

Toilet repair can be cosmetic, major and European renovation
Overhaul involves a more global rework. Often, in the course of such work, the redevelopment of the bathroom is carried out. In the photo of the repair of the bathroom and toilet, you can see the rooms in which the dividing wall between these rooms was demolished or, conversely, rebuilt. Most of this work requires the participation of professional installers. Overhaul costs are quite high. In addition, it is more durable than cosmetic.
Note! If a major overhaul of a bathroom in a panel house has been completed recently, or if the toilet is in a new building, there is no need for fundamental changes. It is enough to limit yourself to a cosmetic update. The same goes for those cases where funds are limited.
Many people dream of a beautiful bathroom and toilet design, so in most cases you cannot do without European-quality repair. It will allow not only achieving the desired result, but also supporting it in the future. It differs from a major renovation by the presence of a unique design project. It has the form of a three-dimensional visualization, compiled on a computer using a program, and is a creative embodiment of all the wishes of the owner of the apartment.

Renovation implies a deeper alteration of the premises, as opposed to cosmetic or major repairs
The cost of repairing a turnkey bathroom and toilet: the price of professional services
The cost of professional services varies from company to company. The higher the level of qualification of the specialists, the higher the price the contractor will ask for. Other factors also influence price formation:
- type of repair;
- volume and level of complexity of work;
- the price of consumables;
- terms of order fulfillment;
- the price policy of the contractor company and its prestige;
- additional services, for example, the work of a designer, preliminary drawing up of a detailed estimate,
- removal of construction waste, purchase of materials, etc.
Turnkey toilet repair price table:
| Repair type | Price of materials, rub. | Price of work of specialists, rub. | Full cost of the service, rub. |
| Cosmetic | from 6500 | from 20,000 | from 26500 |
| Capital | from 12000 | from 25000 | from 37000 |
| Renovation | from 14500 | from 38000 | from 52500 |
The table shows the approximate cost of repair work using the example of bathrooms measuring 1.2x1.2 and 0.9x1.2 m.
Table of the cost of installation work when repairing a turnkey toilet / bathroom: bathtub, toilet bowl and other plumbing:
| Name | Price, rub / piece |
| Mixer | 550 |
| Shower hose | 600 |
| Hygienic shower | 900 |
| Built-in mixer | 1200 |
| Heated towel rail | 1600 |
| Toilet | 1800 |
| Bidet | 1800 |
| Instantaneous water heater | 1800 |
| Boiler | 2400 |
| Shower tray | 2600 |
| Wall hung toilet installation (without the price of the toilet) | 3000 |
| Bath | 3200 |
| Shower cubicle (without assembly) | 4000 |
| Hydromassage bath | 5400 |
How to develop a beautiful bathroom design, taking into account its size
Before purchasing materials and preparing a room for renovation, you need to carefully consider the interior. To begin with, the area of the room is measured. The future situation depends on its footage. If the design of a toilet in Khrushchev is to be developed, then the choice is not so great. We'll have to adjust the interior to the existing conditions. Then you need to determine what equipment and plumbing will be installed in the room.
Important! In the process of developing the design of a bathroom in Khrushchev, regardless of the size of the room, it is imperative to take into account the norms for installing equipment.
If the free area is very small, then you will have to limit yourself to the installation of the toilet bowl. Large rooms allow the installation of a washbasin, urinal or bidet. In this case, the interior will only depend on imagination and financial capabilities.
Toilet renovation: design and layout in accordance with standards
In the process of laying communication systems and installing plumbing fixtures, it is imperative to be guided by the standards that apply not only to city apartments, but also to private houses and office buildings. If the bathroom is to be installed in the attic, you need to retreat from the inclined plane by at least 1.05 m, and this parameter does not depend on the size of the attic.

During the repair of the toilet, you must be guided by the standards
The door from the toilet must not go out into the kitchen or the living area. It is better to choose a hallway or corridor for these purposes. The door leaf should open exclusively outward, and not inwardly. The minimum permissible ceiling height in the room in front of the toilet is 2.1 m.
The minimum dimensions of a bathroom in Khrushchev:
- Length - 120 cm.
- Width - 80 cm.
- Height - 240 cm.
For people with disabilities, other dimensional parameters are provided. The minimum width of the room is 160 cm or more, and the length is 200 cm. During the renovation process in the bathroom combined with the toilet, it is imperative to install special handrails for the bath.
For the interior of a small toilet, it is advisable to select compact plumbing. Some toilets are partially built into the wall during installation. They are ideal for small bathrooms. The assortment of shops also allows you to pick up a small sink. The most compact are teardrop-shaped products.

The minimum dimensions of the toilet can be: width - 80 cm, length - 120 cm, height - 240 cm
Helpful advice! To save space, instead of a bath, you can install a shower stall.
Bathroom and toilet can be independent or be in the same room. Separate bathroom design is usually developed based on typical sizes. In buildings with the old layout, the dimensions of the toilet are 0.8x1.5 m. Panel houses have more spacious rooms - 1x1.5 m. As for the bathroom, its size is 1.2x1.65 m.
For the repair of a bathroom combined with a toilet, the minimum dimensions are also provided - 1.7x2 m. Such dimensions will not allow installing a full-fledged bath. There is only enough space for a shower stall. Lavatories with a minimum size are found only in Khrushchev houses. In buildings with improved layouts, the area of the combined premises is already 5 m2 or more.
Toilet design: photos and good examples of layouts
Any changes affecting the layout of the premises must be carried out by specialists. If the structure of the building is violated, a collapse is possible, therefore it is strictly forbidden to do it yourself.

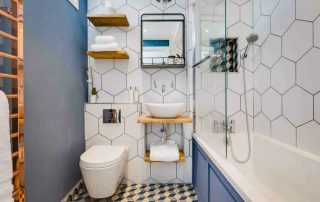
If the size of the room allows, then it is advisable to place a sink in the toilet
If the size of the rooms is minimal (about 2.5 m²), it is advisable to combine the rooms of the bathroom and toilet by removing a partition between them. For such projects, compact plumbing must be selected. It is better if the shower stall or bath will have a corner structure. A partially built-in toilet will do the trick. The area reserved for the installation of the washing machine can be located under the sink or located at the entrance. Medium mirrors will visually expand the room.
The design of the 4 m² washroom could be more flexible. The washing machine and plumbing in the bathroom can be located as you like. To get rid of steam, it is advisable to install a hood in the room, which will remove excess moisture. It is better to place the bath in the far corner of the room, and use the adjacent one for mounting cabinets and a washing machine.
Bathrooms measuring 7 m² or more allow you to install both a shower and a bath. In such rooms there is enough space for placement:
- bidet;
- two sinks;
- washing machine;
- drying clothes;
- lockers for storing towels and household items.

Spacious toilets allow you to install not only a sink, but also a spacious wardrobe or cabinet
Helpful advice! By installing a shower screen near the bathtub, you can not only prevent splashing water, but also achieve privacy.
How to make repairs in the toilet yourself: useful information
In order not to hesitate for a long time, where to start repairs in the toilet, you can use the standard scheme, which includes the following steps:
- choosing a place and method for installing the toilet;
- development of a design project;
- selection and purchase of building materials;
- removal of communications (drain pipe and riser);
- dismantling of finishing on walls, floor and ceiling;
- pipeline laying;
- installation of a plumbing cabinet;
- installation of flooring;
- installation of a toilet;
- installation of ventilation and lighting systems, as well as plumbing (bidet, sink, urinal);
- finishing of walls, ceilings and a sanitary cabinet;
- boiler installation;
- replacement of the door structure.
You can start repair work after making sure that you have all the necessary tools and materials. Tools required for DIY toilet repairs:

Before starting repairs, it is recommended to develop a design project for the premises
- screwdriver with a set of nozzles;
- puncher;
- gas wrench;
- rollers and brushes;
- welding machine and pipe cutter (if the metal pipeline will be replaced with a plastic one);
- a spatula for applying glue under the tiles;
- meter and tape measure;
- plumb line and building level;
- carpentry and locksmith tools (files, hammer, hacksaws, chisels, chisels, etc.).
Important! You need to drain the water from the toilet cistern, otherwise it will spill onto the floor.
Before proceeding with the dismantling of plumbing fixtures, turn off the hot and cold water supply. For this, the taps are shut off, providing access to the central water supply system. Then you need to make sure that there is no liquid left in the pipes.
Related article:
Toilet tiles: DIY tips for choosing and installing
Benefits and varieties. How to choose a tile for toilet and bathroom? Councils for the organization of design. Laying tiles in the toilet with your own hands.
Preparation for repair in the toilet: photo and process of dismantling the sink
Brackets are used to fix the sink to the wall. Some models have a decorative pedestal that covers the drain and other piping elements and acts as a support. The work on dismantling the sink begins with him.

First you need to remove the sink from the bracket that fixes it to the wall
Sink dismantling process:
- The fastener is unscrewed on the floor, the decorative support is removed.
- A container is placed under the sink so that water does not spill onto the floor during the dismantling of the siphon.
- A storage glass is twisted on the siphon, the liquid is drained into a container, and then it returns to its place.
- At the bottom of the sink, the nut is unscrewed, the siphon is removed along with the drain hose.
- The entire drainage system is dismantled, and the funnel of the sewer pipe is closed with a lid or a rolled up rag so that an unpleasant smell does not penetrate into the apartment.
- Using an adjustable wrench or a gas wrench, all hoses that supply fluid to the mixer are disconnected (in some cases, open-end wrenches with a size ranging from 19 to 30 mm can be used).
- The sink is removed.
If the installation of a new sink and mixer is not intended, these elements remain screwed on.
Repair work in the toilet: photo and process of dismantling the toilet
Having got rid of the sink, you can start dismantling the toilet. To do this, you must disconnect the supply hose from the water pipe and the tank. The latter can be secured in two ways. If brackets are used as retainers, the tank is simply removed from them. For bolted connections, the fasteners must be unscrewed. Then the connecting pipe is removed from the outlet pipe and pulled out from the sewer socket.

To disconnect the toilet from the floor, you need to unscrew the fasteners
Note! The connecting pipe must be thrown away, and a new one is subsequently installed in its place.
At the next stage, the toilet itself is removed directly. To detach it from the floor, you will need to unscrew the fasteners. These can be studs, bolts, or screws. Depending on what type of clips was used, you can use a screwdriver or wrench for this.
Sometimes, in the process of repairing a small toilet, cement is not used to install the toilet. Fixation is carried out only with sealant and screw connections. In this case, to remove the toilet, you just need to swing it. This must be done very carefully. If the toilet is fixed with a concrete solution, it will not work to dismantle it as a whole. As a rule, in most cases, the product cracks or splits, after which it is simply unsuitable for further use.
Preparing surfaces for renovation in the toilet: dismantling the finish
Regardless of what material was used as finishing the toilet in the apartment, you will have to get rid of the old coating, since during the operation it managed to absorb unpleasant odors that may appear after the repair. In addition, the presence of old finishes on the walls will not allow a high-quality surface treatment with a primer. As a result, the adhesive properties of the glue and decorative finish will significantly decrease, due to which the coating will peel off faster and soon it will be necessary to renew the interior of the bathroom again.

In order to dismantle the old tile, you need a puncher
Old tiles on the walls can be dismantled with a puncher. This will also require a flat blade chisel. A spatula and a hair dryer will help get rid of the paint. For these purposes, a sander can also be used, on which a round metal brush is previously put on. To remove the plaster from the walls, you will have to thoroughly soak the surface with water. After that, the coating is removed with a thickened spatula. The recommended tool thickness is 2.5-3 mm.
The easiest way to remove wallpaper from the walls is to do the following:
- the surface is thoroughly wetted;
- a break is taken so that the canvases are well saturated with water and soaked;
- the wall surface is moistened again;
- the coating is removed from the walls with a spatula.
When the walls and ceiling are cleaned, you can proceed to dismantle the flooring. You will need a chisel to do this manually, but it is much easier to remove the finish using a hammer drill.

To remove paper wallpaper, it must be moistened and removed with a spatula.
Note! It is very important to remove all material particles, even the smallest ones. To do this, you can use a sander equipped with a metal brush. In addition, the surface is necessarily leveled.
The final stage of preparation for the renovation of the bathroom and toilet: waterproofing work
After the finish has been removed from the walls and floors, it is necessary to take out all construction debris. Then the surfaces are thoroughly cleaned, for this you need to brush them around. It is advisable to collect the remaining dust with a powerful vacuum cleaner.
Further, the surfaces are treated with a deep penetration primer. Experts recommend using antiseptic agents to repair toilets in Khrushchevs. The primer improves adhesion between the surface and the finishing materials, and also prevents mold. Processing is performed twice. Before re-applying the composition, you need to wait until the previous layer is completely dry.
This completes the preliminary preparation - you can proceed directly to the waterproofing work, which must be performed both during repairs in a small toilet and in a large bathroom. The fact is that there is water supply and sewerage in the room, so the likelihood of leaks is not excluded. The presence of high-quality waterproofing will avoid flooding of neighbors on the lower floors in case of an accident.

Before waterproofing, the walls must be treated with a primer
You can find various types of waterproofing materials in stores. The most affordable are the coating agents that treat the joints between the floor and walls. The material is applied to the seams in strips, the width of which is 15-18 cm. A waterproofing tape is laid on top of the not yet dried coating. It must be well pressed to the surface in order to drown. The waterproofing tape increases the joint protection against leakage if large amounts of water are spilled onto the floor. After all the joints are dry, the entire floor is covered with a waterproofing mixture. If necessary, you can still apply 1-2 layers of coating.
Important! Each new layer of waterproofing compound is applied to the surface only after the previous one is completely dry. Only in this case the coating will not lose its protective properties.
Overhaul of the bathroom: replacement of the pipeline
With a major overhaul, replacement of the pipeline is necessary, especially if the system has been in operation for many years. It is better to replace metal communications with pipes made of more modern and practical materials, for example, plastic or metal-plastic. You can use a grinder for cutting products, and a gas wrench for twisting.

It is recommended to use the services of specialists to replace the pipeline
In the absence of experience and relevant skills, it is better to hire a specialist who will draw up the optimal wiring diagram, taking into account the placement of taps that shut off the water and meters. It is advisable that the risers be replaced on all floors in the entrance. It is much more difficult to draw up a diagram that also includes water meters, as well as filters.
The simplest is the tee piping, which is often encountered by apartment owners in the process of repairing a small bathroom. This system unevenly supplies water to different points of consumption (subject to simultaneous use), and this is its main disadvantage.
In the collector circuit, each water intake point is connected separately.Thanks to this, hot and cold water is distributed evenly throughout the system, regardless of how many points are consumed. The tee system can be replaced with a collector system, but then the pipeline will have to be updated throughout the apartment.
If there will be a sink in the toilet, this element must be included in the wiring diagram. Its connection hoses against the wall, close to the collector, can be closed using a small box. If the sink is installed near the door, a box should be used to camouflage the pipes, or simply hide the communications in the walls by placing them in the grooves.

It is better to replace old metal pipes with plastic or metal-plastic
Useful advice! Most often, in the photo of the repair of the bathroom and toilet, you can see tiles on the walls. If this material is used as decoration, it is advisable to hide communications in the walls, and not close them with a box.
Repair of a toilet after piping: masking communications
If you look at the finished interior options, you will notice that in the photo, the toilets look nice and neat after repair. This result is ensured not only due to the carefully developed design and competent selection of materials, but also due to the skillful masking of communications, because even completely new pipes do not bring aesthetics into the interior of the room.
Most often, a box is used to mask the pipeline in the bathroom. The structure looks like a frame, sheathed with plasterboard sheets. As a building material for the manufacture of the frame, metal profiles or wooden blocks can be used. All structural elements are carefully calculated. Using a hacksaw or a grinder, the selected material is cut into parts of the required size, which are fastened with self-tapping screws during installation.
Most often, the frame is installed at the bottom of the wall, where the piping is usually located. To hide the sewage system, it is advisable to build a separate box. In some cases, the entire wall is sewn up with drywall. Regardless of how exactly communications will be hidden, it is imperative to provide direct access to them. For this, a hole is cut out in the drywall, where an inspection hatch with a door is installed.

You can disguise communications in the toilet using a box
When the frame is assembled, all its joints must be strengthened. For this, a fiberglass mesh-serpyanka is used, which is processed with putty. You should also cover up all the caps of the screws so that rust does not appear through the finish. Then you need to decide what material the access door will be made of, since the choice of finish will depend on this. If wallpaper is glued to the box, you can use furniture hinges to fix the door.
Note! If wallpaper is used as a finish for a drywall box, then the inspection hatch is installed immediately (before the start of finishing work).
Instead of a door providing access to communications, plumbing shutters or blinds can be used. They are installed after all the finishing work in the room. Often, apartment owners resort to budget repairs with PVC panels. In this case, the hatch door is made of a similar material and is attached to the battens, which are part of the frame.
Small bathroom design: photos and finishing options
When the frame is completely sheathed and putty, it must be covered with two layers of primer and thoroughly dried. After that, you can start finishing work.

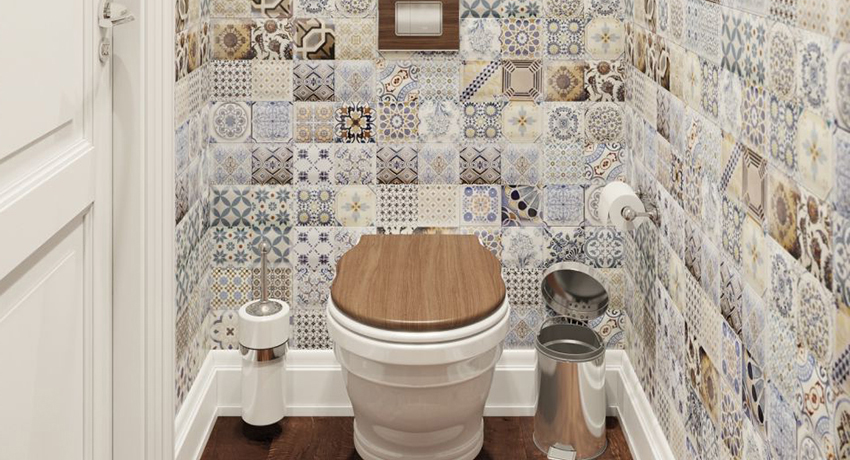
You can use tiles, plaster, wallpaper and panels to decorate the toilet
The decor chosen for the toilet and all finishing materials must necessarily be resistant to moisture and chemical detergents. These requirements are met:
- ceramic tile;
- washable wallpaper;
- plastic panels;
- plaster impregnated with a deep penetration primer.
Tiles can be used as floor finishes. It is durable, simple and reliable, and easy to clean. The repair of a toilet in an apartment with self-leveling floors looks very impressive in the photo. They are a self-leveling epoxy based coating with a 3D effect.
Practical toilet repair: photo and technology of wall decoration with tiles
Ceramic tiles are the best finishing material for walls and floors in the toilet. It has excellent performance and decorative qualities. In addition, you can decorate the walls with tiles yourself, without resorting to the services of specialists.

The tile has excellent decorative and performance characteristics
Step-by-step tile laying technology:
- The surface of the walls is leveled with drywall or putty.
- A layer of primer is applied.
- Tile adhesive is applied to the wall with a notched trowel.
- The tiles are carefully laid on the wall (according to the chosen scheme) and slightly pressed against the surface.
- Sometimes it is necessary to adjust the tile size. For cutting tiles, it is advisable to use a specialized tool - a tile cutter. For these purposes, a glass cutter or a sander with a diamond wheel can also be used.
- The seams between the tiles are filled with a joint. The color of this grout can be any. Usually it is matched to the overall color scheme of the room, although contrasting options are also possible.
Useful advice! The use of plastic crosses during the installation of the tiles will allow you to get even rows and beautiful seams of the same width.
How to repair a toilet with PVC panels yourself
Fixing panels to walls is much easier than laying tiles. With this material, you can hide all surface defects. Plastic panels are not as durable as tiles, but they are cheaper. In addition, they can be easily changed if the finish is worn out or just tired.

It is very easy to install PVC panels, but they are less durable than tiles
To sheathe the ceiling of the bathroom with plastic panels, you must follow the instructions:
- A lathing structure is formed on the ceiling, consisting of wooden bars or metal profiles.
- Wiring is laid in accordance with the developed lighting system diagram. The cables must be de-energized during operation.
- Where the ceiling lathing will go over to the walls, moldings are attached that function as internal corners.
- Marking is applied to the panel, holes are cut out for mounting fixtures.
- Installation of plastic panels should be started from the wall. The first element is attached to the molding grooves. The rest are stacked one after another, fixing in the same way.
After that, you can start decorating the walls. Their surface is treated with a primer, after which the crate is assembled from wooden battens. It is advisable to use dowels as fasteners. If the panels are to be mounted vertically, the lathing should be horizontal - and vice versa. The thickness of the slats should not exceed 2 cm, and the width can be any (3 cm or more).

Before laying the panels, you need to cut holes on them for mounting fixtures
Useful advice! It is advisable to align the rails vertically immediately. Moreover, in the process of assembling the frame, it is better to fix the rail and the lining on the wall at the same time.
The slats are installed in increments of 40-50 cm. Dowels are suitable as fasteners. Attach a rail to the wall and drill a hole through it. Then a plastic dowel is hammered into it. The rail is again attached to the same place and fixed on the wall with a self-tapping screw. At the bottom of the structure, a starting molding is attached, where the ends of the panels will be inserted. The trim must also be fixed vertically. Therefore, moldings are also installed in the corners of the room.
After that, the material is cut. Then the panels are inserted one by one into the grooves of the moldings, leveled and fixed on the crate. In this case, there may be several options for fastening:
- nails;
- metal clamps;
- clips.

PVC panels can be fastened with nails, clips or clamps
Clamps allow you to replace a damaged panel without disassembling the entire wall. The clips are convenient to use, but they cannot be installed without special guides, which requires additional costs.
How much will it cost to repair a toilet: the price of consumables
If the repair is carried out on its own, the costs will depend on the area of the room, the chosen design, the quality of materials and other factors. Even if we take into account all the nuances, it will not be possible to say exactly how much it costs to repair the toilet, since the estimate may increase due to unforeseen circumstances. You should always add about 30% to your results.
Table of average prices for consumables:
| Name | Quantity of material, unit rev. | price, rub. |
| Metal-plastic water pipe (16 mm) | 1 running. m | 70-120 |
| Sewer pipe (50 mm) | 1 running. m | 75-150 |
| Wooden beams | 1 PC. (6 m) | 80-200 |
| Plastic panel | 1 m² | 150-250 |
| Acrylic dye | 5 Kg | 200-500 |
| Compression fitting | 1 PC. | 250-500 |
| Tile | 1 m² | 250-500 |
| Antiseptic primer | 5 l | 250-500 |
| Leveling compound for self-leveling floors | 25 Kg | 280-750 |
| Sink | 1 PC. | 900 |
| Mixer | 1 PC. | 1500-2200 |
| Toilet | 1 PC. | 3000-3500 |
Do-it-yourself repairs are a great way to acquire new skills or improve existing skills. In the absence of such, it is better to hire specialists. To reduce the cost of repairs, some operations can be performed independently, for example, dismantle the old finish, make a concrete screed on the floor, etc.