In winter, any owner of a summer house or private house is faced with the need to clear snow from the yard, paths, driveway to the house, as well as the roof. Using a special technique, which is produced by many companies, it is easier and faster to do this. But there is another option: a do-it-yourself snow blower. Anyone who is familiar with the working principle of snow blowers and has certain technical skills can assemble the device on their own.

A snowblower that effectively copes with the cleaning of the local area can be built independently
Content
- 1 Types of snow removal equipment for home with your own hands
- 2 How to make a snow blower with your own hands
- 3 Making a snow blower with your own hands from a chainsaw
- 4 DIY snowblower: the advantages of the electric model
- 5 Diy rotary snow blower device
- 6 Making a snow blower with your own hands: videos about self-assembly
Types of snow removal equipment for home with your own hands
Snowblowers are designed for mechanical removal of snow cover in the required area. Their functions include collecting the snow mass and throwing it to the collection point. The engine driving the car can be electric or gasoline. And the snow removal equipment itself is divided into self-propelled (crawler or wheel drive), manual, one-stage and two-stage.
For self-assembly of such garden equipment, you can use a chainsaw engine, an electric motor or walk-behind tractor, as well as various improvised materials that everyone on the farm probably has. Before making a do-it-yourself snow blower, you should familiarize yourself with the varieties of such equipment and choose an acceptable option for yourself.

The choice of a snow blower design depends on many factors, one of which is the area of the site that is supposed to be processed.
Electric snow blowers are capable of cleaning small areas near your home, such as a porch or narrow paths. To free the territory of impressive volumes from the snow cover, such a unit will not work. In addition, its work is not efficient if there is ice or significant drifts. On the other hand, this technique is quite compact, easy to operate and easy to store.
Self-propelled snowblowers powered by a gasoline engine do an excellent job of removing large amounts of snow from vast territories.Moving independently, these vehicles have excellent maneuverability and long throw range. The technique is large enough, however, when working, it absolutely does not need the use of physical efforts.
Before you make a manual snow blower with your own hands, you need to keep in mind that non-self-propelled models are designed to clean small areas of freshly fallen snow up to 25-30 cm thick.They are mainly used for daily cleaning of sidewalks, garden paths and flat roofs. Such devices are quite maneuverable, however, when removing a dense layer, it will be difficult to control the equipment, since you will have to push not only the apparatus, but also the thickness of snow in front of it.

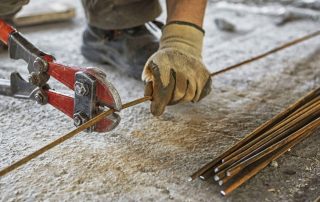
DIY snowplow with chainsaw engine
Useful advice! When assembling a non-self-propelled snowblower for the house with your own hands, you should use as lightweight parts as possible, since the equipment will work due to human efforts.
How to make a snow blower with your own hands
Making a homemade snowblower for your home with your own hands is a great opportunity not to spend money on purchasing expensive models from leading manufacturers and at the same time to avoid time-consuming clearing of the area from snow with a shovel. In addition, home-made equipment will become the pride of any owner of a country house or summer cottage.
It will not be difficult to assemble a homemade snowblower if you have an idea of the principle of operation of such equipment and its structure. To clear snow from the surface of the paths and the yard of your own house, it will be enough to assemble an auger or rotary model. These are simple machines and everyone can make them. Making a combined homemade snow blower with your own hands is somewhat more difficult, but if you wish, you can cope with this.

Snowblowers can be both self-propelled - wheeled or crawler-mounted, and non-self-propelled, which require operator efforts
Before you make a snowblower with your own hands, you need to decide on the type of engine. Equipping equipment with an internal combustion engine, it should be noted that this will be a powerful enough unit that can function on any surface of your site. However, the components and fuel for it are quite expensive. In addition, the disadvantages include the complex technical content of such a technique.
As for a do-it-yourself snowblower with an electric motor, in this case, you can use any motor from a relatively powerful electrical equipment. A trimmer or electric saw motor will do. The advantages of such a technique include the availability of electricity, the disadvantages - a small range. To cover the entire area, you will need an extension cord or street wiring with multiple outlets.
Useful advice! When assembling an electric snow blower with your own hands, it should be noted that the electric motor needs good waterproofing, since it is afraid of moisture.
On the Internet, you can find a large number of videos of homemade snow blowers, viewing which will help you to visually familiarize yourself with the technology of manufacturing various types of snow blowers.

The device of a rotary snowblower
Making a snow blower with your own hands from a chainsaw
The main advantages of a homemade chainsaw snow blower are:
- low cost of components (in addition, you can purchase a used chainsaw at a low price);
- high performance of the unit;
- the ability to make the main units from available materials at hand.
The disadvantage is the impossibility of providing the apparatus with self-propelled movement.
When making a snow blower from a chainsaw with your own hands, its motor is used as a driving force.To adapt the engine from such a technique for a snowblower, it is necessary to disconnect it from the frame and slightly upgrade it. The engine power will affect the main parameters of the snow blower: the quality of clearing, the throw range and other parameters.
In addition to the engine, the snow blower design includes:
- auger body (bucket) - you can make it from roofing sheet metal;
- auger shaft - a 20 mm (¾ inch) pipe will do;
- screw surface of the auger - made of sheet iron, some use a conveyor belt;

The design based on the engine from the chainsaw is a budget option for a homemade snow blower
- side parts - 10 mm plywood or sheet steel is used for their manufacture;
- supporting structure (frame) - it is welded from a profile pipe (corner 50 x 50 mm);
- handle - from a pipe with a diameter of 15 mm (½ inch);
- blade for feeding snow into the outlet chute - metal plate 120 x 270 mm.
In work, you can use the drawings of a snow blower from a chainsaw with your own hands, posted by users on the Internet.
Do-it-yourself auger formation for a snow blower: video of step-by-step production
The main working element of the snow blower is the auger. It consists of cutting ring-blades attached to the drive shaft. A pipe with a length of about 80 cm is used as a shaft. In the center of the pipe, you need to saw through a hole, into which a blade will subsequently be inserted to feed snow. As the shaft (pipe) rotates, the blade will throw snow back.
Before you make an auger for a snow blower with your own hands, you need to develop a diagram or use ready-made drawings, according to which the rings will be cut. The auger blades are made of sheet steel. To do this, 4 discs are cut out of the metal, cut them and pulled out in the form of a coil. After that, the finished parts of the spiral are welded to the pipe: equally on each side.
; 2 - end axis (steel, bar d30, 2 pcs.); 3 - screw shaft (steel, pipe 42x6.5, 2 pcs.); 4.13 - studs MB (steel, bar d6, 36 pcs.); 5, 17 - screws (steel, sheet s2); 6 - central axis (steel, bar d40); 7, 16 - central bearing housings; 8 - asterisk (z = 36, t = 19.05); 9 - nut М36х3; 10 - bearing 160205 (4 pcs.); 12 - bolt М8 (6 pcs.); 14, 15 - bearings 236205")
Auger mechanism for a snow blower: 1, 11 - halves of the end bearing housing (steel, sheet s2, 4 pcs.); 2 - end axis (steel, bar d30, 2 pcs.); 3 - screw shaft (steel, pipe 42x6.5, 2 pcs.); 4.13 - studs MB (steel, bar d6, 36 pcs.); 5, 17 - screws (steel, sheet s2); 6 - central axis (steel, bar d40); 7, 16 - central bearing housings; 8 - asterisk (z = 36, t = 19.05); 9 - nut М36х3; 10 - bearing 160205 (4 pcs.); 12 - bolt М8 (6 pcs.); 14, 15 - bearings 236205
Further, having determined the center of the shaft, two blades are welded parallel to each other, which will eject snow. Metal spacers are welded along the edges of the pipe to fix the screw structure. The helical blades are attached to the spacers on one side, and to the central blades on the other.
Useful advice! When making an auger for a snow blower from a chainsaw with your own hands, it is very important that the turns of the metal spiral are located at the same distance from the center and towards it. Otherwise, the technique will vibrate strongly.
In the manufacture of the screw body, its length is left equal to the length of the shaft, taking into account the segment for the drive. Trunnions are welded to the edges of the shaft, with the help of which it is mounted on bearings. They are used in a closed design to avoid the ingress of snow and water. You can get a visual idea of how to make an auger if you watch a video of a homemade snow blower: in this case it will be much easier to assemble a snow blower with your own hands.
DIY assembly of a snowblower from a chainsaw
The manufacture of the screw body begins from the sides. To do this, two circles are cut out of the metal, the diameter of which exceeds the diameter of the screw assembly by 6-7 cm. A sheet of metal of the appropriate size curved into a semicircle is welded to the sides. In the center of the side parts, holes are arranged into which the auger mechanism is inserted. The bearings are welded to the sidewalls from the outside.On the section of the pipe under the drive, a driven sprocket is fixed by welding (an asterisk, for example, from a motorcycle, is suitable).
Next, proceed to the snow removal device. It can be made from a pipe with a diameter of 100 mm and a length of about 1 m. In order to install the pipe, a hole of the corresponding diameter is made in the screw body. It should be located on the back of the case. A snow thrower pipe is inserted into this hole, fixed with bolts, and a box is installed on top.
The frame for the snowplow is made by welding shaped pipes into the frame. The strips for mounting the engine are attached to the transverse corners of the frame. It should be noted that the power plant must move freely along the frame and be able to be fixed in the desired position. A handle is welded to the frame with the throttle control of the engine of homemade snow removal equipment brought out to it.

Homemade chainsaw snow blower longitudinal engine
Depending on the type of terrain, the frame of the snow blower is equipped with wheels or runners. Wheels can be used for flat areas, skids for uneven and uneven surfaces. The base for the runners is made from bars, to which plastic pads are attached for good glide.
DIY snowblower: the advantages of the electric model
Electric snow blowers have several advantages over models equipped with combustion engines. These include:
- relatively quiet work;
- due to the absence of filters, fuel, spark plugs in the engine, such units are easy to care for and maintain;
- no need for refueling;
- low weight of equipment;
- do not emit smoke during operation;
- low cost and excellent efficiency.

Low noise level and low weight of the structure are one of the main advantages of the electric snow blower
However, electric snow blowers also have disadvantages, including:
- low engine power (up to 2 kW);
- constant monitoring of the condition of the electrical cable for damage;
- small radius of action (as far as the carrying length allows);
- the need for efforts to move the device.
Useful advice! Before making a snow blower with an electric motor, select wires whose insulation will withstand the load and will not crack under the influence of frost.
DIY electric snow blower assembly
The technology for making electric snow removal equipment with your own hands is in many ways similar to the device of gasoline models, however, the driving force of such equipment is an electric motor. It can be the simplest motor from an electric saw, grinder or other power tool. Refer to the electric snow blower drawings when assembling with your own hands. Videos on the topic will help you avoid editing mistakes.

An example of an electric snow blower device: 1 - electric motor; 2 - a pulley from the car; 3 - sewer plastic pipe; 4 - half-tap; 5 - steering wheel; 6 - packet switch
The auger assembly and housing can be assembled as in the example of a chainsaw-based snow blower. It remains to connect the electric motor. This can be done in different ways: by means of a gearbox or a belt drive. In the first version, the axis of rotation of the motor is located perpendicular to the pipe (shaft). The auger rotates thanks to a gearbox that connects the shaft and axis of the electric motor.
The second option assumes that the axis of the motor and the auger shaft are placed in parallel and connected by a belt. This scheme allows you to quickly remove and install the electric motor by adjusting the tension of the belt drive. For work, you can use ready-made drawings that can be adjusted to fit your size.
Related article:
Snow blower for walk-behind tractor: the principle of operation and the basics of self-assembly. DIY snow blower manufacturing options. Characteristics of various models. Self-installation instructions.
Getting started with self-assembly, you should adhere to some recommendations:
- in order to avoid damage to the engine as a result of stones and other objects falling into the auger, it is necessary to use safety sleeves, bolts. Due to this, if the load is exceeded, the bolts will fail, and the engine will not jam;
- the width of the auger body is selected taking into account the size of the surface requiring cleaning;
- when installing a single-stage snow blower, the outlet chute should be located on top and on the side of the body, which will allow the thrown snow to travel a shorter distance.

The snow blower engine can be gasoline or electric
Layout of a snow blower from a trimmer with your own hands
For assembling a homemade snow blower from a trimmer, not all models of electric scythes are suitable. If the trimmer has a curved bar with a steel cable rotation transmission, then such a tool is weak and not suitable for making a snow blower. One of the requirements is that the trimmer has a straight bar and the transmission of rotation from the motor to the coil by means of a gearbox and a rigid shaft. Such devices are more powerful and can be used for snow blowers.
Before making your own snow blower from a trimmer, you need to check that you have all the necessary tools. You will need a welding machine, grinder, drill. The sequence of work is as follows:
- the body can be made from a small metal barrel, which must be cut approximately 15 cm from the bottom. A hole is made in the center of the bottom of the barrel, into which the protruding element of the gearbox will be placed. Holes are drilled along the edges - at a distance that coincides with the shield mounts on the gearbox itself;
- a 10 x 10 cm square hole is made on the side of the barrel to tilt the snow mass;

A snow blower made from a trimmer with your own hands
- the third part of the open case must be covered with a sheet of tin so that the hole for the snow outlet is exactly in the center;
- four blades are required to make a rotor. It is necessary to cut four rectangular plates measuring 25 x 10 cm from sheet metal. These blanks must be cut so that the shape of the blade is obtained. After that, they are welded to the trimmer disc;
- The snow deflector can be made from the leftover parts from the metal barrel. To do this, a rectangular strip of 15 x 30 cm is cut out. This blank must be bent and the side parts 10 cm high are welded to it. Thanks to them, the snow will be directed in a certain direction when ejected;
- making a shovel. It is made of sheet metal 30 x 40 cm. The edges of the plate are bent so that the sides are about 2 cm high;
- the snow deflector is welded to the body where the ejection hole is located. The scapula is fixed from below. The gearbox is bolted. The rotor is mounted like a trimmer blade.
A video of a snow blower from a trimmer with your own hands will help you get acquainted with the assembly process in more detail.
Diy rotary snow blower device
The main components of a homemade rotary snow blower with your own hands are:
- an internal combustion engine equipped with a silencer;
- fuel tank;
- throttle control cable.
For the manufacture of all elements of the snow blower, you will need a lathe. It is used to fit all parts of the mechanism to the desired size. If such equipment is not available, the manufacture of the rotor can be ordered in the workshop according to the sketches you have.
Measures for the device of a rotary snow blower can be divided into several stages:
- assembly of the screw mechanism;
- rotor manufacturing;
- housing installation;
- frame device.
Having made each unit separately, they are assembled into one structure.To make the snow blower look presentable, it is painted after assembly.

The device of a homemade rotary snow blower: A - body; B - rotor disc; B - hub; G - scapula; D - ring; E - deflector; F - scraper; З - bracket; And - a knife; K - runners; L - handle bar; M - brace; H - transverse bar; О - bar for the engine; P - handle
Manufacturing of components for a rotary snow blower
The manufacturing technology of the auger mechanism is similar to the auger device for a snow blower from a chainsaw. A dense (10 mm thick) conveyor belt can be used as screw blades. The dimensions of the auger unit must correspond to the dimensions in the drawings.
The rotor is made of sheet metal with a thickness of 2.5-3 mm. With the help of a compass, it is necessary to draw a circle of the required diameter on the sheet and cut it out with a grinder. To make the blades, a blank part from an electric motor is taken as a basis. Blades are formed from sheet metal. They are welded at an equidistant distance from each other to a steel disc connected to the hub. The number of blades must be at least four.
The frame for the snowplow is assembled by welding pieces from the metal corner into the frame according to the existing scheme. All components of the frame are bolted.
Useful advice! Rotary snow blowers should use more powerful bearings that can withstand the beating of the rotor mechanism.

For self-assembly of the snowblower, you can use the materials at hand
When all the components of the snow blower are ready, they begin to assemble them into a single unit. The screw shaft is mounted on the rotor mechanism. Then this whole mechanism is fixed to the frame with bolts and a pressure ring. The rotor is fastened to the frame by means of a special bracket. As a snow thrower for a homemade rotary snow blower, a plastic pipe with a diameter of 100 mm is used.
Advantages of combined models of snow blowers
Compared to auger aggregates, combined snow blowers are more efficient in operation, since the load is distributed among themselves by both the auger and the rotor. They have sufficient power and can cope with the cleaning of the territory from the snow mass of an impressive volume. Among the advantages of homemade rotary snow blowers are:
- excellent maneuverability and high productivity of equipment;
- depending on the engine used, the snow throwing range can be up to 12 m;
- the ability to adjust the width of the snow cover;
- the small weight of the machine (up to 20 kg) allows you to cope with the cleaning of the house area (including a woman);

The process of clearing the local area from snow
- the ability to repair a snow blower with your own hands;
- low cost of materials for the manufacture of all components of the unit.
Self-production of a rotary snowblower is a rather complicated and painstaking business. If you are poorly versed in technology, do not have certain skills or do not have the necessary tools, and finances do not allow buying a factory model, you can make a snow shovel with your own hands.
Making a snow blower with your own hands: videos about self-assembly
For many, it may seem like a daunting task to assemble your snowplows yourself. Justifying the saying “it is better to see once than hear a hundred times”, many craftsmen post thematic videos on the Internet. The videos contain the highlights of the assembly of homemade snowblowers, as well as information about the components used for their device.
On the Internet, you can find a huge number of video instructions, where various options for homemade snow removal equipment are presented: based on a chainsaw engine, walk-behind tractoras well as an electric motor. The plots describe the method of making a screw mechanism and provide possible materials for their manufacture.

All dimensions in drawings placed on the network can be adjusted depending on your own needs
On the network you can find many ready-made drawings and assembly diagrams of snowblowers of various models. They can be used to make your own model, while all dimensions in the drawings can be adjusted to apply to an individual snow blower.
Acquaintance with the video materials will provide useful information on how to correctly prepare and set up a snow blower. The video of repairing a snow blower with your own hands contains visual information about common faults and breakdowns, ways to eliminate them, as well as the correct maintenance of devices.
Having studied in detail the proposed drawings, diagrams, step-by-step instructions and videos, everyone can try their hand at making a home snowplow. After all, everyone in the garage or workshop has an old lawn mower, chainsaw or other tool that will fit in to adapt it to a snow blower. And for those who doubt their capabilities, it is better to purchase a factory model.