The roof is one of the main elements of any building. Not only protection from precipitation depends on it, but also the appearance of the house. Modern roofing materials allow you to create practical and beautiful roofs near houses, spending a minimum of resources. One of these materials is metal tiles. It is quite convenient in installation, but requires the use of additional elements, including an end strip for metal tiles.

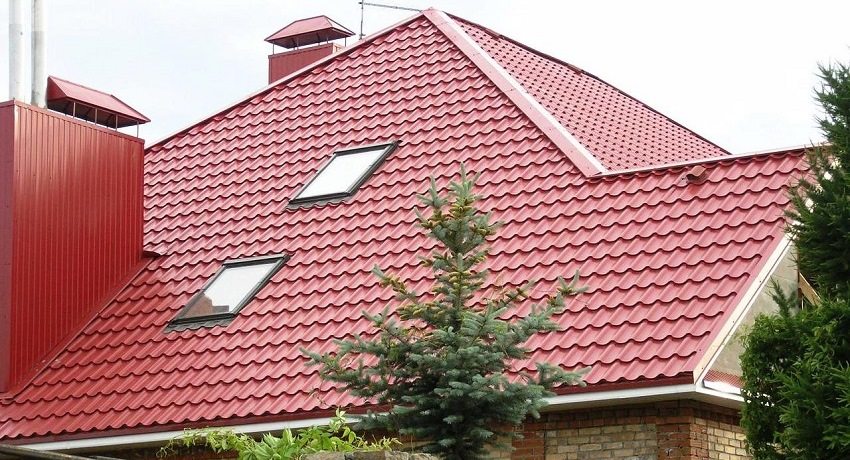
Metal roofing looks beautiful and will last a long time
Content
End strip for metal tiles: purpose and installation features
In order to cover the roof with metal roofing material, it is necessary to use several types of slats:
- cornice;
- end or wind;
- ridge;
- abutment strip for metal tiles.
All of them serve as additional protection of wooden roofing elements from the influence of adverse environmental factors, as well as for decorative purposes.

End plate appearance
The end strip for metal tiles is made of galvanized metal, up to 0.55 mm thick. It comes in various colors, similar to the main roofing material. There are products with polymer and composite coating. This roof element has the form of a corner in cross section. Its edges are slightly bent or there may be ribs on the plane. These nuances give additional rigidity to the product. The standard length of the bar is 2 m.It is attached to the ends of the slopes, which provides protection lathing from moisture and wind penetration. For this reason, this product is also called a wind bar for metal tiles.

Typical dimensions of the end strip
Related article:
|
Installation of an end strip for metal tiles
- The length of the end of the ramp is measured and the number of whole strips is counted. If necessary, the latter is cut to the required length.
- Installation starts from the bottom of the ramp and goes up. In this case, the products are laid with an overlap of at least 50 mm.
- The horizontal part of the end strip for metal tiles should completely overlap the ridge of the roof covering, and the vertical part should cover the sheathing boards from their ends.
- The element is fixed using roofing screws of the same color, both in the vertical plane and in the horizontal one. At the same time, from above, the screws are screwed strictly into the ridge of the metal tile. The distance between the self-tapping screws should be 30 - 50 cm, and it is most convenient to screw them in with a screwdriver, starting from one side, so that the bar does not warp.

End plate fastening diagram for installation of metal roofing
Do not forget about sealing the gaps between the plank and the roof covering. In addition to the protective function, the wind bar for metal tiles also has a decorative one. The roof, decorated with this element, has a more complete and harmonious look.
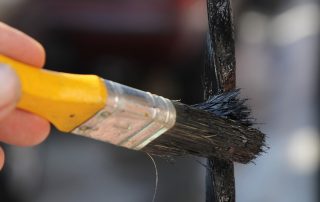
Helpful advice! When fixing the plank with self-tapping screws, you must be very careful not to miss the battens on the board. If this happened, then in no case should the self-tapping screw be removed, since it closes the hole made.

Fixing the strip with self-tapping screws
In the process of roofing work, great attention should be paid to safety. The ladder or scaffold must be securely anchored and not dangerous. It is most convenient to attach a wind bar for metal tiles from the scaffolding installed along the gable of the building. This will allow you to move freely along the entire length of the ramp edge. Before attaching the additional element, it is worth to sew up the lower part of the crate hanging over the pediment with facing material. This will allow you to avoid inconveniences in the future, since the installed bar can interfere with this process.

Metal roof structure - end view
When installing the product, pay attention to the alignment of both planes, since "waves" or "twisting" will not only reduce the protective functions of the element, but also spoil the entire appearance of the roof. Smooth fastening can only be ensured by strictly following the installation rules and using measuring tools.
Helpful advice! The end plate for metal tiles must be fastened with self-tapping screws with rubber washers "in tightness". This will prevent water from getting under it, and the wind to shatter, causing subsequently rattling sounds.

The wind bar performs not only a decorative, but also a protective function
Other additional elements and their purpose
Among others required for roof installation, elements can be distinguished by a ridge strip, which covers the ridge over the cover sheets. The eaves strip is similar to the end strip, but is attached to the eaves before installing the roof. Of particular interest is the abutment strip for metal tiles, which is used at the joints of roofing sheets with walls, pipes, valleys or other roof elements. It installs on top metal tiles and prevents water from entering through the junctions.

Additional elements for the roof
In conclusion, we can add that the need for additional elements must be calculated when purchasing material, so that they all match the same color with metal tiles.