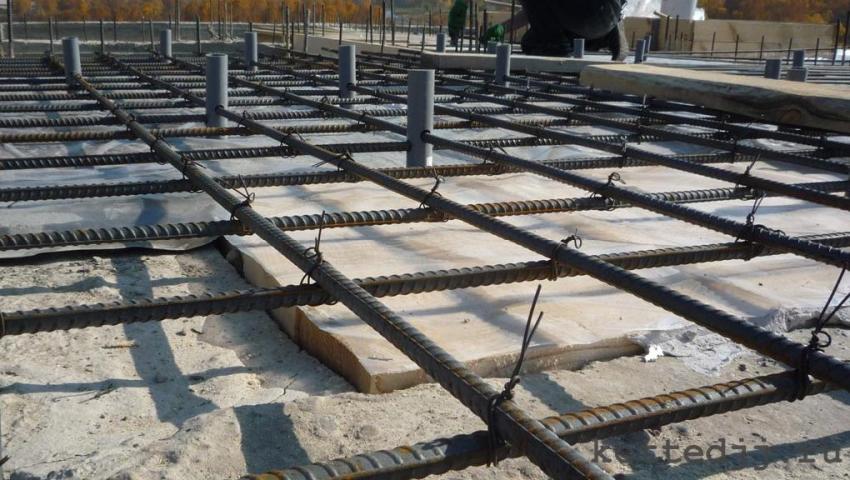
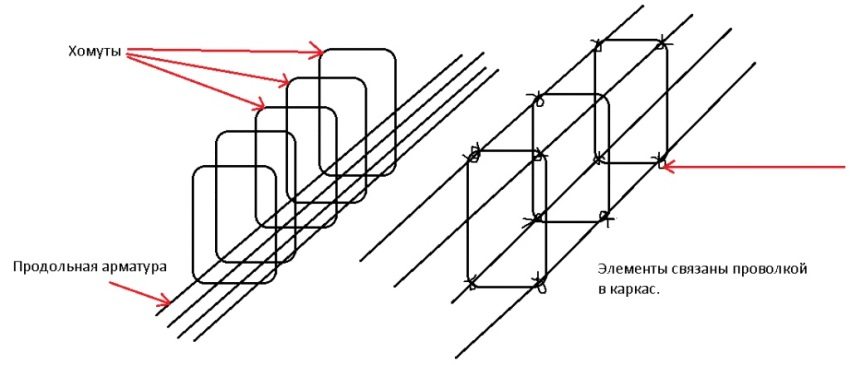
When reinforcing monolithic concrete structures, it is always necessary to fasten the reinforcement rods together. To do this by welding is long, inconvenient and expensive, therefore it is customary to tie them with wire using a hook for knitting reinforcement. This inexpensive and easy-to-use device is sold anywhere. Making it yourself from improvised means is also not difficult, and even a child can learn how to use it.
Content
What is a crochet hook
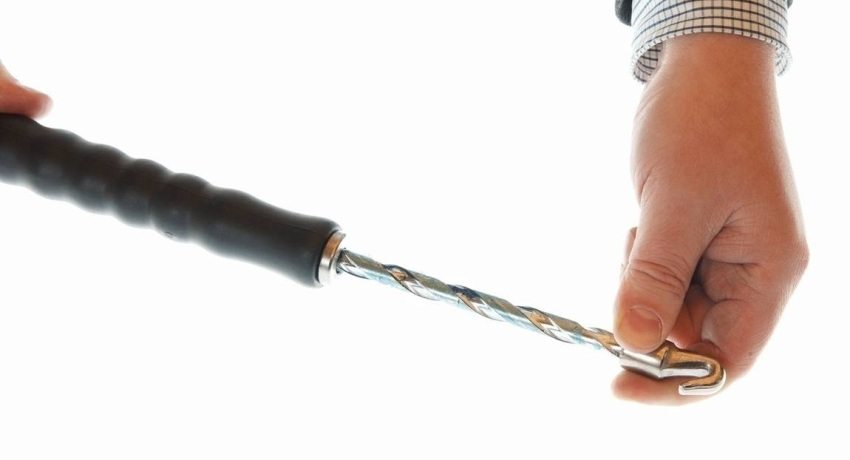
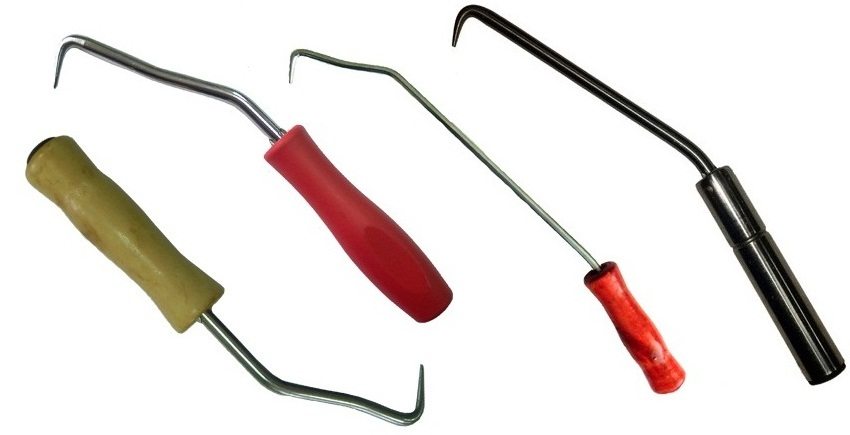
Reinforcement hook is a hand-held device designed for the convenience of tightening the knitting wire around the reinforcing rods in order to attach them to each other. It is a metal hook of a certain shape with a comfortable handle. It is possible to buy a product, and its price is only from 2 to 5 USD, or to make it yourself, knowing the features of its shape.
The reinforcement is tied with a knitting wire, which has a thickness of no more than 1-2 mm. In this case, for thicker reinforcement, the wire is taken with a larger cross section. It is sold in bays, in which 50, 100, 200 m are wound. The cost of a bay is insignificant, so you should not try to save money on it by using a wire that is not intended for this purpose.
The shape of the hook is in the form of a rod, the tip of which is slightly curved so that it is convenient to grip the wire when carrying out the tying process itself. Not every shop hook is perfect. It happens that the bends are uncomfortable or incorrect, or the rod is too thin to allow the hook to bend. Therefore, sometimes it is more rational to make an independent hook for knitting reinforcement.
Useful advice! For making a homemade crochet hook, it is better to use an elastic steel rod. It should not unbend with considerable effort.
A regular hook made from a welding electrode
The easiest and cheapest way to make a knitting device is from an ordinary welding electrode with a thickness of at least 4 mm. It is perfect for a small amount of work. If it is necessary to tie a large amount of reinforcement, then it is better to refuse to use the electrode hook, since the hand gets very tired from it.
Related article:
Do-it-yourself wood splitter: drawings, photos, instructions. How to choose a wood splitter. Types of wood splitter. Features of screw, hydraulic and rack wood splitter. Self-assembly of the unit.
In this case, the device can be made from a piece of thin reinforcement or other similar metal rod of soft but resilient steel.
How to make a hook from a rebar
To make a high-quality and convenient device with which it is possible to tirelessly tie a large number of fittings, you will need:
- a piece of a rod of reinforcement or a steel rod with similar characteristics, 15-20 cm long and 6-8 mm in diameter;
- two hex nuts, as well as two washers of a slightly larger diameter than the reinforcement, which can be tightly put on the rod;
- any that has served its purpose, a handle from a screwdriver or paint roller.
The handle is fixed on the rod with nuts and washers so that it does not dangle along it. In this case, the free rotation of the handle around the rod must be maintained. The second side of the rod is sharpened a little like an awl and bent. How to correctly bend the end of the rod can be seen in any photo. This option is a little more complicated than in the case of the electrode, but it is much more convenient to work with it, and it cannot be called disposable, since it has a decent service life.
Screw type hook
Such a device is not so easy to make on your own, but you can buy a ready-made one at any store. This hook can be considered semi-automatic, since the special device of its handle allows you to rotate the tip, making only translational movements. In practice, it turns out that if you pull the hook towards you, the tip turns and tightens the wire. In this case, the worker needs to make minimal efforts, and the knitting speed increases significantly. Its use is very convenient, but the cost of such a device is much higher, so it is worth buying it only for large volumes of work.
Semi-automatic hook made from a screwdriver
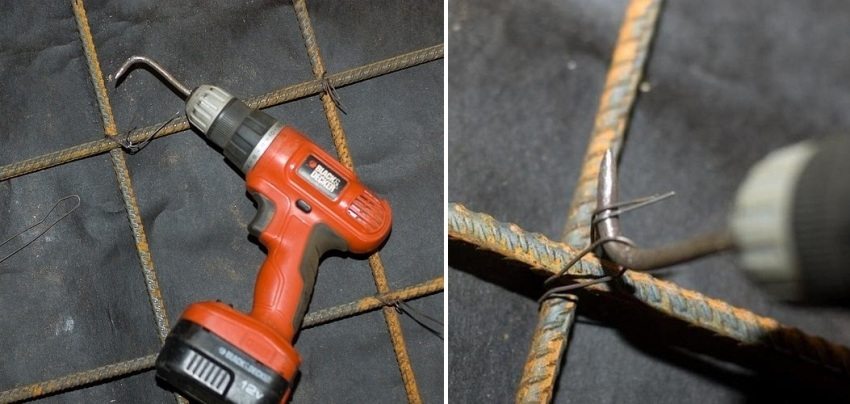
A semi-automatic hook is sometimes made on your own in a very simple way. To do this, take a nail with a bent end and chop off its cap. With this end, it is inserted into screwdriver... After a short workout, you can perfectly adapt to tighten the reinforcement with a knitting wire using this makeshift device. To do this, we need some kind of thin metal rod, for example, a nail, devoid of a head, one end of which must be slightly bent to the side, and the other end must be installed in a screwdriver.
Automatic rebar tying device
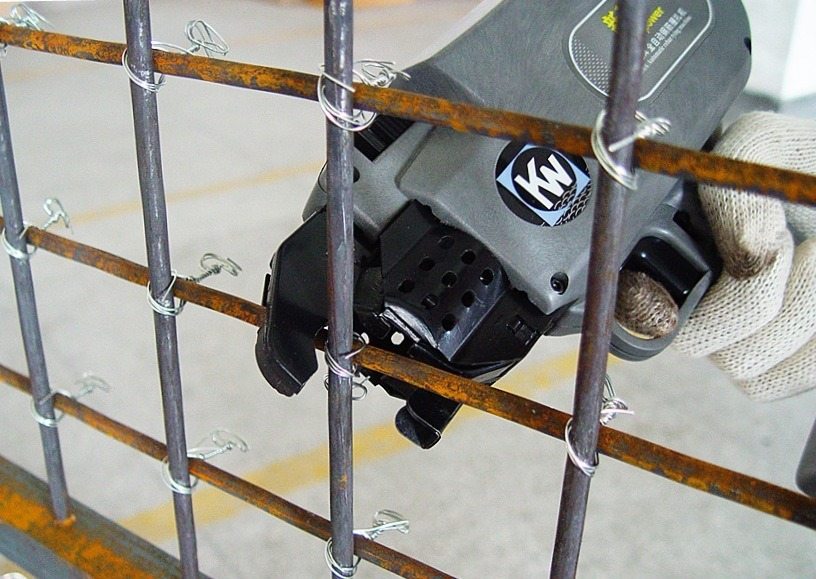
For those who are professionally engaged in construction, it would be advisable to purchase a special automatic device called a gun for reinforcement knitting. It is very convenient to use it, because it is able to do one node per second. The wire may not be cut into separate pieces at all. It is simply inserted into a device that ties a knot in the right place and cuts off the ends. Such a gun works on a battery, which makes it unnecessary to have an electric cable at the construction site itself.
Crochet technology
No matter what kind of hook we use for knitting reinforcement, the technology will always be the same. It is extremely simple and accessible to anyone. The wire must be cut into pieces 30-40 cm long, however, this parameter can strongly depend on the section of the rods.
Useful advice! Several samples must be taken before cutting the wire. By calculating the required length, you can cut the wire more precisely so that no residue remains.
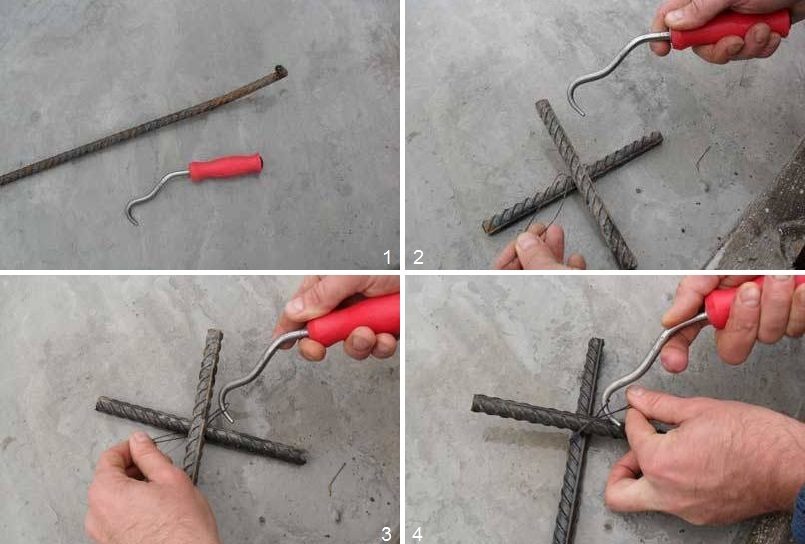
Next, we follow a very simple algorithm:
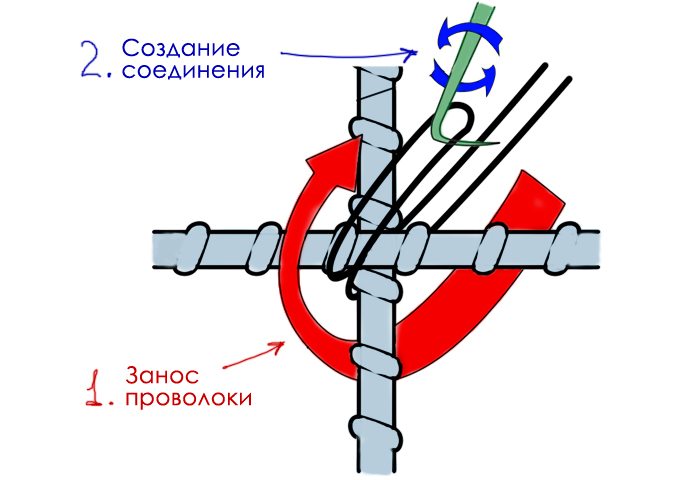
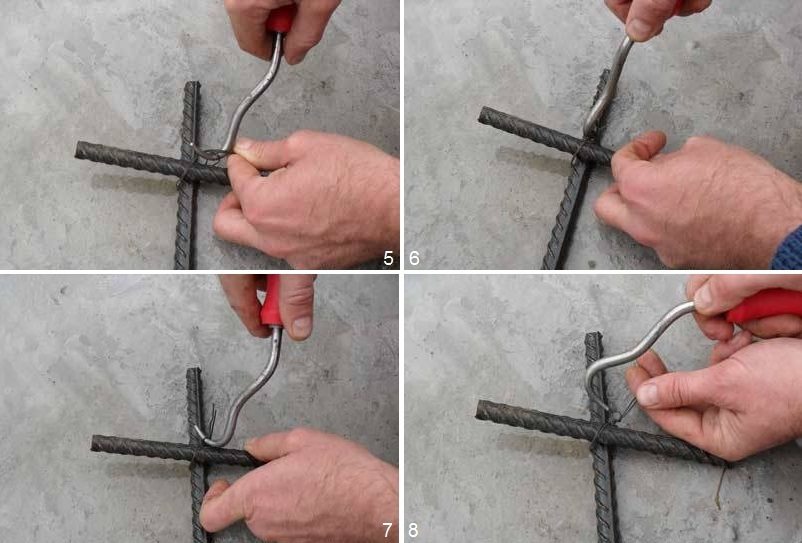
- A piece of knitting wire folded in half is wrapped around the knot to be fastened.
- The hook is inserted into the formed wire loop and hooked with it on its other end.After that, simple rotational movements are performed.
- The first few turns are done quickly enough.
- Then the speed of rotation is slowed down and the knot is pulled down with great care so as not to break the wire.
- After that, the hook is simply pulled out and the strength of the connection is checked.
Useful advice! To check the reliability of the tie, you do not need to try the wire itself. It is necessary to shake the reinforcement rods relative to each other. They shouldn't move.
The hook for tying the reinforcement is a simple, but very necessary tool, which is easy to make yourself from the available means.
Crochet reinforcement (video)
