The process of insulating walls outside with polystyrene foam with your own hands, a video of which is often found on the network, requires a detailed explanation. To use this modern, effective cold-protection material, you must first read about its technical characteristics. Expanded polystyrene has all the necessary qualities so that it can be used to decorate the external walls of buildings.

Expanded polystyrene is a popular material for wall insulation outside
Content
Technical characteristics of polystyrene foam
Without going deep into the intricacies of production and technical characteristics of expanded polystyrene, we will consider the consumer properties of this insulation. Firstly, this material is sheet and rigid, which is very convenient, since it can be installed on any vertical and horizontal surface. Secondly, it has the ability to successfully retain heat in a room due to the fact that it consists of millions of granules filled with an air mixture that has a low thermal conductivity. Thirdly, penoplex durable and waterproof, which makes it possible to use it in fairly harsh conditions.
From the listed properties it becomes clear that the technical characteristics of expanded polystyrene allow it to sheathe not only surfaces indoors, but also to mount it as an insulating component for ventilated facade systems on the outer walls of houses. How to do this correctly will be discussed further.

Polyfoam is the popular name for expanded polystyrene
Algorithm of wall insulation outside with expanded polystyrene with your own hands, video and description of the stages
To avoid trouble, before starting work, you must carefully read all the rules for installing polystyrene, and then start performing the work in the following steps:
- we carry out thorough surface preparation. If the walls of the house are made of bricks or lightweight concrete blocks, and are covered with a layer of plaster on top, then deep potholes and cracks must first be repaired with putty. After it dries, the wall is primed to avoid mold growth. The main task is to ensure that the foam slabs adhere to the wall tightly, without forming gaps. On log wooden walls, it is necessary to remove irregularities and cut off too protruding parts of the logs. Since the surface of the expanded polystyrene itself is very smooth, it is advisable to spot it with a needle roller in order to ensure high-quality adhesion to the wall surface. Among other things, it is necessary to remove all foreign objects from the wall, including trims from windows and ebb tides;
- always begins with the installation of the corner profile wall insulation outside with polystyrene foam with your own hands. A video of its installation can be found on the net.The whole process of this can be described as follows. Along the lowest edge of the wall adjacent to the foundation, places are marked for holes, which are drilled and inserted into plastic screw caps. A profile made of galvanized steel, which has an L-shaped shape, is placed with a perforated part on the line of holes and screwed with screws 3 - 4 cm long.A fastening step is recommended to be done about 40 cm. , did not slide down, but rested against it.
Useful advice! When choosing a starting strip (profile), you need to focus on the thickness of the material plates. The profile should not be thicker than them. The corners of the plank are fixed with corner connectors, and the profile parts are connected to each other with plastic parts. These measures compensate for the thermal expansion of the materials.

It is very convenient to use special foam-glue for installing expanded polystyrene
- glue for gluing boards is prepared from dry powder, which is sold in a store. It is supplied with instructions for cooking, so there is no need to delve into this process in detail. It is only important to note that its consistency should be such as to ensure the most convenient work with it;
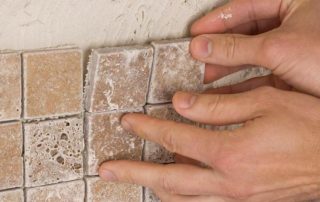
- first of all, everyone insulates window slopes and doors. For this, the foam slabs are cut with a sharp knife to the required size. The glue is applied around the entire perimeter and in central places over the entire area of the slab. After that, it is pressed against the surface with force;

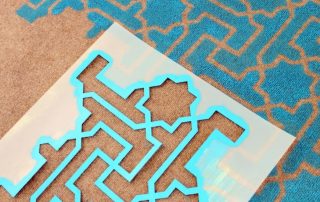
Expanded polystyrene sheets with L-shaped edges allow you to completely overlap the joints with each other
Useful advice! The best option for insulating the outer walls of a building is polystyrene foam sheets with L-shaped edges. They allow you to completely overlap the joints between them, which prevents cold bridges from appearing in such vulnerable places.
- after the necessary slopes and other elements are insulated, they begin to insulate the walls outside with expanded polystyrene with their own hands. Editing videos are usually filled with various nuances, so it is recommended to watch them. Begin gluing from the bottom row. Plates are alternately smeared with adhesive, placed on the profile of one of the sides and pressed against the wall surface with effort. When the first row is completed, they begin to install the second, but it is done so that the pattern of the joints resembles brickwork, that is, with an offset relative to the first row.
The bonding process is very important. Therefore, the laying of the slabs must be carried out, constantly checking the evenness of the lines with the help of the building level. It is necessary to keep a constant 2 - 3 mm distance between the boards, and the adhesive protruding from the gaps must be removed until it has set. In the case when, through carelessness, a gap is too large, it must be filled with polyurethane foam, not giving the cold a chance to penetrate it. At the corners in the extreme slabs, teeth are cut, with which they are attached to each other. This ensures the required rigidity of the corner joints and significantly increases the reliability of the structure. The spike connection must be carefully glued.

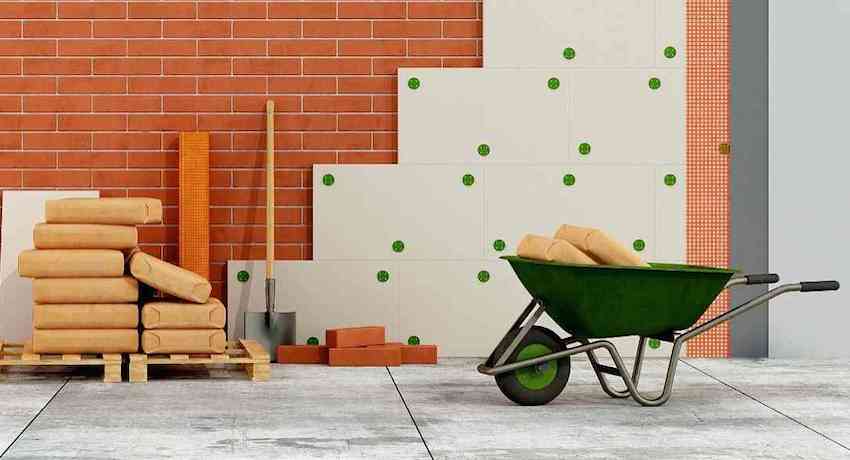
Ventilated facade construction with expanded polystyrene
Final work
On this, the insulation of the walls outside with expanded polystyrene with their own hands is not yet finished. The video of this process will tell you that after the glue dries, the plates must be fixed with special dowels. They look like fungi hollow inside with wide caps. A hole is drilled in the slabs and the wall by 4 cm, corresponding in diameter to the dowel. A fungus is inserted into the hole, and a long nail is hammered into it, which expands the plastic dowel inside the wall, providing a secure attachment. In this case, the cap presses the penoplex tightly against the wall. It will take from 6 to 8 per 1 m² of such fasteners to ensure reliable fastening of the plates to the surface.In areas where there are slopes and other elements, you need to increase this number. When calculating the need for materials, this circumstance must be taken into account. Fungus caps are putty on top.
Related article:
|
When the slabs are securely fastened, start machining the corners. To do this, corners made of plastic or aluminum are glued to all corners, and from above they are fixed with a reinforcing mesh for reliability. It is also glued to the glue.

Expanded polystyrene is fixed with appropriate construction dowels with wide caps
Further steps depend on what material the facade will be finished with. If a ventilated facade system is created, then the guide profiles for it are fixed on top of the insulation and mount the siding or facade panels. If a layer of decorative plaster is supposed to be applied to the insulation, then several more steps must be taken:
- polystyrene foam plates are wiped with sandpaper and coated with glue. Then they are glued to the entire surface reinforcing mesh for plaster... For a good leveling of the mesh surface and reliable adhesion to the plates, it must be periodically smoothed with a spatula, making herringbone movements from the central part to the edges. Excess glue should be removed without delay;
- when all this is dry, proceed to applying the putty. Its layer should be even and cover the mesh;
- then they wait three days for the putty layer to dry completely. After their expiration, the entire surface is treated with sandpaper.

Scheme of arrangement of a "wet facade" with decorative trim
Useful advice! For better adhesion with the topcoat, a special primer is applied to the putty, which contains quartz sand. This will create a matte, rough surface that is suitable for applying any plastering decorative mixture.
To get significant cost savings, it is better to do repair work on wall insulation outside with expanded polystyrene with your own hands. The video and this step-by-step instruction will help you do it correctly, efficiently and save significant finances. You just need to follow the proposed recommendations and the procedure.