The creation of a stylish and original interior is a natural desire of the owners of houses and apartments. You can make a dream come true in the modern world with the help of an extraordinary wall design. Stylish wall murals can seriously compete with decorative plaster and exquisite panels: how to glue them correctly and efficiently, so as not to spoil the material and appearance of the room, will be prompted by the recommendations contained in this article.

It is possible to achieve good results when gluing photowall-paper by attracting experienced specialists, but it is quite possible to do the work with your own hands
Content
- 1 Photo wallpaper on the wall: features of the material and its advantages
- 2 What are the wallpapers: classification of materials
- 3 Types of photowall-paper by texture: structure and application
- 4 3D wallpaper on the wall: innovations in interior design
- 5 Photo wallpaper on the wall: how to glue different types of products correctly
- 6 How to glue photowall-paper: surface preparation procedure
- 7 How to glue photo wallpaper without seams on the wall: the procedure for organizing work
- 8 How to properly glue photowall-paper with different bases on the wall: general recommendations
Photo wallpaper on the wall: features of the material and its advantages
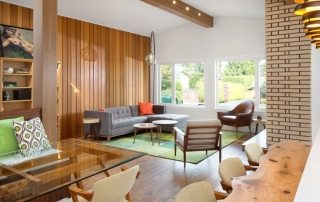
Modern wall murals are a powerful tool in creating stylish designs that can completely change the interior. Good quality material is quite expensive, and therefore requires a special approach to gluing and maintenance. Making a choice in favor of photo wallpaper, the owners take a decisive step towards revitalizing the interior. This unusual type of wall decoration can turn a children's room into a fabulous space, give the living room a dynamic touch of a bustling city or, conversely, the tranquility of a spring forest, and create a romantic atmosphere in the bedroom.

Stylish wall murals can seriously compete with decorative plaster and exquisite panels.
The modern construction industry offers a wide selection of these products - from reproductions of works of art and virtual images of architectural monuments to modern 3D images of landscapes, views of megacities or episodes from fairy tales and films. Each consumer can choose the desired product, taking into account the financial capabilities of the family and the practicality of the material.
The interior with photo wallpaper looks very elegant.The canvases have a unique advantage, as they can fit into any style. It all depends on what kind of image is chosen to create a particular design. It is quite possible to glue this material with your own hands, for this it is enough to study all the technological subtleties and select the appropriate material for the base.
The attractiveness of this type of coverage is due to the brightness and realism of the images, therefore, you need to start choosing wallpaper precisely from the preferred picture, which should correspond to the general design of the room.
Exclusivity of the design of rooms with photo wallpaper: choice of themes
Important! Wallpaper theme should fit into the style of the interior. For example, images of architectural monuments are unlikely to be suitable for modern design, and abstract subjects will not look in country or Provence styles.

Wallpaper have a unique advantage, as they can fit into any style
Taking into account the stylistic focus and genre themes, the wallpaper is conventionally divided into the following groups:
- Natural motives. This is the most extensive group in terms of topics, which includes panoramas of forests, steppes and mountains at different times of the year. This option is ideal if the goal is to fill the room with bright colors.
- Water in the theme of photowall-paper calms and adjusts to rest. It can be landscapes of coastal sea and river zones, waterfalls, imitation of rainy weather outside the window.
- Animals on the photowall-paper. Images of representatives of the fauna will appeal to children. Stylists advise against posting photos of aggressive wild animals that adversely affect the psyche. It will be much better if pets are watching from the wall.
- Photo of the car and the city. This type of wall-paper will appeal to fans of progress, as it provides an opportunity to plunge into the modern environment and the dynamics of life.
- Art and sports plots will fit perfectly into the bedroom design - this is a choice for creative people.
Separately, it should be said about the types of paintings containing illustrations of flowers. Wall murals of this theme look best in bedrooms. Images of white buds will fill the room with tenderness and lightness. Tulips, roses and orchids are especially popular in interiors. Flowers can be red, pink, or yellow. They look beautiful both against a background of greenery and against a black and white background. For example, a room with tulips wallpaper, made in the same color scheme with a general design, will indicate the taste of the owners.

Subject photo wallpaper must correspond to the purpose of the premises
Features of room stylization and design of photo wallpaper
The chosen theme must necessarily correspond to the style of decoration of the rooms, since the overall design should not be contradictory. Stylists identify types of wallpaper that are suitable for certain interior styles:
- for the oriental style, wallpapers with the image of sakura branches at different times of the year, hieroglyphs and mysterious buildings are recommended;
- photos of reservoirs, natural landscapes, cozy courtyards and a variety of colors will ideally fit into Provence;
- snow-white winter landscapes and panoramas are optimally matched to the Scandi style;
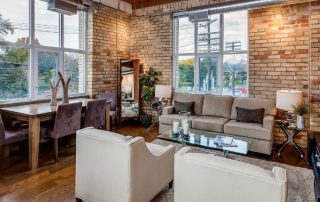
- for a loft, abstract drawings and graffiti should be selected, and textured brick-like wallpaper is perfect;
- the Art Nouveau style welcomes the depiction of cars, architecture and macro photography.
In modern styles, a variety of types of such coverage can be used. Almost any picture will fit here, the main thing is that it should be combined with other interior items. These can be both reproductions of classics and images of the city at night. Wall murals with abstract patterns are suitable for almost any interior. The main thing is the correspondence of colors and shapes.

Photos of reservoirs, natural landscapes, cozy courtyards and a variety of colors will ideally fit into the Provence style
Useful advice! Fans of experiments should pay attention to 3D 3D wallpaper. Thanks to their ability to visually expand the space, you can hide imperfections on the walls.
How to choose a wallpaper for a photo wallpaper: a game of shapes and colors
Wall murals are placed on one wall, otherwise the interior will put excessive pressure on the psyche. Therefore, it is necessary to choose the right companion wallpaper for the photo canvas.
Panoramas or scenes with a perspective effect look especially beautiful when the wallpaper serves as a continuation of the photo image. For example, a photo of an old street, stretching into the distance, with old brick buildings will perfectly complement textured brick-like wallpaper.
When choosing products, special attention should be paid to the color palette. For example, for small rooms it is worth choosing canvases in light and pastel colors. For spacious rooms, such as a living room or a hall, darker specimens are also suitable. It is better to glue bright options into the children's room. The photo wallpaper "World Map", framed with cheerful wallpaper in light colors, will look great on the wall. This design will perform, in addition to decorative, also a cognitive function and will certainly please the little owners of the room.

Photo wallpaper is placed only on one wall, so it is necessary to choose the right companion wallpaper
It is imperative that you familiarize yourself with a number of alternative options before buying photowall-paper and choose the most acceptable one. At the same time, the factor of psychological perception is important. For example, wall murals and accompanying canvases of bright flashy colors are unlikely to fit in a bedroom, but they will look quite harmonious in a spacious living room or dining room. The catalog of photowall-paper will be an excellent assistant in making the right decision.
What are the wallpapers: classification of materials
When choosing wallpaper for your house or apartment, first of all, you need to decide on an image that will best fit into a particular interior. To better understand the species diversity of products, you should look at the wallpaper photo. A coating is chosen on the wall not only taking into account the visual and aesthetic characteristics - it is necessary to pay attention to their other characteristics. Wall murals are divided into groups based on the following criteria:
- base material;
- textured features;
- the presence of additional decorative effects;
- matching a certain style.
The base material plays a key role in ensuring the correct technology for gluing wallpaper, because the reliability of fixing the paintings on the wall depends on the base material. This classification category is the broadest and includes the following types:

The backing material plays a key role in ensuring the correct application technology
- paper-based wallpaper;
- canvases with a vinyl layer;
- non-woven photomurals;
- wallpaper with a textile base.
Useful advice! In order to understand how photowall-paper is glued in a particular case, it is necessary to study all the specific characteristics of the product, select the desired glue and follow certain instructions.
Paper and vinyl wallpaper: photo examples of wall decoration
Previously, wallpaper was produced exclusively on a paper basis. In modern hardware stores, you can find products devoid of the main drawbacks of paper, characterized by easy gluing and a long service life. Still, paper wallpaper still finds its consumer. The advantages of the material are environmental friendliness and an affordable price. Paper-coated walls breathe easily and any adhesive can be used. The disadvantages of paper murals lie in the properties of the material itself:
- fast wear;
- low level of strength;
- lack of moisture resistance, which contributes to the appearance of fungus and mold;
- burnout under the influence of sunlight;
- do not hide flaws on the walls.
Thus, taking into account the listed disadvantages, before gluing paper photo wallpaper, you must make sure that the room is fairly dry and protected from excessive exposure to ultraviolet rays.

Walls with paper photo wallpaper "breathe" easily, and you can use any glue
Vinyl photomurals are opaque dense fabrics with a soft two-layer base consisting of paper and PVC. Such a base has heat and moisture resistant properties, so the wallpaper can be washed and cleaned using different means. The surface also assumes any embossing. The material does not emit toxins, does not rot, mold and mildew do not grow on it.
When gluing, the material is able to stretch, thereby facilitating its fixation in uneven corners and in places where walls have a complex structure. It is characterized by durability and strength. Texture helps to hide defects and joints. Cons - airtightness and high cost, for gluing they use a special composition that is applied to the wall.
Textile and non-woven photomurals on the wall: features and characteristics
Non-woven base is a combined fibrous web that does not stretch even when wet and does not shrink when dry, thereby ensuring ease of gluing. The coating is easy to clean, therefore it is acceptable for decorating bathrooms and kitchens. At the same time, non-woven fabric is easily abraded and lends itself to other mechanical influences.
Before gluing non-woven photomurals, you need to purchase a special glue. It is applied exclusively to walls, which eliminates the appearance of air bubbles and helps to hide irregularities, and the joints become invisible. Non-woven wallpapers are breathable, they do not pose a threat to human health, therefore, they are suitable for decorating bedrooms, living rooms and rooms for children.

Before gluing non-woven wallpaper, you need to purchase a special glue
Useful advice! Paper wallpaper can be made moisture resistant using lamination technology.
Textile wallpapers appeared long ago and have not lost their popularity. Their structure is a lower non-woven-paper layer of the base and a natural fabric covering. Any image and photos on this type of wallpaper are easy to apply and hold perfectly. Cotton, linen, silk and even velor are used for their production.
Textile wallpaper does not fade when exposed to ultraviolet radiation. It is the textile coating that is best suited for creating pictures for high-resolution photo wallpapers and models with a self-adhesive coating, therefore this is the most expensive type of wallpaper. When gluing textile wallpaper, the wall is carefully leveled and primed, and the glue is applied to the canvas and kept for a certain time.
Types of photowall-paper by texture: structure and application
The combination of materials in the production of wallpaper allows you to obtain a varied textured surface, which makes it possible to reproduce the texture of the canvas, traces of brush strokes, plaster or their combination. The texture is obtained by embossing a vinyl or non-woven base. On paper wallpaper, you can get a glossy and matte surface. Fabrics have their own unique texture.
 perfectly hide small defects on the walls")
Photo wallpaper with a deep texture (up to 3 mm) perfectly hide small defects on the walls
Imitation of the canvas creates the impression that there is a real picture in front of your eyes. The texture can be glossy or matte, without much relief, which does not allow to hide flaws on the surface of the base. Before gluing the wallpaper, the walls must be leveled, and during operation they require constant maintenance. This texture is suitable for depicting landscapes and still lifes. For example, tulips murals look great.
Wallpaper for painting has a deeper texture (up to 3 mm), hiding small defects on the walls. Simulated brush strokes help to recreate the canvases of classic artists and the beauty of the world around.
Related article:
Photomurals for the kitchen: how to advantageously beat the interior in a capricious room
Color solutions for kitchen photowall-paper. Versatile coating designs. Options for expanding space.
The sandy texture consists of varying degrees of matte finish, which allows light to diffuse without creating glare. Suitable for various interiors. The disadvantage of the picturesque and gritty textures is the ability to quickly accumulate dust, so the wallpaper will have to be washed or cleaned frequently.
The plaster texture allows you to betray the figure of frescoes by combining smooth and embossed surfaces, repeating the contours of the picture. Wallpaper for walls of this type is used in the creation of Venetian plaster, as the surface becomes vintage.

Texture is obtained by embossing a vinyl or non-woven base
Useful advice! Canvases depicting nature look great on the wall. Photo wallpaper with a picturesque theme will help you relax after a working day. Before pasting such products, the walls must be carefully primed.
3D wallpaper on the wall: innovations in interior design
A special category of photowall-paper is made up of innovative canvases with a three-dimensional 3D image. This is the latest fashion in the wallpaper industry. Illusoryly, such products on the walls create an expanded space and help not only convey the beauty of photographs with animals and plants, which were shot using the macro method, but also create a sense of presence in the image. With the help of such modern technology, it is possible to betray the infinity of outer space and the mystery of underwater objects, landscapes of nature and the city at night.
Photo wallpaper in the interior with a three-dimensional image will help to create a truly unique and exclusive design in any room. Such images look most realistic in combination with well-thought-out lighting and in the case of the location of the picture from floor to ceiling. Applying 3D photo wallpaper on the wall allows you to visually increase the space, which is ideal for small-sized rooms.
The approach to interior decoration with 3D effect wallpaper should be especially careful. It is necessary to take care of the lighting and the correct arrangement of the furniture. The door variants of three-dimensional photo wallpaper look original, which can turn a doorway into a bookcase, fireplace, fabulous arch or visually continue the room with the image of a flower valley or forest path.

A special category of photo wallpaper is made up of innovative canvases with a three-dimensional 3D image
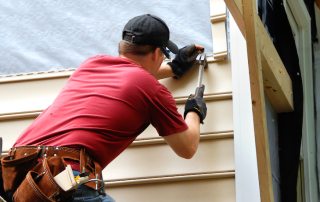
Photo wallpaper on the wall: how to glue different types of products correctly
The main goal when gluing photo wallpaper is to get a solid picture. Wallpaper on the walls should be free of bubbles and joints should not be visible. In addition, it is necessary that the adhesive has a reliable adhesion to the surface. It is possible to achieve good results by involving experienced specialists, but it is quite possible to do the work with your own hands, following clear instructions. These savings will allow you to buy higher quality material.
Even before starting work, it is necessary to prepare inventory and materials:
- plaster solution;
- putty;
- putty knife;
- primer for plaster;
- a primer for wallpaper;
- plastic container for diluting glue;
- adhesive solution of the appropriate type;
- warm water;
- scissors for trimming fields;
- office knife for double cutting of overlapped joints;
- building level;
- plumb line for applying vertical markings;
- pencil;
- brush and roller for applying glue;
- narrow rubber roller for ironing joints,
- ruler;
- square for marking canvases and walls;
- roulette;
- clean rags;
- sponge;
- stepladder;
- stool.

The main goal when gluing photo wallpaper is to get a solid picture
Useful advice! Before gluing the wallpaper on the wall, you need to prepare the surfaces and the adhesive solution. The packaging of any glue contains detailed instructions.
Glue preparation requires a certain sequence of actions. First, warm water is poured into a container, and then the dry composition is gradually poured until the desired consistency is obtained. After a few minutes, the solution is mixed, eliminating lumps, and brought to homogeneity.
Features of the choice of glue for photo wallpaper of different types
Particular attention should be paid to the choice of glue, which determines the reliability of fixation and the durability of the wallpaper. In this case, it is necessary to take into account the following points:

Particular attention should be paid to the choice of glue, which determines the reliability of fixation and durability of the wallpaper.
- For wallpaper made of paper, which are light and thin, you can take any adhesive solution. It is important here to prevent the paper from getting wet. If you delay, the wallpaper will get wet and stretch, and when it dries, it will shrink, which can lead to the formation of defects.
- The glue for paper wallpaper should have a transparent and thin consistency with an admixture of antiseptics.
- During the preparation of the glue solution, the appropriate thickness should be observed for each type of wallpaper base. The denser the texture of the canvas, the thicker the glue should be.
- The adhesive mixture should not emit a strong odor.
- The adhesive packaging must be intact and dry.
- The quality of the wallpaper must be checked before applying the adhesive. The product that has been in contact with the solution cannot be replaced in the store.
To select the desired type of glue, use the following table:
| Type of photo wallpaper | Type of adhesive mixture |
| paper wallpaper | any wallpaper glue |
| vinyl | special composition for heavy wallpaper |
| non-woven wallpaper | adhesive for non-woven wallpaper |
| photo wallpaper without seams | composition for heavy or textile wallpapers |
| laminated | mix for heavy wallpaper |
| textile | special composition for textile wallpaper |
| frescoes | solution for heavy non-woven wallpaper |
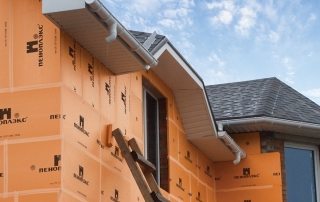
How to glue photowall-paper: surface preparation procedure
One of the conditions for high-quality wallpapering is the preparation of the walls. The surface must be flat and clean, which will ensure a snug fit of individual elements and masking of the joints. First, you need to carefully inspect the walls for irregularities, dents and depressions. If the wall is strongly curved, then care should be taken to level it with plaster or drywall. If there are only some defects, then it is recommended to carry out the following stages of wall preparation:
- remove old coating and loose plaster;
- dismantle the baseboard;
- remove electrical switches and sockets;
- remove nails, screws;
- align the walls;
- apply a primer.
For easier removal of old wallpaper, it is recommended to moisten the wall with water and wait 5 minutes until the glue dissolves and the canvases come off the surface. After that, a layer of penetrating primer is applied and wait time until it dries. The primer should be applied to a completely dry surface.
Important! You cannot glue the products on old canvases, since an old image will appear through the beautiful photos on the wallpaper after drying, which will ruin the whole look.

One of the conditions for high-quality wallpapering is the preparation of the walls
Then you should eliminate all irregularities: cover the pits with plaster, and cut off the bulges. Their presence can be determined using a level or plumb line. After the plaster dries, the irregularities are rubbed over with putty. Two thin layers of a special primer are applied to the walls. It is advisable to treat corners and places near windows with a fungicidal solution to prevent the appearance of mold or mildew.
How to glue photo wallpaper without seams on the wall: the procedure for organizing work
The usual width of wallpaper is 53 or 100 cm, so it is quite easy to glue them on the walls in vertical stripes. A seamless canvas with a width of 2.5 or 3 m is often used as a photo wallpaper.Moreover, their length can reach 5 m.The most common option is a photo wallpaper on a wall 3 by 3 m. plane of the wall.
The basis of seamless canvases, as a rule, is made of non-woven fabric. It can also be a paper or fabric base. Wall murals are glued using a special technology. In the process of preparing the wall, it is required to ensure that the external and internal corners are strictly perpendicular to the floor and ceiling, and the wall itself has no protrusions. It is necessary to use exclusively an adhesive composition for heavy wallpaper, which must have a thick consistency. The glue is applied gradually to small areas of the surface and immediately glue this part of the canvas.
It is best to start work from a place that is least open to view, for example, from the corner where the curtains will hang. Wallpaper from above and below is fixed with special slats, and then leveled with a rubber spatula or roller. After gluing about half of the canvas, you should check the perpendicularity of the image using a level.

The basis of seamless canvases, as a rule, is made of non-woven fabric
If necessary, openings for windows and doors, holes for switches and sockets are cut out in the wallpaper. When the entire surface is pasted over, you should carefully and evenly cut off the excess wallpaper. It is better to remove the slats after at least 24 hours - after the canvas is completely dry. It is better to glue seamless ready-made wallpaper on the wall together: one holds and unwinds the roll, and the other spreads and glues. Even an experienced master cannot do this on his own.
How to glue wall murals, consisting of 4, 8, 12 parts
Pictures consisting of several fragments must be glued from the center of the room or from the edge of the future image. To do this, you need to pre-lay the composition on the floor and make the appropriate markings on the wall. The white stripes that are found at the edges of each piece must be carefully trimmed using a utility knife or scissors.
Useful advice! It is recommended to start gluing wall-paper consisting of 4 fragments from the center, and from 12 parts - from the edge of the picture. It is important to keep an eye on the whole image.
The process of pasting itself is the following sequence of works:

You need to start gluing wallpaper from left to right from the first to the last strip
- Drawing a clear vertical line on the wall, from which wallpapering begins. This can be done using a laser or conventional building level. A homemade plumb line is also suitable.
- Measurement of the size of the wallpaper and its fragments in order to determine the location for each part. At this stage, the proportionality of the corners is also checked and the location of doors, windows, switches, sockets, niches and recesses on the walls is taken into account.
- The sheets are folded with the pattern down so that the first (in the gluing queue) canvas lies on top.
- Application of a layer of glue and direct gluing of the sheet to the place marked on the wall. This must be done slowly and carefully. It is necessary to check again the coincidence of the marking with the edges and only then level the surface.
If the wallpaper has special stock strips that are much thinner than the main canvas, then such wallpaper requires an overlap. The overlap strip is cut exactly in the middle, the edges are once again coated with glue and the joint of the canvases is carefully rolled with a rubber roller.
How to properly glue photowall-paper with different bases on the wall: general recommendations
When gluing photo wallpaper with your own hands, you should carefully study the instructions that come with the glue and wallpaper with different base and texture.It is also useful to study more detailed step-by-step instructions for gluing different types of canvases and watch the thematic video "How to glue photo wallpaper on the wall."

On the surface of the walls, markings should be applied in accordance with the pattern laid out on the floor.
The average drying time for wallpaper lasts about 2-3 days. During this period, it is strictly forbidden to open the windows so as not to provoke a draft, and it is also impossible to deliberately increase the temperature in the room in order to accelerate the drying of the wallpaper. Changes in temperature can cause the web to peel off, and high humidity will contribute to the appearance of bubbles.
If bubbles appear, you can proceed as follows. Take a medical syringe with a thin needle, draw some glue into it, pierce the bubble and squeeze some glue inside. Next, the area is glued and smoothed, and the excess glue that appears is removed with a dry cloth. Sometimes a construction knife and a thin brush are used to get rid of bubbles, but, according to experts, the trick with a syringe is more convenient and practical.
How to glue paper wallpaper: step by step instructions
General recommendations for pasting walls apply to all types of wallpaper, but each of them (due to the features described above) requires an individual approach to gluing.
Important! The wall under the paper wallpaper should have a perfectly flat surface!
Instructions for working with paper-based photo wallpaper:

When gluing paper photo wallpaper, glue is applied both to the wallpaper itself and to the wall
- Before you start gluing paper-based wallpaper, you must carefully level the wall and cover it with a primer.
- On the surface of the walls, markings should be applied in accordance with the pattern laid out on the floor.
- Next, you need to cut off the white fields (if any).
- Dissolve the glue in a clean, bulky plastic container.
- Turn the photo wallpaper fragment “face down” and spread the glue on the inside.
- Apply glue to the section of the wall where the prepared fragment is supposed to be glued.
- Without delay, until the paper is wet, glue the sheet. It is best to glue the canvas from top to bottom.
- Smooth out the piece of wallpaper with a soft cloth.
The remaining parts of the wallpaper are glued in the same way, while it is required to immediately remove the remnants of the glue with a dry cloth. Then you should carefully inspect the joints and, if necessary, additionally lubricate them.
How to properly glue non-woven wallpaper and vinyl-based wallpaper
Beautiful vinyl-based murals are glued according to similar instructions, which include the following steps:

Vinyl-based photomurals are glued using the same technology as paper
- Preparation of the wall surface, which is a primer impregnation with two coats.
- Marking in accordance with the dimensions of the wall mural.
- Preparation of a thick adhesive solution according to the instructions for the adhesive.
- Spreading the first canvas, which is then folded in half and kept for a certain time indicated on the package.
- Smearing the wall in the area where part of the photo wallpaper is supposed to be glued.
- Sticking the canvas on the designated area.
- Thorough smoothing of the sheet.
The rest of the parts are glued using the same technology, after which the seams are smoothed out and recesses for switches and sockets are cut out.
The technology for pasting walls with non-woven photowall-paper is slightly different from the instructions described above, although in general it assumes the same cycle of work:
- Layout of sheets and layout of the wall within the glued surface.
- Prepare the glue, which should be quite thick. To do this, you must strictly follow the instructions on the package.
- Carefully smearing the section of the wall where the fragment is supposed to be glued, and there is no need to apply glue to the canvas itself.
- The dry cloth is glued and leveled.
- Similarly, all subsequent fragments are glued along the applied markings.
- Trimming of joints and their additional gluing in order to maximize adherence and masking of seams.

The technology of pasting walls with non-woven photowall-paper implies careful spreading of a section of the wall with glue, and not of the canvas itself
Useful advice! If you carefully dismantle it, then the wallpaper on a non-woven base can be re-pasted. This makes it possible to eliminate errors if the sheet was glued incorrectly.
How to glue 3D photo wallpaper on the wall: video instruction
Almost all photomurals with a three-dimensional pattern are made on a non-woven base, therefore, the technology described above is used for gluing. It is necessary to take into account the fact that the parts are produced without a stock, therefore 3 D wallpaper on the wall is glued end-to-end. Three-dimensional canvases must be treated with special care, since the slightest damage to the drawing can distort the overall perception of the picture. To avoid the consequences, self-adhesive wallpaper was invented. The process of gluing them is significantly different from the method of pasting walls with other types of wallpaper.
It is better to work with self-adhesive wallpaper together: one person carefully removes the backing, and the second gradually glues the sheet, smoothing the surface with a rubber spatula. Carefully peel off the protective layer: tear off about 5 cm and immediately glue the upper part exactly along the marked lines. In no case should the adhesive surfaces be connected, since it will already be unrealistic to separate them. As a result, the wallpaper will be damaged.
The details must be glued immediately exactly according to the markings, since they immediately stick and it will no longer be possible to move them. In addition, you should work as quickly as possible, because the adhesive base without a backing quickly loses its properties and dries up in a few minutes. Smooth the surface with a rubber trowel to avoid air bubbles. If a bubble does appear, then it must be pierced with a needle, expelled air and carefully iron the surface.
Thus, working with self-adhesive wallpaper requires certain skills. The slightest missteps will entail at least the loss of the 3D effect, at the most, they will ruin the expensive material.
A well-chosen theme of photo wallpaper, corresponding to the style of the room, will make it possible to create an original interior design. Correctly selected glue and strict adherence to the technology for gluing a particular type of product will ensure high-quality fixation of the photo wallpaper on the wall. The photos and tips given in the article will help you avoid mistakes and get an excellent result that will allow you to admire picturesque landscapes, beautiful sunsets or the mysterious underwater world for a long time.