Most of the apartment owners want to increase the total area of housing by joining a balcony to it. In order to be able to use this room as a living room, it should be equipped with high quality. In order to avoid unnecessary material and physical costs, you can carry out the insulation of the loggia with your own hands: a step-by-step photo instruction will become your irreplaceable assistant. After all, properly carried out insulation work will help turn a cold balcony into a cozy room.

Nice loggia with panoramic windows
Content
The better to insulate the loggia from the inside
Today's market provides a wide selection of building materials for every taste. Most often, it is used as a balcony insulation:
- Styrofoam. It is made of foamed plastics with various densities. Release form - square and rectangular plates. Polyfoam is easy to handle and extremely easy to install. A distinctive feature is a long service life. A step-by-step photo of how to insulate a loggia with your own hands using polystyrene will show by example all possible styling options. You can find such instruction on the Internet on construction sites;

A secluded resting place with soft pillows
- mineral wool. Produced from a variety of glass, volcanic and sedimentary melts. Available in rolls and slabs. It is a very effective insulation for balcony rooms;
- extruded polystyrene foam (penoplex). The material is obtained by extrusion of plastics. View - rectangular slabs of various colors. It is equipped with a chamfer around the perimeter, which allows for a more dense and quick installation. In some cases it is used as a sub-floor. Penoplex has an average degree of flammability and is afraid of chemical solvents;

Loggia with insulation in two layers
- foamed polyethylene foam. This is a layer of gas-filled polyethylene soldered to aluminum foil. This foil material is easy to lay and cut. The rather thin structure of the insulation allows you to lay it not only end-to-end, but also overlap. The aluminum base is a kind of thermal reflector. Fighting off a different temperature, it almost doubles the thermal efficiency.
If you plan to insulate the balcony space, then it is better not to use mineral wool. Its processing is quite laborious and requires additional costs. In addition, there is a high probability of condensation formation, which can be very undesirable and may affect its technical qualities.

Isofol is used as an effective protection against moisture and steam
It must be borne in mind that in no case should the balcony be weighted down. Therefore, it is best to use lightweight foam plastic, no more than 5 cm thick, as a heater. Its cost is much less than that of mineral wool and a more modern material - extruded polystyrene foam.
Related article:
How to insulate a balcony with your own hands: step by step photos and instructions. Frequent mistakes. Installation of windows. Insulation of walls, floors and ceilings. Balcony roof insulation. The nuances of winter insulation.
Do-it-yourself loggia insulation: step-by-step photo instruction
Correctly performed work on arranging the balcony will help you significantly save on utility bills. The heat will be stored in the apartment, and not go outside it. The main thing is to repair the loggia with your own hands in stages and slowly. The basic plan of action is as follows:
- Thorough cleaning of the balcony from foreign objects.
- Dismantling of old materials.
- Glazing.
- Laying electrical wiring.
- The choice of insulation material.
- Floor insulation, walls and ceiling.
- Interior decoration.

When gluing insulation, you can use a level to level the surface
Important! Before starting work, you should immediately decide on the installation of an additional heat source on the balcony. After all, installing a battery requires certain preparatory work.
For glazing a loggia, it is better to use the services of professional specialists, and we will consider in detail in this article how to properly insulate the loggia from the inside on our own. In theory, you can finish all the work in ten days, but in practice it always takes much longer. Be prepared for this when planning your renovation.

To retain heat in the room, high-quality glazing should be performed
A step-by-step video "how to insulate a loggia with your own hands" can be viewed on the Internet. In the video you can see all the main stages of work and various nuances necessary for its high-quality execution.
How to insulate the floor on the loggia with your own hands
Many people ask the question: how to insulate a loggia so that it is warm there in winter? You need to start with a high-quality floor arrangement. So, the work plan:
- carefully sweep debris from all corners and potholes in concrete;
- Seal all gaps in the floor surface and in the joint. This must be done using polyurethane foam, sealant or polyurethane mastic;

When laying foam, do not forget about vapor barrier
- allow time for complete drying;
- waterproofing and vapor barrier. Use a special membrane or regular plastic wrap. Secure all joining seams with construction tape. Remember that the material should fit snugly against the walls. Watch the video "warm floor on the loggia with your own hands", it will clearly show all the working moments of this process;
Helpful advice!Never install a vapor barrier film on the cold side of the insulation, otherwise you will significantly reduce heat transfer. When using foil-clad material - the shiny coating should "look" down.

You can get rid of the cracks on the loggia using polyurethane foam
- fix the wooden frame using polyurethane foam. It is applied to the floor in straight lines. Wooden beams are placed on top, keeping a distance of about 50 cm between them. Do not forget to install spacers, otherwise the foam can lift the frame and disturb the proportions of the structure. After complete drying, the spacers should be removed;
- lay the insulation between the beams, securing it with special glue. The resulting voids are filled with foam or sealant;
- fix the base boards or chipboard on the beams;
- proceed with the decorative coating.

Wooden frame for penoplex
The technology of wall and ceiling insulation is identical to that described above.On the Internet you can find many visual lessons on insulating a loggia with penoplex with your own hands. Step-by-step instructions, photos and videos will help you figure out all the intricacies of the upcoming repair yourself.
Insulation of the floor of the loggia with penoplex with self-leveling floor
When using penoplex as insulation, you should pay special attention to the base and number of storeys of the balcony. For example, an increased level of humidity will immediately exclude the possibility of using mineral wool. After all, it can accumulate water vapor in itself, and this will subsequently negatively affect the state of your floor covering. In addition, it can lead to excessive dampness, mold and mildew.

A dowel fungus is used to fasten the insulation
When choosing expanded clay, remember that its amount is directly proportional to heat transfer. The higher the layer, the warmer. Therefore, if you do not need to significantly raise the floor level, it is better not to use this material.
Penoplex (expanded polystyrene) is an excellent choice. The material has the following undeniable advantages:
- low thermal conductivity;
- moisture resistance;
- high compressive strength;
- durability;
- environmental friendliness;
- ease of mounting.

Select glue for mounting extruded polystyrene foam based on the level of humidity in the room
The insulation procedure itself is simple to perform and consists of only a few points:
- Lay the waterproofing layer (polyethylene, membrane), fixing it carefully.
- Lay the floor surface with logs using a building level. This will help to make styling more accurately and efficiently.
- Place the foam sheets between the strips and fix around the edges with polyurethane foam.
- Cover the structure with plywood or chipboard.
- Apply a decorative finish in the form of linoleum or carpet on top.

Laying foam between wooden joists
Helpful advice! Never use polyurethane foam containing toluene or organic solvent adhesive. These substances can damage the insulation.
Do-it-yourself wall insulation and decorating the loggia inside
In addition to the underfloor heating, additional thermal insulation on the walls and ceiling should be made on the loggia. This will keep the room warm even more. How to insulate the loggia from the inside with your own hands, the video will show in more detail. You can easily find it on the Internet. A step-by-step description of this process looks like this:
- thoroughly clean the walls and ceiling;
- be sure to treat these surfaces with an antiseptic. This will protect them from the appearance of mold and mildew;
- fill the lathing beams on the ceiling and walls. The height of the structure should be slightly greater than the thickness of the selected insulation. For better fixation, choose dowels with locking screws;

Constructive solution for using a loggia
Helpful advice! For thermal insulation to be of high quality, purchase mineral wool 7.5 cm, and penoplex 0.5-1 cm thick. Large parameters are usually used only for outdoor work.
- glue the insulation with foam in cylinders;
- lay a layer of plastic or foil film on top. This will create the necessary vapor barrier;
- lay electrical wires for future lightening;
- sew on top with plastic or wood panels. You can also use drywall, but only moisture resistant. This must be done using nails, clips or self-tapping screws.

Working with mineral wool requires precautions
To choose a wall covering, look at the different photo of interior finishes of loggias in the Internet. Choose the most attractive for you in terms of price and structure. Only after that, start your main work.
How to insulate a loggia with penoplex
Penoplex can insulate balcony surfaces in two ways: adhesive and frame.
When insulating with the glue method, a thin layer of glue is applied to the prepared walls and ceiling (Sevener, Ceresit ST 85). Then the foam boards are neatly laid. Some experts advise additional reinforcement with self-tapping screws or other fastening tools. This is optional and is up to everyone's discretion. Let the frame dry a little.

Glue is applied along the perimeter and in the center of the foam sheet
Apply another layer of glue on top. Install a special reinforcing fiberglass mesh (5x5 mm), and re-cover with adhesive. After the structure dries well, you can start various finishing activities. If you still have any questions on how to insulate a balcony with your own hands, step-by-step photos will help you figure out all the nuances.
The wireframe method is considered to be more complex and time consuming. First, waterproofing is carried out, then a heat-insulating frame is made. It consists of a cell frame (metal profile, slats, bars), which is fixed on the surface to be treated. The cells are tightly filled with insulating material (roofing felt, glassine) and foam plates.

Installation of insulation on the ceiling is carried out in a checkerboard pattern
A vapor barrier (polyethylene) is installed on top, which serves as additional protection against moisture ingress. Wooden or decorative panels can be simply laid on top, and for wallpaper or painting you will need a drywall interlayer.
Listen to practical advice on how to equip a loggia with your own hands from several specialists, and only then choose a method of insulating the loggia.

In addition to thermal insulation on the loggia, it is worth considering vapor barrier
Thermal insulation of a panoramic loggia
In modern houses, panoramic loggias are often built. They provide an excellent overview and help to avoid primitive layouts. A photo of a loggia combined with a room will help you find new interior solutions. For example, create a beautiful winter Garden or a cozy resting place.
Warming of this type of balcony begins with careful processing of assembly seams. Outside work consists of installing flashing strips, internal - in sealing cracks and potholes with foam.

An example of combining a warm floor with insulation
Then the first layer of insulation material is laid. If you have chosen penoplex, then start mounting the plates strictly from the corner. For this, holes are drilled in the concrete and plastic fasteners are installed in them (three pieces for one slab).
Craftsmen recommend observing a staggered laying order to improve the sealing of seams. All empty spaces are carefully filled with construction foam to avoid heat leakage.

On contact with air, the polyurethane foam expands and polymerizes
Helpful advice! It is better to additionally fix the ceiling tiles with special glue. This will improve the reliability of the connection.
The next step will be to create a protective layer that saves from condensation. Use penofol or penolon. The sheets are stacked so that the foil side "looks" up. All joints are glued with aluminum tape. Then finishing work begins.

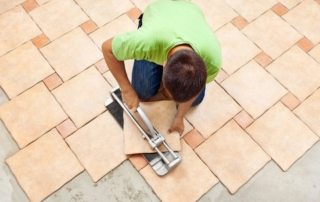
Using electric warm floor under the tiles in the insulation of the loggia
If your loggia has panoramic glazing, then take advantage of the geo-line technology. It allows you to apply a warm contour made of PVC structures to the glass base. The execution of these works should be entrusted exclusively to professionals.
The floor surface must be insulated. This can be done electrically by laying the necessary cables or heating mats. If you don't want to have the extra expense of paying your electricity bills, then more traditional flooring should be done. How to do this was described above.True, in the case of panoramic windows, the insulating material can be laid in two layers. Large glass surfaces allow more cold to pass through than concrete walls.

The infrared film floor is mounted under the finishing
Warming and finishing balconies on our own is not very difficult, but laborious and long-term. It is worth noting that the time and resources spent will pay off when you get a spacious, comfortable and beautiful space. In addition, it will serve as a buffer zone in the apartment, helping to retain additional heat in the living area. Watch on the Internet a video of step-by-step instructions for insulating loggias with your own hands, and create a new space and interior at no special cost.