Modern interior decoration is unthinkable without the use of drywall sheets... This material is popular for a reason. Due to their softness and plasticity, the sheets can be cut with a jigsaw, bend and sheathed with them on almost any surface. Very often, this material is sheathed with ceiling suspended structures, which can be simple or multi-level. For example, you can design plasterboard ceilings for a bedroom: photos and a description of the installation process are easy to find.

One-level suspended ceiling
Content
What are plasterboard ceilings for a bedroom: photos and design options
The best way to level the ceiling is with a suspended ceiling system. There are many types of finishing materials for cladding this structure, but we will consider the cheapest and most common of them - plasterboard. A bedroom is a room in which the ceiling should not only be practical, but also beautifully designed. Ceilings for a bedroom made of plasterboard, the photos of the design options of which are striking in their diversity, are divided into several types:
- suspended single-level ceiling, with installation of profiles on U-shaped fasteners directly to floor slabs. Most often it is installed in residential premises;

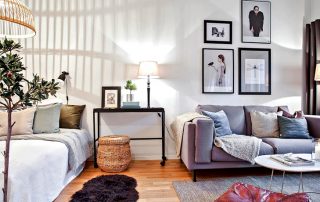
Plasterboard ceiling in the bedroom
- single-level suspended ceiling, with hangers attached to the floor slabs. This type is mounted in industrial and commercial premises with high ceilings;

Fastening the ceiling to hangers
- multi-level structures with a combined type of frame attachment. The lower level can be made in straight lines or be curved in any shape.

Duplex plasterboard ceiling in the bedroom
Helpful advice! With a low wall height, you should not choose a multi-level type of construction. The construction of such a ceiling will greatly reduce the height of the room, which will make it uncomfortable to be in it. A beautiful ceiling can also be created on one level.
DIY installation of a single-level false ceiling in the bedroom
In order to independently make a suspended ceiling in your bedroom, you need to stock up on the necessary tools and materials. For this you will need:
- plasterboard sheet. Its standard length and width are 120x250 cm, and the thickness is from 0.6 to 0.8 cm. This is precisely the ceiling drywall. Unlike the wall one, it is thinner and lighter. The required number of sheets is calculated by the area of the room, rounded up. When installing multi-level ceilings, the calculation is more complicated.In this case, the area of the side surfaces must be taken into account;

Plasterboard box around the perimeter of the ceiling
- CD and UD profile. It is made of soft metal. With its help, the frame of the entire ceiling structure is constructed. The profile is 350 - 400 cm long;
- П - shaped mountings. In common parlance, they are called peshkas. They are made of the same metal as the profiles themselves;
- self-tapping screws, screws, dowels;
- putty;
- lamps and wiring to them;
- a water level with a length greater than the diagonal of the room;
- chokline - a special thread with blue, which beats off a horizontal line along the level;

Spot lighting in the bedroom
- puncher and screwdriver;
- construction knife;
- cutter for cutting holes for fixtures;
- tape measure, level, spatula.
Related article:
|

These tools and materials are enough to build a plasterboard ceiling for a bedroom. A photo different stages of installation also does not hurt to add to this list.
Helpful advice! When screwing self-tapping screws into drywall, use a special nozzle that has a limiter. This will prevent the paper from tearing.

Duplex ceiling
Preparatory work and markup
Before starting the main work, it is necessary to prepare the walls and the base of the ceiling. To do this, use a puncher from the ceiling to beat off pieces of plaster that do not hold well. If there is a rounding between the walls and the ceiling, then we also remove the yoke. It is necessary to ensure that the walls are even at the points of attachment of the profile.

Plasterboard flower in the children's bedroom
In order to make the correct markings, you need to use the water level. To do this, look for the corner in which the ceiling is at the lowest point. The mark is placed so that the bottom of the frame is at least 25 mm from the ceiling. From this mark they begin to work as a level. You need to do this together. One person holds the water level at the first mark, and the other puts marks at each of the remaining corners.

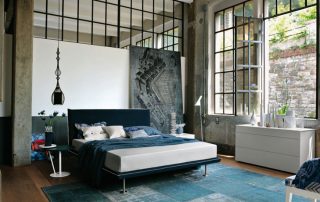
Wood and plasterboard in the ceiling decoration
When the level is found in all corners, the points are connected with straight lines using a chokline. The UD profile is intended for wall mounting. It turns around the entire perimeter bedrooms so that its bottom edge coincides with the level lines. When all the profiles are screwed on, you need to find the most right angle in the room. It is from him that drywall will be mounted.

Ceiling painted with glossy brown paint
From a right angle every 50 cm, mark the places on the ceiling where the CD ceiling profile will be located. We do the same with the opposite wall. Symmetrical points on the walls are connected by parallel segments that can be hit with a chokline. U-shaped fasteners are screwed along these segments after 50 cm. The CD profiles are inserted at the edges into the UD wall profiles and passed inside the pads. Then the middle of each profile is raised 2 - 3 cm higher and the nearest U-shaped mount is folded.

LED ceiling lighting
Across the CD profiles, pull the thread tightly between the UD profiles. It will serve as a level. Then, one by one, the ceiling profiles are set on a thread and fixed with self-tapping screws in pawns. When all the peshki are screwed to the profiles, the frame can be sheathed with drywall, but first you need to bring the wires to the places where the lamps will be.

Drywall in bedroom decoration
Plasterboard filing
Installation of a plasterboard ceiling for a bedroom, a photo of which will not disappoint your friends, must be done correctly. For this, the distance between the ceiling profiles must be strictly observed. It should be exactly 50 cm. Since the length of the sheets is 250 cm, the sheet rests on 6 profiles. He closes the last sixth only half. The second part will be closed by the next sheet.

Single level ceiling in the bedroom
Helpful advice! If the room does not fit a whole number of drywall sheets, then all of them should be fixed first. Then measure the remaining distances and cut the sheets on the floor, and then finish the work.

Wide border around the perimeter of the ceiling
Fastening of plasterboard sheets to the frame is carried out using self-tapping screws 25 mm long. One sheet should take about 60 pieces. It is necessary to screw in the screws very carefully so as not to damage the sheet. In this case, the caps should be slightly recessed.

Spot lighting in a false ceiling
After all sheets are hemmed, it is necessary to putty the joints and fastening points of the screws. To do this, you can use any putty mixtures or ready-made putty. We use a narrow spatula as a tool.

High ceiling decoration in the bedroom
Lighting creation
The lighting in the bedroom should be special. It needs to be dimmable. To do this, you can use the main chandelier or lamp and independent point light sources... The fixing of the chandelier to the ceiling is carried out in the usual way, but to install the built-in spotlights, you need to drill the required number of holes with a cutter, to which you can pull the wires. After finishing finishing, you need to insert the lamps themselves into these holes.

Plasterboard construction over headboard
Helpful advice! It is most advantageous to use LEDs as a working element for spotlights. Although they are more expensive than incandescent lamps, they are very bright and consume significantly less electricity.

Plasterboard ceiling structure
Finish plasterboard ceiling
There are many ways to finish drywall ceilings for bedrooms. Photos of some options can suggest interesting ideas. The most common options are wallpapering and painting with water-based paints. In addition, the suspended ceiling can be designed liquid wallpaper or apply to it decorative plaster... It is recommended to apply several coats of primer to the sheets before any finishing.

Volumetric elements on the ceiling
The technology for installing multi-level ceilings is not too different from that discussed above. However, it is much more difficult to build it and it requires some skills, since you first need to make a template. Installation of curved ceilings provides for bending of plasterboard strips when sheathing the side surfaces. This can be done easily if the strips are slightly moistened with water. The curved contour is cut with a knife or jigsaw.
A beautiful and functional ceiling in the bedroom can be made from a material as simple as drywall. You just need a little patience and skill for everything to work out efficiently, beautifully and reliably.