Styrofoam ceiling tiles are a great way out of a dead-end position when you want to make a beautiful renovation, but money is just barely enough. They are not expensive, and it will not be difficult to choose the right color and texture. This finishing material is very undemanding to the quality of the repaired surface, and is also easy to install. Therefore, for high-quality finishing of ceilings in low-budget repair options, it is indispensable.

Styrofoam tiles can be used to decorate the ceiling quickly and easily
Content
Styrofoam ceiling tiles: general information, types and their characteristics
Extruded polystyrene foam (styrofoam), and in everyday life, foam is a very versatile material. A huge number of different products and building materials are made from it. Due to its structure with millions of small cells filled with air, it has properties that are very necessary for finishing materials:
- low thermal conductivity, which allows you to retain heat inside a room trimmed with foam;
- the ability to give the product any shape;
- pliability for processing;
- incredible ease.

Ceiling Tile Design Examples
Foam ceiling tiles in most designs are square. The sizes of the squares are 500X500, 250X250 or 300X300 mm. Sometimes there are rectangular specimens 1000x165 mm, which are called panels and are used for finishing public non-residential premises. There are tiles and other geometric shapes, even irregular ones. From it you can upload whole compositions of various topics.

Combination in decoration ceiling in the kitchen foam tiles and other materials
The simplest tile options have the usual white foam color with an unpretentious ornament on the front surface. They are designed for finishing ceilings for painting with water-based compositions. For this reason, they do not have a glossy surface, which ensures good ink absorption. The cost of ordinary tiles is minimal, so the cost of purchasing it does not exceed the cost of painting a ceiling of a similar area.

Styrofoam tiles on the ceiling in the kitchen
The thickness of any foam tile does not exceed 14 mm, and more often ranges from 2.5 to 8 mm. Due to this, taking into account the specific weight of the foam, the mass of 1 m2 of the coating does not exceed 400 grams. That is, a room of 20 m2 can be covered with a material whose total weight is only 4 kg. In addition to the tiles themselves, the industry produces a large number of related products from the same expanded polystyrene: moldings, cornices, sockets, baseboards.This allows the ceilings to be finished in a uniform style.

Painted foam tiles on the kitchen ceiling
Helpful advice! When buying a tile made of polystyrene foam 500X500 mm, after measuring the area of the glued surface, round off the result to a larger integer multiple of 5. After all, the tile will have to be cut along one of the walls. When laying diagonally, the amount of material required must be increased by 15%.

Foam tiles with gloss lamination in the dining room
Methods for making foam tiles
Today there are 3 ways to produce foam ceiling tiles.
- The pressing and stamping method involves compressing and compacting large foam boards using an industrial press. Such products have a thickness of 0.7 - 0.8 cm.
- The injection manufacturing method is a high temperature die casting. In this case, very thick products are obtained, about 1.4 cm thick.
- The tiles obtained by extrusion have the smallest thickness from 2.5 to 3 mm. It is on them that decorative film coatings are glued.

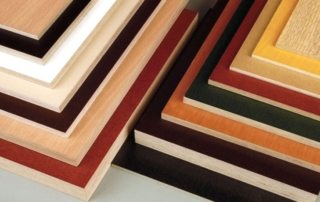
Examples of painted and laminated ceiling tiles
In the manufacturing process, the manufacturer uses various industrial technologies to give the front surface of the tiles the desired appearance: smooth or embossed, laminated or not, white or colored.
Of particular note are the tiles, which use a seamless installation technology. They have standard dimensions of 500X500 mm, but their edges are equipped with a special relief formation, and the material itself is very pliable and soft. For this reason, the tiles can be aligned so that the seam simply cannot be seen. Such tiles require a special gluing technology and special quick-setting glue.

The ceiling in the living room is decorated with foam tiles
All the pros and cons of foam ceiling tiles
Like any material for interior decoration, tiles have properties, both positive and negative. If we talk about the indisputable advantages, then these are:
- thermal insulation properties;
- resistance to humid air;
- immunity to fungus and various types of mold;
- lack of the possibility of rotting;
- very low price.

Installation of foam tiles on a suspension frame
In addition, foam ceiling tiles are successful in masking small irregularities in the ceiling surface. No special tools, knowledge and skills are required to stick this material on the ceiling.
Related article:
|

The tile also has serious drawbacks:
- The fire hazard of foam tiles does not allow its use in childcare facilities. Even those products that are made using special modern fire-fighting technology are capable of melting with the release of toxic volatile substances.
- Poor soundproofing properties of polystyrene foam.
- The presence of a significant number of joints that create the impression of an incomplete ceiling. This disadvantage was eliminated by creating seamless tiles.

The traditional color of ceiling tiles is white
Helpful advice! In the foam, with prolonged exposure to sunlight, irreversible processes begin. They develop gradually, but lead to deformation and destruction of the structure. For this reason, such tiles should not be glued in open areas, terraces or light-colored verandas.
Technology of gluing ceiling tiles from expanded polystyrene
As mentioned earlier, pasting the ceiling with foam ceiling tiles is not a complicated and high-tech process. Any person with sufficient accuracy, patience and care can do this work. This should be done according to specific instructions in several stages.
- The preparatory work includes a complete cleaning of the ceiling surface from old coatings and various contaminants. In this case, significant differences and irregularities need to be corrected. For installation, you need to buy the right glue. The one that is sold specifically for such a tile, which has a transparent color, is not very convenient, since it is intended for perfectly flat ceilings. When using it, tiles must be pressed strongly against the ceiling and held for a long time until the glue sets. This is very inconvenient, as your hands get tired for a long time. At the same time, after a while, some of the tiles may also fall off. Therefore, it is better to buy a white quick installation or any finishing putty.

Options for placing tiles on the ceiling
- You need to prepare a tool: a stationery knife with spare blades, a ruler, a chop, a tape measure, a pencil and a rag to clean the glue.
- We make the ceiling marking correctly. To do this, draw diagonals and mark their intersection. Next, we connect the midpoints of opposite sides with segments. All the resulting lines should intersect at one point. This is the very center of the room. Care must be taken to chandelier was right here, otherwise the ceiling will look ugly. Through the central point, the perpendicular lines are beaten off with a paint cord, along which the first rows of tiles are oriented.

Foam tiles laid on the ceiling in parallel rows
- The first two tiles are brought together at the corners in the center and pass the cord from the lamp in the corners. For this, the corners of the tiles can be cut off. Then we will close this place with a glass of a chandelier. Glue the rest of the tiles in a spiral around the first two. At the same time, it is strictly monitored that all rows and columns are parallel. At the walls, the tiles are cut to size with a knife, without fear of leaving a small gap, which can later be hidden by the baseboard. If there is a pattern on the tile, make sure that it matches, forming the desired composition.
- Sealing is done with silicone sealant. In the case of using putty, the seams are filled by themselves when gluing.

Finishing the ceiling with expanded polystyrene tiles - an economical and practical option
Helpful advice! If the glue does not set for a long time and your hands get tired of holding the foam ceiling tiles, then you can make special supports, similar to long mops. Their length should strictly coincide with the height of the ceiling minus the thickness of the tiles.
The use of foam tiles for finishing the ceiling allows you to make a very inexpensive and high-quality renovation of the premises. Additional elements in the form of skirting boards and sockets for a chandelier will help to give the interior with such a ceiling a more attractive and finished look. Moldings and columns will further highlight its features.
How to glue ceiling tiles with your own hands (video)