Proper care of plants at an early stage of their development is the key to a good harvest in the fall. So, ensuring comfortable growing conditions for crops is a task that faces every dacha owner. One of the best helpers in achieving this goal is the greenhouse. Of course, there are not always funds for buying an expensive structure, so we will consider how to make a greenhouse from scrap materials with our own hands.

Creating a greenhouse from scrap materials is not only an opportunity to use unnecessary things, but also to organize favorable conditions for growing vegetables
Content
- 1 Do-it-yourself greenhouse made of scrap materials: advantages of use
- 2 Types of greenhouses with their own hands from scrap materials
- 3 Materials used for the construction of mini greenhouses for summer cottages
- 4 How to choose the right place to install a homemade greenhouse
- 5 How to make a simple greenhouse for cucumbers with your own hands
- 6 Do-it-yourself greenhouse for peppers: photo of the Wigwam design
- 7 How to make a greenhouse for a tomato: the simplest designs
- 8 How to make a greenhouse for tomatoes with your own hands: stationary construction
- 9 How to make a greenhouse from old window frames: step by step instructions
- 10 DIY greenhouse care tips
DIY greenhouse made of scrap materials: advantages of using
The main purpose for which greenhouses are used in agricultural activities is an earlier start of sowing. Indeed, it often happens that sudden frosts kill newly planted seedlings or prevent the seeds from growing. Small homemade greenhouses are a great way to protect plants by creating the most comfortable growing conditions for them.

The most economical option for creating a greenhouse is to use plastic wrap and unnecessary wooden boards.
Self-made constructions, subject to careful observance of all the recommendations for arrangement, are in no way inferior to purchased ones, and can increase the yield up to 3 times. The main thing is to provide a stable microclimate inside the structure.
One of the main advantages of a greenhouse made according to the instructions is the ease of access to the plants that are planted inside. It is easy to take care of them, of course, provided that the place and design of the greenhouse are correctly selected.
Among other advantages of using simple greenhouses made from scrap materials with your own hands, it is worth noting:
- ease of installation and dismantling, ease of repair work;
- a homemade greenhouse will cost less than all other options;

An example of a successful implementation of a wall-mounted greenhouse for growing seedlings
- it is possible to choose a greenhouse, the design of which will organically fit into the situation of the site without spoiling its appearance.
Types of greenhouses with their own hands from scrap materials
Thinking about building a mini greenhouse with your own hands, the first thing you need to decide exactly is the purpose of this design. It is on this that most of its characteristics will depend, including size, material of manufacture, etc. So, for example, a mini greenhouse-greenhouse will be able to provide you with radishes and herbs in early spring.
If we are talking about a greenhouse for a tomato with your own hands, then you will need to build a fairly strong and solid structure. Indeed, at each subsequent stage of plant development, more and more space will be required, which is the main task to provide. The same applies, for example, to cucumbers and other crops, the ground part of which is large.

Building a tall greenhouse from old windows and doors allows you to install comfortable shelves for growing both short and tall plants.
The requirements for mini greenhouses for seedlings look completely different. In this case, the main emphasis should be on the size of the structure, and on its ability to provide the plants with the required microclimate. It is desirable that a fairly large part of the greenhouse opens for ventilation, for example, the roof or side flap. On warm and sunny days, this will have a positive effect on plant growth.
Another common option is structures that are adjacent to the wall of the building. The construction of such greenhouses is very simple, and with the correct location, such a greenhouse will in no way be inferior to other types.
Helpful advice! A greenhouse can be of almost any size, up to the fact that it will be designed for one plant, for example, when it comes to growing a small number of seedlings.
Materials used for the construction of mini greenhouses for summer cottages
Speaking about materials for a greenhouse, it is worth paying attention to the fact that the structure should consist of two parts: lower and upper. The lower part is represented by a simple drainage system, which is easy to make from organic debris, fallen leaves, straw, etc. From above, all this is covered with earth. This is not necessary, but drainage will provide the plants with extra warmth.

Mini greenhouses for sprouting seeds in the open field can be created using wire, film and a hair dryer to fix polyethylene
As for the upper part, which is represented directly by the greenhouse box, there are many options. Today, in mass production, more and more preference is given to frames made of profiled or metal-plastic pipes. If we are talking about a greenhouse with our own hands from scrap materials, the photos show us the incredible variety of available solutions.
For example, greenhouses made of plastic bottles, pipe and film structures, as well as frame greenhouses are very popular. It is not difficult to implement any of these options with your own hands, especially if you follow the step-by-step instructions for work.
It is especially worth noting the use of wood in the construction of such structures. This applies to both the construction of greenhouses with your own hands from old window frames, and those cases when the frame is assembled from a bar. This material is used quite often, despite the fact that it is more susceptible to the process of decay, as well as deformation as a result of drying out.

Mini greenhouses are convenient because they can be easily placed anywhere you need, even on the balcony of an apartment
As for the covering materials, there are only three options: film, glass and polycarbonate. In the first case, the main advantage is low cost.Having spent quite a bit of money, you can get a suitable covering material that will last one, and with careful treatment, even two seasons.
Glass is quite another matter. It is much more durable, although it can break as a result of impact. Of course, no one buys glass especially for a greenhouse, since it has a lot of weight and its use simply will not be justified, but if we are talking about using window frames with already built-in glasses for this purpose, then this option is quite acceptable.
Today, polycarbonate is considered the ideal option. This material combined all the best qualities, and allowed the owners of suburban areas to create light, comfortable and inexpensive greenhouses. Polycarbonate is easy to work with, and its light transmittance allows plants to get enough sunlight and heat.

In the warm season, non-woven polypropylene fiber can be used as a shelter for a small greenhouse - spunbondwhich allows fresh air to pass through well, but at the same time allows you to control the microclimate
Helpful advice! One of the main requirements for the covering material for greenhouses is high light transmittance. That is why, even if we are talking about self-made greenhouses made of plastic, it is worth taking care that the plants do not suffer from a lack of sunlight.
How to choose the right place to install a homemade greenhouse
Looking through the instructions on how to make a greenhouse for seedlings with your own hands or for any other purpose, you should pay attention to the choice of its location. A suitable construction only in combination with the correct location will allow for a good harvest.
First of all, the place that is chosen for the installation of the greenhouse must be protected from strong winds and drafts. Also, it is important to avoid stagnation of water in the place where the greenhouse is installed. For this reason, it is not worth installing in a low-lying area where precipitation and melt water can accumulate.

A greenhouse made of polypropylene pipes and polyethylene film can be easily dismantled and assembled in another place, in the case of an incorrectly chosen arrangement of the structure
If you plan to make a structure that will open from one side, then it is highly recommended that this be the southern part. The side that faces north should, if possible, be deaf in order to avoid a drop in temperature and the occurrence of drafts inside the greenhouse.
Also, it is necessary to ensure that a sufficient amount of sunlight penetrates into the greenhouse. For this, it is best to avoid installing the structure under large trees or in the immediate vicinity of agricultural buildings. The only exceptions are greenhouses that are adjacent to the house. But in this case it is imperative that this be done from the sunny side of the house.
How to make a simple greenhouse for cucumbers with your own hands
As already mentioned, there are many options for arranging greenhouses, each of which takes into account the specifics of a particular crop, the cultivation of which is planned in this case. Consider one of the examples of the simplest design - a do-it-yourself greenhouse made of film, which is designed for cucumbers.

When building a greenhouse for cucumbers, it is important to calculate in advance how much space is needed for adult plants.
The first stage is the preparation of the site for the installation and arrangement of the drainage layer. In this case, you will need to remove the top layer of soil (about 50 cm) and fill the bottom of the pit with rubble or gravel. Then a layer of organic waste is placed in the pit and covered with earth. In this case, the topsoil must be at least 30 cm.
Then, along the perimeter of the prepared site, you need to make a fence. Using steel wire, stiffeners are made, from which a frame for the covering material will later be obtained.In the process of work, you can also use soft wire, tying more rigid elements with it. This will give the whole structure more strength.
As covering material a film is used, which is pulled over the ribs and fixed. In hot weather, the film can be raised so that the plants are additionally ventilated, and with the onset of coolness, you can additionally throw a thick cloth or blanket over the greenhouse, which will provide the cucumbers with warmth.

Covering material you can not attach to arcs, but use heavy stones or bricks to fix at the base of the greenhouse
Helpful advice! After the cucumbers have grown and no longer need protection, it is not at all necessary to completely dismantle the greenhouse. It is very convenient to simply remove the film and leave the frame as a support for weaving plants.
Related article:
DIY greenhouses: the best projects and materials for construction
What materials to use for construction. How to choose a place to install a greenhouse. Construction of various types of structures.
Do-it-yourself greenhouse for peppers: photo of the Wigwam design
Interested in the question of how to make a greenhouse for peppers with your own hands, you can find a structure called a Wigwam. To make it, you will need a plastic bag without a bottom, a wooden stake and long rods. Both willow and poplar trees are quite suitable. In addition, you can use hazel and willow twigs. The main thing is that they are flexible, and their diameter does not exceed 20 cm.

A greenhouse of the Wigwam design can be easily created in a short period of time using improvised means - sticks and polyethylene
If there is no plastic sleeve, you can make it yourself. For this, a piece of polyethylene of a suitable size is taken, folded in half, after which the edges of one and the sides are soldered under the influence of temperature.
The good thing about such a simple greenhouse is that it is very easy to build and disassemble it alone. To do this, mark a circle on the ground, the diameter of which will correspond to the diameter of the sleeve. A wooden stake is driven in the center of this circle, which will act as a base. Then they proceed to driving in the rods, evenly placing them around all the circles.
All the rods must be securely fixed in the ground, and then assembled together at the top point and tied to the central stake. A polyethylene sleeve is put on top of such a frame, the top of which is also fixed to the stake. At the bottom, on top of the film, you can pour earth or put any heavy objects (boards, bricks).

A greenhouse for peppers should only be placed in a well-lit place, since the plants of this culture love light and do not grow well in the shade
In order to take care of the plants conveniently, you can not only raise the lower edges of the film, but also completely lower the covering material downward, untiing it at the upper attachment point.
Helpful advice! In addition to plastic wrap, you can make the top layer for a greenhouse with your own hands from spunbond - a non-woven material whose characteristics meet all agronomic requirements.
How to make a greenhouse for a tomato: the simplest designs
You can often find greenhouses for tomatoes from scrap materials. You can make them with your own hands from anything, including plastic bottles, which are sure to be found in every country house. It is best to use large containers such as 5 liters. You can make a mini-greenhouse for one plant as follows: cut off the bottom of a plastic five-liter bottle and deepen the remaining container into the ground.

The use of plastic bottles is considered the most economical option for sheltering young plants.
Inside such a mini-greenhouse, small tomatoes will feel quite comfortable, which, as they grow, need to be directed to the neck of the bottle.
Another great example is a photo of a small do-it-yourself greenhouse made from a plastic container that is often used for baking. Sometimes they even use plastic containers for eggs, making a hole in each cell to avoid stagnant water.
Helpful advice! If you need to place the plant in a very small container, such as in the case of an egg tray, you can substitute a peat tablet for regular soil.
It is noteworthy that the possibilities for the independent construction of small greenhouses are not limited by anything. With a little imagination, you can create any unusual designs that will not only protect the plants from the cold, but also become a decoration of the summer cottage.

A mini greenhouse for a tomato can even be made from an old clothing cover
Complex designs of a greenhouse from plastic bottles with your own hands
In contrast to elementary structures and plastic containers, you should pay attention to structures that, although made from recycled materials, still require a lot of effort and time from the owners.
For example, using the sewing method, an almost ideal greenhouse can be created from plastic bottles with your own hands. This will allow you to realize a fairly large amount of unnecessary packaging, and at the same time it is worthy to replace any covering material.
Looking through photos of greenhouses for seedlings with their own hands, which were made from bottles, you can see that a wooden frame is usually used as a base, to which bottles are attached, connected to each other. Of course, this process is a lot of trouble, and cutting bottles is a rather tedious process, but what is important is that the resulting design meets all the requirements and is functionally in no way inferior to other complex designs.

An example of a complex greenhouse design made of plastic bottles and a wooden frame
How to make a greenhouse for tomatoes with your own hands: stationary construction
If you have the opportunity to allocate space and time for the installation of a stationary type structure, then you can consider more capital options, for example, a greenhouse made of a shaped pipe covered with polycarbonate or plastic film. Since such a structure is usually not dismantled for the winter, it must be strong and reliable enough to withstand severe wind loads and the weight of precipitation.
It is easy to make a greenhouse from a profile pipe with your own hands, especially if you use a ready-made drawing with all sizes of parts for work. To install such a structure, it is recommended to prepare a reliable foundation that will firmly hold the greenhouse and will not allow it to fly away in strong gusts of wind.
The simplest scheme available for implementation is an arched structure. To do this, you need to bend several pipes of the same size and fix them in such a way that you get arches standing one after another at an equal distance. For greater strength, additional stiffeners are attached at the top and sides.

The stationary structure of a tomato greenhouse can be constructed using shaped pipes, wood and plastic wrap
If a film is used as a covering material, then it is simply laid on top, fixing it to the pipes using self-tapping screws or other devices. An allowance is left at the bottom, which allows you to sprinkle the edges with earth or fix the film with the help of improvised objects with sufficient weight. How to do this correctly, you can see in the photo of a greenhouse for a tomato with your own hands.
It is a little more difficult to work with polycarbonate, however, the result is worth the effort, given that its service life can be up to 30 years, while the film will not last more than 1-2 seasons. Polycarbonate is screwed to each side of the frame, after which the excess is removed with a sharp knife, and the seams are processed and sealed.
Helpful advice!In the same way, you can make a greenhouse from metal-plastic pipes. It is quite simple to assemble the frame with your own hands, given the flexibility and pliability of the material, and you can choose any type of covering material.

Height arches in the greenhouse for tomatoes should be higher than adult plants to avoid contact of the covering material with fruits and leaves
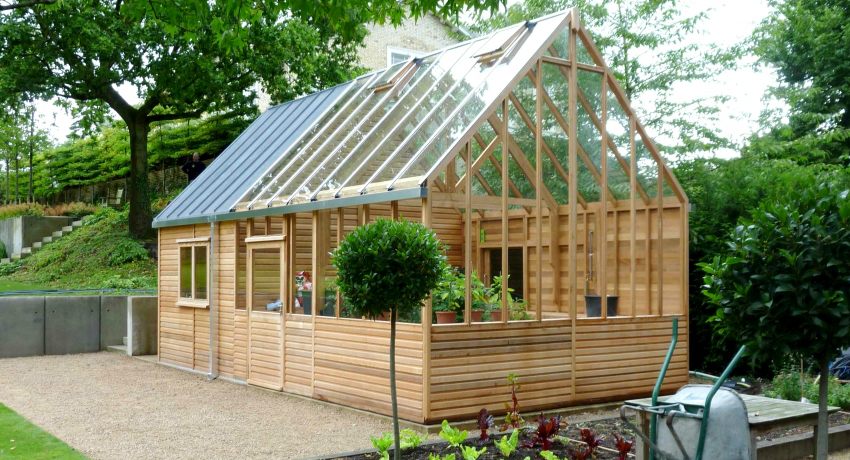
How to make a greenhouse from old window frames: step by step instructions
This, at first glance, an unusual method, in fact, has become quite widely known. The thing is that with the advent of metal-plastic windows, more and more old frames are simply unnecessary, despite the fact that they remain intact, and sometimes even glazed.
Do-it-yourself photos of greenhouses from window frames perfectly demonstrate how diverse designs can be that are made of such a simple material. Here there are both small structures and greenhouses of impressive size, suitable even for growing tall crops.
But before starting work, it is important to consider that the wooden base of the frames is quite heavy, so the finished structure will be heavy, especially if glass is inserted inside. Therefore, in this case, it is recommended to prepare a reliable foundation - a columnar foundation.

A small greenhouse made of old window frames can become a real decoration of a garden plot.
How to make a foundation for a greenhouse from frames with your own hands: photo instruction
In order to make the foundation, it is worth starting with standard markings that indicate the boundaries of the future greenhouse. In each of the corners, and then, observing a three-meter step, it is necessary to dig holes with a depth of about 50 cm. You can also make deeper holes, because the main goal is to reduce the level of soil freezing in winter.
The first 10 cm of each pit are filled with a layer of gravel, which is carefully compacted. Then formwork is made on the sides, and hollow metal pipes with a diameter of 10-15 cm are inserted inside. With the help of a building level, they are leveled, fixed with bricks and poured with concrete.
You can also make a base using a wooden bar, from which a box of a suitable size is made. But in this case, it is extremely important to pay attention to the processing of wood with protective agents against moisture and insects.

When planning and constructing a base for a greenhouse from old window frames, the future weight and size of the structure must be considered
Do-it-yourself step-by-step guide to building a greenhouse frame from window frames
To understand how to make a greenhouse from window frames, it is enough to perform a few simple operations step by step:
- Preparation of window frames: hinges, handles and other hardware must be removed. Old paint is completely cleaned off, and the frame itself must be treated with protective agents.
- It is highly recommended to remove the glasses from the frames at the preparatory stage, since in the future it will be very easy to break them, and you do not need any inconveniences, such as additional weight and difficulties in processing the frame.
- Window vents must be carefully sealed, and if there is such an opportunity, then dismantled altogether.
- We turn to the assembly of the frame: if we are talking about a small greenhouse, then the frames can simply be connected using ordinary self-tapping screws and corners, and if the structure has impressive dimensions, then you will need to prepare a wooden frame in advance for fastening the frames.
- After the frames are fastened and inserted into the frame, the remaining space and even the smallest gaps must be filled with polyurethane foam.

Belgian greenhouse constructed using one large window and treated wood as a frame
Helpful advice! If there is such an opportunity, it is better not to insert the old glasses into place at all, but instead install pieces of polycarbonate of a suitable size.
As a roof for such a greenhouse, a plastic film or more expensive polycarbonate can be used. The material is attached to the lathing and fixed with special clamps, clamps or self-tapping screws.
DIY greenhouse care tips
Due to the imperfection of self-made structures, as well as often rather harsh operating conditions, almost all owners have to deal with the need for repair work. Especially, this applies to those structures for which a plastic film was used.
The film is more likely to be damaged than other materials, but at the same time it can be quite easily repaired. To do this, you need to remove it from the frame and lay it out on a flat surface so that the damaged area is in front of you. Place the cut plastic patch on top of the correct size. Having covered all this with a newspaper, it is carried out on top with a soldering iron or the edge of an iron.

Greenhouses with a film coating must be checked from time to time for integrity in order to avoid a drop in temperature inside the structure.
In almost all other cases, it will be easier to replace the damaged element and re-cover the greenhouse. Trying to stick a broken piece of a plastic bottle, etc., is a waste of time.
But it is worth thinking about improving the quality of the soil inside the greenhouse. Firstly, it will have a positive effect on the yield, and secondly, it will provide the plants with additional heat. The ideal soil mixture in this case includes the following components: 1 part of sand, 2 parts of turf, 3 parts of humus. Also, it will not be superfluous to add one teaspoon of superphosphate, potassium sulfate and urea.
Helpful advice! Even if a good quality potting mix has been prepared, it should be used for no more than one year. In the next season, the soil must be renewed.
Using one of the above technologies, you can easily make a greenhouse for peppers, tomatoes, cucumbers or any other seedlings with your own hands. Moreover, using improvised materials for work, you can get rid of unnecessary trash, turning it into a beautiful and functional greenhouse.