Eggs are one of the foundations of a healthy diet and a potential source of income. This is why raising laying hens is so profitable: you get fresh eggs, dietary meat on your table and for sale, and chicken manure is good to use to fertilize the site. In order for the chickens to feel great and rush regularly, it is worth creating comfortable living conditions for them by building a chicken coop for 10 chickens with your own hands: drawings and instructions will help you cope with this task.

A beautiful chicken coop will harmoniously fit into the design of the site
Content
- 1 Calculation of the size of a chicken coop for 10 chickens
- 2 The choice of materials for the construction of a chicken coop
- 3 Choosing a place to build a chicken coop for laying hens with your own hands
- 4 Do-it-yourself chicken coop: video, tips for building floors and walls
- 5 Arranging a chicken coop inside with your own hands: photos and recommendations
- 6 The final stage of the device for laying hens
- 7 Is it worth buying an inexpensive chicken coop for 10 chickens
Calculation of the size of a chicken coop for 10 chickens
To correctly determine the scale of the building, first of all, select for yourself:
- Your goal of raising laying hens is one thing if you need fresh eggs for your daily diet, and quite another if you decide to turn bird farming into a source of income.
- The number of birds you are able to keep on the farm.
- House size appropriate for your site.

A small chicken coop for 10 chickens is quite within the power to build independently
Helpful advice! Inhabitants of a hen house for 10 chickens will provide 3 people with fresh eggs. It is worth keeping twice as many birds for a large family. And if you plan to turn the maintenance of chickens into a source of income, immediately expect to build a chicken coop with your own hands for 50-100 birds.
Do not be afraid of the large scale. In the absence of experience in construction, you can inexpensively buy a chicken coop or try your hand at small buildings. If, during the construction of a mini chicken coop for 10 chickens with your own hands, you foresee in advance a place for expanding the economy, over time, if necessary, you can easily increase the area of the room by completing the chicken coop.
DIY chicken coop for 10 chickens: drawings for calculating sizes
Any construction begins with the creation of a blueprint. Do not neglect this stage - regardless of the scale of the venture, your drawing should be as detailed and clear as possible. So you will have a clear picture of where you want to come as a result and a developed plan of action.
When creating a drawing, it is not necessary to exactly copy the finished schemes. This is the beauty of the decision to build a chicken coop with your own hands: you can design a dwelling for birds at your discretion, in accordance with the characteristics of your site and your own ideas about convenience.

Coop for 10 chickens: A - facade; B - view from the side of the vestibule; B - general plan of the chicken coop
However, with little experience in building chicken coops for chickens, it is worth referring to ready-made drawings and calculations in order to navigate and not miss important details. Particular attention should be paid to calculating the size of a chicken coop with your own hands for 10 chickens, because if the birds live in cramped conditions, there can be no question of any comfort for them.
For example, 3 hens need 1 m² of space. This means that for 10 chickens and a rooster, a chicken coop with dimensions of 2x2 m will be sufficient for a dwelling. Accordingly, if your farm has 20 birds, the hen house should be 3x3 m. And so on - the size of the hen house is directly proportional to the number of birds.
If you are building a poultry house that is designed to house the birds all year round, keep in mind that chickens tend to cluster in winter and require less living space. For this time, 1 m² of area is enough for 4 chickens. Thus, for 10 birds in winter, 2.5 m² is needed.
In the drawings of the chicken coop with your own hands, do not forget to take into account the walking enclosure. Its proportions are directly related to the size of the poultry house itself: with a chicken coop width of 2 m, the minimum parameters of the aviary are 2x6 m.

Drawing of a chicken coop intended for keeping 10 chickens
The choice of materials for the construction of a chicken coop
The reliability and durability of the poultry house largely depends on the quality and correctness of the materials and tools chosen for the construction. The basic necessary among them include:
- cement;
- sand;
- a hammer;
- nails;
- Rabitz;
- mineral wool or other material for insulation;
- roofing material;
- boards, beams;
- slate or other material that can be used for the roof;
- door hinges, lock;
- brick;
- electrical cable;
- light bulb.

The poultry house should be convenient for both birds and its owners.
Choosing a place to build a chicken coop for laying hens with your own hands
Having decided on the size of the future poultry house and the materials and tools necessary for construction, you can start choosing a place for construction. Regardless of whether you decide to buy a ready-made chicken coop or build a mini chicken coop with your own hands, it is important to find a suitable location. Indeed, in this place the birds will have to spend all their time: sleeping, rushing and walking, therefore it is important that it does not become a source of discomfort for the chickens.
Observe the following rules:
- the place must be dry - excessive humidity can adversely affect the health of birds;
- choose a surface with a slight slope so that in case of heavy rainfall, the water will quickly go away without spoiling the soil near the hen house;
- make sure that the chosen place is well lit;
- ideally, the aviary where the chickens will walk should be located on the south side so that the sun's rays warm it at any time of the year.

The place for the chicken coop must be chosen with great care, which will ensure the comfort of the chickens and increase their egg production
The main advice on how to make a chicken coop correctly prohibits placing it on the ground. The building requires a good foundation - a foundation.
How to build a chicken coop: choosing a foundation
There are two optimal types of foundation:
- Columnar.
- Tape.
Do-it-yourself mini chicken coop drawings usually provide for a columnar foundation, since it is best suited for lightweight construction. In addition, it has a number of other important benefits:
- the construction of this type of foundation does not require a long wait for the concrete to harden;
- columnar foundation is easy to fill;
- with a columnar foundation, underground ventilation is formed, which protects the chicken coop from mice, and also allows you to save money, extending the life of the wooden floor covering.

The process of building a pillar foundation for a chicken coop
It is not difficult to build such a foundation:
- Drill pits around the perimeter of the future chicken coop to a depth of 1 m.The diameter of each should be approximately 15-20 cm.The distance between the posts should be 1 m.
- Next, you need a round formwork. It can be constructed from any materials available - asbestos-cement pipes are ideal.
- Insert the pipes into the hole.
- Insert threaded reinforcement into the pits before pouring concrete.
- As a result, using a nut, the support bar is attached to the concrete pillars.
Helpful advice! If this process seems too complicated, you can watch numerous thematic videos on how to build a chicken coop or choose an easier option for installing a chicken coop. For example, you can take 4 blocks of concrete or any other suitable material. The space between the supports is laid with stone or brick, providing the structure with stability and integrity. Please note that the height of the posts above the ground must be at least 20 cm, then the space under the house can be used for walking chickens.

The frame structure is optimal for the poultry house, as its construction is fast and easy.
Do-it-yourself chicken coop: video, tips for building floors and walls
According to the drawings, do-it-yourself photo of chicken coops, it is clear that a frame structure is being erected on the basis of a columnar foundation. Its peculiarity lies in the simplicity and high speed of construction, which makes the construction of a chicken coop not much more difficult than buying a chicken coop for 10 chickens ready-made.
Stages of construction of a frame structure:
- Take bars with parameters 70x70 mm.
- To build the frame, nail the vertical posts to the support bar.
- Add horizontal beams to the structure for the base of the roof and floor.
In this case, you should also carefully calculate the parameters. For example, for a poultry house for 20 chickens, the parameters of the low and high walls under the condition of a pitched roof are calculated based on the dimensions. From a photo of do-it-yourself chicken coops for 10 chickens, it can be seen that they can be low, but, in any case, the distance between the floor and the ground should be at least 35-45 cm.
Take care of the presence of a window, as well as two doors: for the owner and directly for the birds. Please note that nests do not have to be in the house itself, as in most photos of chicken coops inside. A convenient option is to attach the nests to the house: in this case, special doors can be made in the nests, as well as a lifting lid for easy cleaning of the nest and taking eggs. If you decide to equip the nests according to this model, you should also provide for their extension at this stage.
Do-it-yourself winter chicken coops for 10 chickens: poultry insulation
In addition, during the wall construction phase, consideration should be given to providing a comfortable temperature for the birds. First of all, it matters whether you are going to keep chickens in the poultry house all year round or it is a seasonal building.
If the chicken coop is supposed to be operated in the cold season, after you have sheathed the walls with boards outside, you need to take care of the thermal insulation of the structure. This is an important point, since when the microclimate is disturbed, the chickens begin to experience discomfort, get sick and, as a result, become inactive and rush less.
If you are going to build a chicken coop with your own hands, photos, schemes will become irreplaceable assistants in this matter. It can be seen from well-drawn drawings that the winter house provides for thermal insulation. One of the following options is suitable as a material for these purposes:
- Styrofoam;
- mineral wool;
- ecowool.
After the installation of the insulation is carried out, it is necessary to sew up the entire structure with boards from the inside.

Insulated poultry house for year-round keeping of chickens
Helpful advice! It is not necessary to use boards for wall cladding. Plastic can easily be used as a suitable material, Fiberboard, Chipboard, etc.
But, of course, the insulation is not enough to provide the bird with comfortable conditions in winter frosts. Therefore, if you intend to keep chickens in a poultry house all year round, it makes sense to buy a winter chicken coop for 10 chickens in a ready-made version or to study in more detail the information on how to build with your own hands special poultry house for winter.
How to build a chicken coop for layers: floor and roof construction
To make the chickens feel comfortable in any weather, a double floor will be useful - it will provide additional insulation of the room. The scheme of such a floor is simple: hem the boards from the bottom of the lathing, and then lay the insulation and lay the floor.
However, you can do without special floor insulation. Sawdust or straw can act as insulation. A thick layer of these materials is an excellent heat insulator, which does not require large costs and efforts on your part.

Be sure to organize an aviary for walking birds, surrounded by a netting
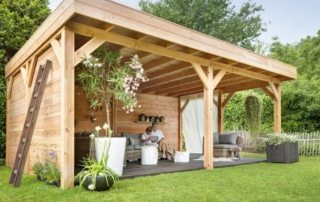
The best material for a warm chicken coop is a bar or log. They are especially well suited for the construction of poultry gazebos.
The simplest roof option is a pitched roof. For its construction, it is necessary to fill boards or beams, maintaining a distance between them of 50 cm. To ensure waterproofing, it is enough to put roofing material on this base.
If you want to provide the poultry house with additional insulation, the roof can be hemmed from the inside with chipboard or boards. Many options are suitable as a material for the outer covering of the roof: slate, corrugated board, reed, etc.
Related article:
Do-it-yourself cellar in the country: a step-by-step guide to arranging. Description of the construction process in steps. Types and features of structures, the advantages of different materials. Cellar waterproofing. Manufacturing of floor, shelves and hatch.
Arranging a chicken coop inside with your own hands: photos and recommendations
In the photo of beautiful chicken coops, they look neat and comfortable both inside and outside. The internal structure of the house is especially important, because this is where the chickens will spend most of their time. Also, the space should be convenient for the owner so that he can easily take care of the birds. It is within your power to make it that way. For a better understanding of the process, see the information below on how to equip a chicken coop inside with your own hands.
How to equip chicken coops inside for layers: the main aspects
Features of the internal structure of the chicken coop:
| Chicken coop part | Useful Tips | Calculations |
| Ventilation |
|
|
| Window |
|
|
| Perch |
|
|
| Nests |
|
|
Helpful advice! The calculation of the length of the perch should be based on the number of birds you have. One hen needs a roost space of 17-20 cm. This way you can easily calculate the sufficient length of the pole. If possible, it is better to take a stick that is longer than the minimum necessary.
In addition, even during the construction phase, you should think about the place where you will feed the birds. Make sure it is as chick-friendly as possible and easy to maintain for you. The length of the feeder depends on the number of birds on the farm. For example, one chicken should have 10-15 cm of trough space. If possible, it is worth making feeders with a margin.
Do not forget to make a couple of additional feeders in the form of boxes and place them above the floor at a height of 15 cm. Make sure that gravel, chalk and shells are always present in these boxes - these are the materials chickens need to form eggs.

DIY chicken coop for 10 chickens
In the above photos of chicken coops in the country with your own hands, you can see how best to equip the feeders inside the house.
Another useful feature in a chicken coop is house dust baths for birds. Setting them up is quite simple: you need any containers that can be filled with sand, wood ash, or garden soil. Bathing in them is extremely beneficial for chickens: it improves the condition of their plumage, and also contributes to the destruction of pests.
The final stage of the device for laying hens
After the completion of the construction of the structure, finishing work is required. They are about the little things, but they are extremely important for the comfortable use of the owner's house and the well-being of the birds. Thanks to them, a do-it-yourself chicken coop for laying hens (photos demonstrate this) will become functional and will not spoil the look of the local area.
Recommendations for finishing works:
- after completing the construction of the house, cover the enclosure for walking with a net. Do not cover the roof: if it rains, the chickens will easily hide in the poultry house or under it;
- A convenient solution would be to combine the front door with a birdhole. For it, you need to make a hole at the bottom of the door, if you wish, you can cut it out separately. The main thing is that the dimensions of the hole are at least 35x35 cm;

Convenient bird gate leading to the walking enclosure
- to form an approach to the manhole, nail a board with horizontal sticks to it;
- the approach must also be mounted to the perch, which will help young birds climb the perch;
- in order for the egg production of chickens to increase, it is necessary to extend their daylight hours. To do this, in spring and autumn, when the day is much shorter than in summer, turn on a small 90 W light bulb in the morning and evening. To do this, you need to put lighting in the chicken coop. It is easy to do this with a cable, and in order not to drill an additional hole, it is easy to pass the wire through the pipe for ventilation;
- to prevent wood from rotting, apply a special impregnation to the surface, paint the building from the street, and inside treat the room with slaked lime to avoid the spread of parasites.
The main features of the ideal do-it-yourself chicken coop for laying hens: photo and description
In summary, it is important to emphasize that various nuances may arise during construction. The situation is influenced by many factors: this is the availability of space on the site, and the need for the subsequent expansion of the poultry house, and even the climatic conditions of the area.However, a number of patterns can be distinguished, following which you can build a poultry house no worse than in the video of do-it-yourself chicken coops for laying hens, given at the end of the article. And you will also be sure of the comfort of your pets.

Nice and functional chicken coop for 10 laying hens
A number of nuances if you decide to build a chicken coop (both in the country and at the place of permanent residence):
- the more spacious the bird dwelling, the better. Therefore, if space on the site and building materials allow, do not make a drawing according to the minimum calculations, but build with a margin;
- make sure there is easy access to all feeders and drinkers in the room;
- all chicken perches should be placed at different heights;
- carefully choose a place for laying hens' nests: they should be located in a dark, quiet and warm corner where the chickens will feel safe;
- there should be enough light in the room, so take care of the presence of windows, as well as the presence of artificial light sources.
Helpful advice! A sedentary lifestyle negatively affects the health of layers. In addition, low activity leads to a decrease in immunity, loss of appetite and, as a result, low egg production. The solution to all these problems is quite simple: it is enough to add bird feed not only to the feeder, but also to the lined straw or sawdust. The search for food makes the chickens tone up, whips up their appetite and makes them move.

After the completion of the main construction, finishing work is necessary, thanks to which the chicken coop can become a decoration of your yard
Is it worth buying an inexpensive chicken coop for 10 chickens
Today it is less and less accepted to build something with your own hands. It is much easier to buy a ready-made mini-chicken coop and not figure out how to build one yourself. In some cases, this decision is justified. If you do not have experience in building household structures, you are unsure of your abilities or do not have enough time, it is better to buy a good chicken coop and provide the chickens with comfortable living conditions.
In addition, it is appropriate to buy a chicken coop if your plans include commercial breeding of chickens and you need a large-scale hen house for a hundred chickens. Or, on the contrary, if you need a very small chicken coop and do not plan to breed birds.
However, building a house on your own will be cheaper, and you can also arrange it entirely in accordance with your own desires and ideas about the ideal chicken coop. After watching the video on how to properly build chicken coops with your own hands, you can easily expand and complete the house in the future if necessary.
Today, many drawings, videos of building a chicken coop with your own hands are available on the network, which will help you understand and master this skill on your own.