Laminate is a modern floor covering that is very popular due to its high performance and ease of installation. The process of laying laminate flooring includes preparing the base, laying an insulating layer and directly laying the covering. To understand how to properly lay laminate flooring, it is necessary to study and take into account a number of important points. Let's try to understand the nuances of the process.

Laminate flooring is a popular and modern flooring
Content
- 1 How to lay laminate flooring: video, necessary conditions for laying
- 2 How to lay a laminate with your own hands: materials and tools for work
- 3 How to properly lay the laminate with your own hands: video, leveling the floor under the laminate
- 4 How to lay a laminate with your own hands: video, substrate options and why you need it
- 5 Laminate coating: how to put it yourself, video instructions
- 5.1 Direct laying of laminate flooring
- 5.2 The subtleties of styling diagonally
- 5.3 Installation of coverage near heating pipes
- 5.4 Laying laminate flooring near wall protrusions
- 5.5 Installation of laminate flooring in large rooms
- 5.6 How to properly lay the laminate with your own hands: installing skirting boards
- 6 How to lay a laminate with your own hands: video of the process
How to lay laminate flooring: video, necessary conditions for laying
Laminate is a rather capricious flooring option when it comes to installation. The room temperature should be constant or at least without significant changes (the optimal range is 15-30 ° C), and the humidity should not exceed 70%. Compliance with these conditions is necessary so that the coating does not deform. It is also not recommended to turn on heating devices or allow drafts during installation.

In order for the flooring to last as long as possible, certain rules must be followed during installation
The maximum allowable height difference for the base on which the laminate is laid is 2 mm per meter. If the floor is more uneven, it should be leveled. This process is different for each individual floor option. Laying the flooring on uneven floors will inevitably lead to premature failure, so try to avoid this.
In addition, it is impossible to mount the covering on the electrical floor heating system. This will dry out and deform the panels. If you really need a heating system under the floor, use the hydraulic option. The hydraulic system of the underfloor heating evenly distributes heat and does not overheat the floor. Remember that the distance between the lower border of the laminate and the elements of the heating system must be at least 3 cm.
The video on how to lay laminate flooring in the right way clearly demonstrates all the preparatory work preceding the laying process, so it can be used as insurance against common mistakes.
How to lay a laminate with your own hands: materials and tools for work
The self-installation process is extremely simple: an insulating layer is mounted on a pre-leveled base, on top of which laminate panels are laid. If laying on a concrete base, an additional waterproofing layer may be required. For installation you need the following materials:
- primer for eliminating unevenness in the floor;
- laminate;
- foamed polyethylene or another version of the substrate;
- construction glue, if you are going to carry out the installation with the glue method;
- wedges for creating deformation gaps;
- skirting boards and mounts for them.
Useful advice! If you are planning to lay the laminate with your own hands, how to lay it with minimal financial costs is one of the very first questions that arise. One way to save money is to use pieces of drywall or wooden pegs as spacers to create expansion gaps.

The process of laying laminate is quite simple, so the installation of this floor covering can be done even by a person who does not have special skills in construction.
In addition to the materials listed above, you will need the following set of tools:
- building corner and tape measure;
- pencil or marker;
- construction knife, hacksaw or jigsaw;
- hammer and wooden block.
After everything you need is purchased, the laminate should be placed in the room where the installation will be carried out for several days. This is done so that the temperature and humidity of the materials are in line with those in the room, otherwise the panels may deform.
How to properly lay the laminate with your own hands: video, leveling the floor under the laminate
Surely many are wondering whether it is possible to lay laminate flooring on an uneven floor. This can be done if the height differences do not exceed 2 mm per meter. If the difference is greater, the coating panels may not fit well or deform during operation. In addition, furniture installed on an uneven floor may not close the doors, it may wobble, which will entail certain inconveniences.
How do I lay laminate flooring on uneven floors? The first priority will be to align it. There is a specific method for each of the base foundation options:
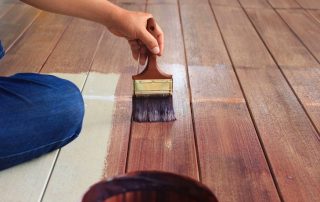
- It is recommended to prime the newly installed cement screed with special building mixtures. Ceresit-15 or Ceresit-17 can be used as such mixtures. Such a primer not only evens out the base, but also prevents it from dusting and insures against the unpleasant squeak of the floor under the laminate;

The process of leveling the floor before laying the laminate
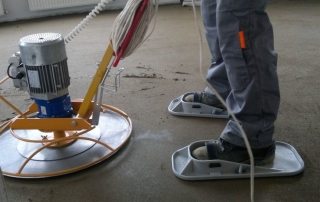
- if you are interested to know how to level the floors under the laminate without a screed, then this is possible provided that a cement-sand mixture is used. With its help, the concrete floor is leveled, recesses and cracks are poured. For better alignment, all holes in the base coat must be widened. If the irregularities are very large, you can use a special self-leveling mixture, which must be sanded after hardening;
- How to install laminate on uneven wooden plank floors? To do this, the old coating must be disassembled, removing and replacing all the failed elements. You can also use plywood leveling, but note that this method will significantly raise the floor level. Therefore, it is not recommended to use it with a low ceiling height;
- if the main floor is plywood or boards, minor irregularities can simply be cut off with a sander.It is imperative to deepen the fastener caps before this.
After the base for laying the laminate is sufficiently flat, you can proceed with the installation of the underlay. Use the visual materials available on the network to visualize the process of preparing an uneven floor and understand how to lay the laminate correctly: videos, step-by-step photo instructions will help you with this. You can see an example of leveling the floor before installing the laminate in this video:
How to lay a laminate with your own hands: video, substrate options and why you need it
The underlayment is a must if you are using floating laminate technology. You can learn how to lay the substrate with your own hands from numerous videos on the Internet.
Useful advice! There are special models of laminate with a backing already glued to the panels. Installation of such a coating is much easier and faster than other types, but it also costs more.
A laminate underlay is needed to ensure the following qualities:
- moisture insulation. The basis of any laminate is compressed paper. This means that the coating is highly sensitive to moisture, which can cause panels to swell and deform. It is especially important to install a layer of moisture insulation if you are laying laminate on a concrete floor;
- soundproofing. If the underlay is not mounted, the concrete or wood flooring under the laminate can squeak and make other sounds;

The floor in the room is covered with a foil backing and is completely ready for laminate installation
- thermal insulation. The backing layer prevents the cold from the concrete or cement coating from affecting the temperature of the laminate. If you use a floor heating system and think about what to put under the laminate so that the heating efficiency does not decrease, for this there are special options for substrates that conduct heat well;
- alignment of small irregularities. Remember that the underlay can only hide very small irregularities; there are methods described above to eliminate more significant differences in height.
There are several common substrate options, each with its own advantages and disadvantages.
Cork panels are one option. They are environmentally friendly and safe for health, made from oak bark pressed using a special technology. The cork masks minor irregularities very well, boasts a high level of heat and sound insulation, as well as a long service life. The disadvantages of a cork backing can be attributed to the fact that it does not tolerate moisture well and is quite expensive.
The subtleties of installing a cork substrate can be found in the video below. The correct laying of the laminate with your own hands, as you probably already understood, largely depends on the quality of this stage of work.
As can be seen from the properties of the material, it is poorly suited for arranging the floor in a bathroom, kitchen or any other room with a high level of humidity. In addition, the cork does not work well with the underfloor heating system. But for laying in the living room, children's or playroom, it is an excellent option.
A much cheaper option for the substrate is polyethylene foam. If you are unfamiliar with how to properly lay the backing under your laminate flooring, you will love the PE foam as it is very easy to use. In addition, it perfectly resists the effects of aggressive chemicals, and pathogenic bacteria and fungi do not multiply on its surface. Another advantage of the material is its increased moisture resistance, therefore it is recommended to make a substrate from it in rooms with a high level of humidity. Also, polyethylene foam is lightweight.
Fragility is the main drawback of the material.It quickly loses its shape and performance properties, so be prepared for the fact that the substrate from it will have to be changed quite often.

The underlay, laid under the laminate, provides a high level of heat, sound and waterproofing
The best option that combines durability, relatively low price and good performance is expanded polystyrene. It is quite simple to install, responds well to the underfloor heating system and masks small irregularities in the base. Another drawback of the material is that panels from it can lose shape over time.
There are also a variety of combination options. For example, if the question arises as to whether it is possible to lay laminate on penoplex, the answer will be yes. The only point is the rather high cost of the material.
In recent years, compressed pine needles have also been popular. This material is absolutely environmentally friendly, breathable well, but is thicker than other substrate options, and is very expensive.
Useful advice! If you nevertheless decide to use coniferous boards as a substrate, they should be laid diagonally.

The main qualities of a substrate for a laminate of pressed pine needles are safety and environmental friendliness.
DIY laminate installation video: how to properly lay the substrate
Before proceeding with the installation of the substrate, you need to carefully study the issue in order to do everything as accurately as possible. To do this, you need to follow these steps:
- How to lay the laminate underlayment in the right way if you have fresh concrete screed on your floor? For this, a thin layer of polyethylene is placed on the floor before installation;
- any type of base floor must be thoroughly cleaned of debris. For this, a vacuum cleaner is used, not a wet rag, since the base must be dry;
- you can cut the selected material with a construction knife or ordinary scissors. When calculating the size of the substrate, it is imperative to take into account the overlap on the walls, which will then close skirting board;

Laying technology for laminate flooring
- it is not possible to install several layers of underlayment in order to compensate for uneven floors. If the selected material is clearly not enough to make the base floor even, then you did not level it well;
- any substrate is mounted corrugated downwards, and in the presence of a foil layer - with the reflective side up;
- the backing sheets must be laid end-to-end, without overlap. If you don't want the material to move, you can glue it to the floor with double-sided tape.
So, how to lay a laminate with your own hands so that the result obtained is no worse than that of professional builders? Expert advice, studying and following the instructions of the material manufacturers, as well as numerous videos of installing the laminate with your own hands will help you with this. For example, you can familiarize yourself with how to properly lay the substrate using this video:
Laminate coating: how to put it yourself, video instructions
Many videos of installing a laminate with your own hands begin with a description of the various installation methods. You can lay the laminate along or across (how to lay it correctly is described in numerous sources). The choice of the method suitable for your case depends on what goals you are pursuing. For example, laying along can visually enlarge the room.
Related article:
Laminate in the interior of the apartment: photos of striking examples of room decoration. Photos of coatings of different colors and textures. What is laminate flooring? How to choose the right floor covering based on your style.
Direct laying of laminate flooring
It does not matter how the laminate is laid - along or across, the correct way is when the installation begins with laying the first panel in the corner of the room near the window.Wedges must be installed between this panel and the wall to form a deformation gap. Next, the next one is attached to the first panel, and so on until the entire row is formed. The second row must be started from the piece that ended the first.
Useful advice! If you are laying the laminate with your own hands and in the process a piece of less than 30 cm remains from the last panel of the first row, half of the new panel must be used to start the second row.
The second row of the coating is initially mounted without connecting it to the first. Only after all the panels of the second row are connected together, it can be attached along the entire length to the previous row. At the same time, for a more reliable connection at the junction, you can attach a wooden block and lightly knock on it with a hammer. The entire floor is mounted in the same way. A video with explanations of experienced specialists will help to correctly lay the laminate with your own hands.
The subtleties of styling diagonally
Diagonal installation is one of the most popular ways to install laminate flooring. How to lay a covering with your own hands in this way? When calculating the amount of material, it is necessary to add 7-8% to the total area of the room.
The diagonal laying of the laminate begins in the same way as the longitudinal or transverse - from the corner near the window. Before starting the installation, a fishing line is pulled from the corner at an angle of 45 ° to the wall: the rows of the coating will subsequently be aligned along it. How to properly lay the laminate diagonally will be prompted by numerous video instructions that can be easily found on specialized Internet resources.
The edges of the first panel with the diagonal method are cut at an angle of 45 °, and wedges are mounted between it and the wall for a gap. After that, you need to measure two strips of laminate so that the joint between them is in the middle of the first row, and the edges cut at an angle are near the wall. The entire floor is filled in this way.
In many videos “Stelim laminate flooring with our own hands” it can be seen that first the whole pieces are mounted, and then the panels are cut and the space near the walls is filled. With this method, you will avoid the risk of irregularities in the joints of adjacent rows.
In living quarters, there are many difficult places for installing coatings, for example, heating pipes, doorways, etc. Good videos on how to lay the laminate yourself can be excellent helpers in such moments.
Installation of coverage near heating pipes
Bypassing heating pipes and other communications is one of the most difficult moments when deciding how to lay laminate flooring on the floor. Correct laying in this case should begin with marking the panel for the future hole. To create a hole in the laminate, it is recommended to use special drills called ballerinas. In this case, the hole diameter must always be slightly larger than the pipe diameter. This is done so that the coating can freely "walk" under the influence of temperature and humidity changes, as is the case with deformation gaps.

Laying laminate flooring near heating pipes is one of the most difficult moments
After the holes for the pipe are drilled, the panel is cut into two pieces. One of them is mounted between the rest of the floor and the pipe, and the second between the wall and communications. The pieces are held together with construction glue. With such a laminate laying, videos of how to lay it in difficult places show that the cutouts can be made more attractive with decorative pipe contours.
Laying laminate flooring near wall protrusions
If the walls in the room where the installation is carried out have irregularities, a corresponding cutout is made directly along the panel. When installing a laminate with your own hands, a video on how to properly lay the material will tell you that in the case of uneven walls, you also need to make a deformation gap.In addition, there is a feature with the connection of locks: from the bottom of the end face, you need to cut off the protruding edge. Because of this, the reliability of the connection may suffer, so the joints must be lubricated with construction glue.

DIY laminate installation near the wall ledge
Installation of laminate flooring in large rooms
If the dimensions of the room exceed 8 by 8 meters, in order to prevent deformation of the floor covering, it is recommended to make expansion joints. Various videos on how to lay laminate flooring with your own hands demonstrate that for this you need to use special profiles that are mounted between two unconnected sections of the laminate. The upper part of such a profile is a cover similar to those used in doorways. This is due to the deformation of the floor due to temperature fluctuations.
Also, such a profile is mounted on the border of various segments of the warm floor within the same room.
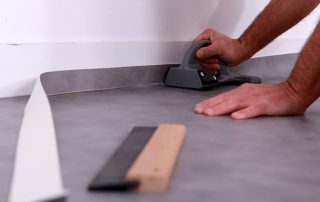
How to properly lay the laminate with your own hands: installing skirting boards
For high-quality installation of the laminate on the floor with your own hands, you just need to know how to lay the plinth correctly. One of the main features of the process is that you cannot fix plinth to the laminate itself or to the floor - fastening should only be carried out to the wall. For each model skirting boards there is a separate mounting option, and instructions for its installation are attached to the product.

When installing skirting boards, it is important that the fixing must be to the wall.
If your walls do not have a flat surface, it is better to use a plastic version of the skirting board, as it will exactly follow the contours of the wall. The wooden variety is best used only with perfectly flat walls.
Most models have special grooves in which the wires are mounted.
Useful advice! The wires must not fall into the gap between the laminate and the wall, otherwise the coating may deform during expansion.
When installing a laminate on the floor with your own hands, how to lay the covering so that it is not damaged by the furniture legs is a very important question. To do this, they must be equipped with soft felt pads.
Laminate can also be installed on a wall at a low height from the floor. The videos of installing laminate on the wall show that this process is practically no different from laying laminate on the floor.
The main rule of caring for laminate flooring is to avoid excessive exposure to moisture and excessive mechanical stress.