Experts say there can be no trifles in the repair. Every element, every detail of the interior must be executed competently, organically fitting into the overall picture. Moreover, when it comes to installing doors. Installation of an interior door is a painstaking but completely feasible process. To help craftsmen who decide to independently install door structures, a master class - do-it-yourself installation of interior doors. It is better to watch the video with practical advice before starting the installation work.

Follow the instructions to install interior door on your own is not at all difficult
Content
- 1 Do-it-yourself door installation - step by step instructions
- 1.1 List of tools
- 1.2 Door frame - do it yourself
- 1.3 How to properly assemble a door frame (video)
- 1.4 Fixing and inserting accessories with your own hands: awnings, handles, locks
- 1.5 Installing door handles on interior doors (video)
- 1.6 Do-it-yourself interior door box installation
- 1.7 Do-it-yourself installation of interior doors. Watch the video - installation of addons
- 1.8 Do-it-yourself installation of interior door accessories (video)
- 1.9 Do-it-yourself framing of door frames with platband
- 1.10 Do-it-yourself installation of interior doors (video)
Do-it-yourself door installation - step by step instructions
To achieve an impeccable result in installation, step-by-step instructions for installing interior doors with your own hands will help. Armed with patience and the right tools, you can start the process yourself.
Related article:
|

List of tools
The required minimum of tools that will be needed to install doors with your own hands:
- tape measure, pencil, construction knife;
- level, square;
- chisel, hammer;
- drills in a set, pen drills;
- angle cutter or miter box and saw;
- puncher;
- screwdriver or a drill.

How to properly install an interior door with your own hands using power tools, photos and videos will tell you.
Door frame - do it yourself
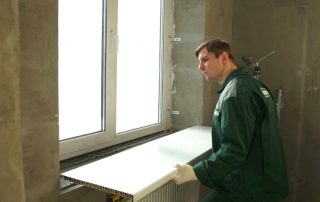
Before starting the assembly, a place is freed up where work will be done. It is more convenient if it is a flat floor surface. To avoid damage to the floor covering, it is recommended to cover the floor with cardboard.

The bathroom is fitted with frosted opaque glass doors
Using a miter box, make a 45 ° cut at the top on both uprights and on one side of the horizontal crossbar of the box. With self-tapping screws, we connect one of the vertical racks to the horizontal component of the box. Self-tapping screws are screwed into holes previously prepared with a drill so that the door cover does not burst. We calculate the internal size of the horizontal crossbar of the door frame.It is defined as the sum of the following values: double the thickness of the upright + door width + two gaps (left and right). The gaps are arranged to the left and right of the frame for free movement of the door leaf and their size corresponds to 3 mm. Cut off the lintel at an angle of 45 ° and connect it with self-tapping screws to the second upright. We get a U-shaped structure.

Bedroom door and wall tiled with the same wood veneer
The length of the uprights along the inner contour is defined as the sum of the upper gap (3 mm), the height of the door leaf and the lower gap (10 mm). We make marks in size and saw off the extra centimeters of the racks.
For example, you can find and familiarize yourself with a photo of installing a door frame with your own hands.
How to properly assemble a door frame (video)
Fixing and inserting accessories with your own hands: awnings, handles, locks
To fasten the hinges to the door, mark 200 mm each at the top and bottom of the door leaf end. We fix with a pencil the places where the canopies begin. We apply loops between the marks so that the edge of the loop strip is aligned with the edge of the end of the canvas.
Having hooked the loops in two places, we draw along the perimeter of the canopy with a knife. This denotes the boundaries of the loop surface. It is advisable to hold the knife several times and go a little deeper. When the contour of the loop is clearly marked, using a chisel we remove the top layer of the cover under the canopy.

Castle insert and do-it-yourself door fittings installation
We do this carefully so as not to damage the coating outside the perimeter of the canopy. The hinge must fit into the recess flush with the door surface. After that, having previously outlined the holes, we fasten the awnings with “native” screws.
We attach the hinges to the box in the same way. In this case, we take into account that the distance from the top of the box to the beginning of the loop will be 3 mm more, and from the bottom by 10 mm (these are the gaps).
We recommend watching photos and videos of installing interior doors with your own hands.

Arched double swing doors in the living room
Choosing a place to insert the handle and lock. As a rule, door handles are installed at a distance of about one meter from the bottom of the door leaf. You can insert the lock slightly higher or lower for your convenience. Having retreated from the edge the desired distance, we attach the lock with the body to the canvas. We mark where the door handles will be. Using feathers and a drill, cut a hole slightly smaller in diameter than the handles.
On the end surface of the door, we circle the perimeter of the recess for the lock. Using feathers (feather drills), we make a recess for the lock mechanism. It should fit completely into this recess. As in the case of the hinges, remove the layer around the perimeter of the plate covering the lock with a chisel.

Massive wooden doors in the room
Useful advice! Hardware is an important accent in the door composition. Check out the photos in the catalogs, and choose models of locks-handles that are suitable in style and solid in performance. Remember, a cheap item cannot be of high quality.
When all the holes are prepared, install the handle and the lock, fixing their position with screws.
In the same way, but already on the box, we cut out a recess for the striker and make a recess for the lock tongue. Having baited the bar, we check how the latch works when the door is closed. If the calculation is correct, we finally fasten the striker.
It is worth looking at educational photos and videos on how to attach hardware to doors.
Installing door handles on interior doors (video)
Do-it-yourself interior door box installation
When installing in the opening of the door frame, we first make three holes in it in the places under the hinges and the striker. We put the box in the opening, fix the position of the uprights using spacers and wedges.
Using a level, we set the box vertically and fix it with self-tapping screws through the previously prepared holes. We check the correspondence of the slots (gaps) to the established size and make sure that they are equal along the entire perimeter.We check the movement of the door - it should remain in the position in which you left it.

Practical sliding doors in the living room
We fill the voids with foam when the door is closed. Before filling the void, we fix the position of the door relative to the box using cardboard. This is necessary so that the box does not move under the influence of the foam.
Useful advice! When filling the gaps between the door frame and the end face of the opening, use low re-expansion foam. In this case, you will prevent uncontrolled deformation of the box under the action of the sealant.
Paper tape will help to keep the front surfaces of the box free from foam contamination.
The complete picture of the process is illustrated by the installation photo. interior door do it yourself.
After filling the gaps with foam, we stand for a day. Then, carefully, flush with the wall, cut off the excess volume of foam with a knife.

White door with three-dimensional geometric pattern
Do-it-yourself installation of interior doors. Watch the video - installation of addons
Do-it-yourself installation of interior door accessories (a video lesson is offered below) is carried out in the case when the door frame does not cover the width of the wall end. Previously, such a drawback was made out by means of a slope device. But it didn't look very neat. Today it is masked with the help of addons.
Having installed the box in the opening with our own hands, we measure the width of the section of the wall uncovered by the door jamb. This will be the width of the addition. If the door accessories you have purchased are more than this size in width, you must dissolve it lengthwise.

Dark wood swing door in the bathroom
We measure the length of the vertical strips of the extension. This value will be equal to the distance from the floor to the horizontal jamb. Giving the desired size to the transverse extension, you need to look to ensure that it fits clearly on the vertical additional strips.
We insert the extensions into the special grooves of the opening and fix them on the outside of the box with self-tapping screws. Holes for self-tapping screws must be drilled in advance.
Useful advice! When purchasing door blocks and additional strips for them, make sure that they are uniform in texture and color. Be careful when choosing a door via the Internet or from a photo catalog - the shade may differ from the real one!
The video will tell you how to install the interior door yourself using addons.
Do-it-yourself installation of interior door accessories (video)
Do-it-yourself framing of door frames with platband
To hide the mounting gaps between the block and the wall, as well as to make the door structure decorative, use platbands.
If the surface platband is flat, it is not necessary to saw it at an angle of 45 °. Look spectacular platbandsconnected at right angles. If the shape of the platband is rounded, then sawing at 45 ° cannot be avoided.

Do-it-yourself door platband installation
It is recommended to first adjust and cut the upper horizontal casing. Then, applying left and right racks to it alternately, cut them using a miter box.
It remains to fix the platband strips with special (finishing) studs, the caps of which are invisible on the platband surface.
The complete picture of the process is illustrated by the video of the installation of door trims.

Sliding wooden doors in the living room
As soon as the door installation work is completed, it is necessary to check the correct installation:
- door movement should be easy;
- the latch should be triggered at the required pressure;
- the mechanisms of handles-locks when closing should not have gaps (backlashes);
- mounting clearances must be the same along the entire length of each side.

Bathroom door made of embossed frosted glass
We offer you to watch the video "How to install interior doors with your own hands."
Having carefully studied the recommendations for installing doors and having read the photos and videos, you can easily cope with the installation of the door yourself.Correctly selected and installed doors will become a reason to be proud of your work.