Replacement of interior doors sooner or later is done in every apartment. The main reason for this is wear and tear of old structures. The procedure itself is simple, so many owners decide to mount the doors with their own hands. Installation of an interior door consists of several stages, the study of which will avoid installation errors.

To do the installation of an interior door on your own is not a complicated job
Content
- 1 Varieties of interior doors
- 2 Installation of an interior door: dimensions and accessories
- 3 Installation of an interior door: options for assembly
- 4 DIY interior door installation: step by step instructions
- 5 Do-it-yourself installation of an interior door: preparatory stage
- 6 How to install an interior door with your own hands: assembling a box
- 7 How to install a door between rooms: insert hinges
- 8 How to put an interior door: installation of a door frame
- 9 Installation of platbands for an interior door: the final stage
- 10 How to install an interior door with your own hands: video and recommendations
Varieties of interior doors
The range of structures installed inside apartments and private houses is quite wide. The modern market offers many models that differ in their dimensions, functionality and design. All interior doors are primarily classified depending on the material of manufacture:
- from fiberboard;

Interior canvases differ in size, functionality and design
- from MDF;
- made of natural wood.
Fiberboard. The frame of such a door is made of wood. The wood base is faced with fiberboard (laminated) sheets. Such designs have many advantages. Their main advantage is their democratic cost. These models are lightweight, which greatly simplifies their storage, transportation and installation. This is a very important property that greatly simplifies the installation of the door with your own hands.
Fiberboard doors are the most common at the present time. The range of such designs is the widest. However, there are some disadvantages for such products. Their main drawback is their weak strength, which is reflected in the low resistance of the doors to mechanical stress. Also, models made of wood and fiberboard do not have good resistance to moisture.
Note! Doors covered with fiberboard are not recommended for installation in bathrooms and other rooms with high humidity levels.

Installation glass interior doors differs from traditional installation
MDF. Such doors can be attributed to the middle price segment. Experts recommend purchasing these designs, as they have the best value for money. Installation of MDF doors is not difficult, despite the fact that these doors are heavier in comparison with the above models.
Speaking about the advantages of such products, it is worth noting that they are distinguished by good strength and are also resistant to moisture. Separately, it must be said that such structures have good sound insulation properties, which is also very important.
Natural wood. These canvases belong to the highest price segment. Natural wood of different species is used for their production. It is most difficult to install an interior door made of natural wood, since it has a rather large mass. Products of this type are the most durable and expensive. Their cost depends on what kind of wood was used to make the door. Natural models fit perfectly into classic designs.

Interior doors are classified depending on the material of their manufacture.
Separately, it should be said about glass interior doors. The installation of such models differs from the installation of traditional options. First of all, it should be noted that the hinges in this case are fixed in a different way. They are attached to the door using special clips. The peculiarity of such doors is that metal bows are suitable for them. In some cases, the door frame is completely absent.
Interior door installation: types of door frames
The service life of the product depends on the quality of the door frame. Therefore, before buying a ludka, you must familiarize yourself with its main types that can be purchased on the construction market. Today there are three types of door frames:
- from fiberboard;
- from untreated wood;
- made of laminated wood.

There are three types of door frames: fiberboard, untreated wood and laminated wood
Fiberboard. A structure of this type has a presentable appearance, but does not have a sufficient margin of safety. A common problem with fiberboard boxes is the deflection of the middle part of the plank under its own weight. The weight of the door leaf also affects the bows, which leads to a large deflection and distortion of the structure over time. It is not possible to install a door, which is characterized by a large mass, on such a frame. Products have a fairly affordable cost.
Untreated wood. The cost of such a box is quite reasonable. For the price, it can be compared with fiberboard pipes. The material of manufacture in this case is a profiled beam, so the strength of these structures is much higher when compared with the previous options. Dry timber wells are perfect for installing any type of wooden interior doors.
Note! Before purchasing a structure from untreated wood, it is recommended to take into account that it needs finishing with paints and varnishes.

Laminated wood door structures are already finished
Laminated wood. In contrast to untreated bows, such structures have a finish, which is represented by laminated paper. The main point that is recommended to pay attention to when choosing such a box is the quality of lamination. Poor quality increases the likelihood of minor and larger scratches and frayed areas.
It is worth remembering that any type of doorway may need additional processing after the wooden door has been installed. The expediency of this operation is determined for each specific case individually.It all depends on the interior of the room, as well as on the dimensions and type of door structure.
Installation of an interior door: dimensions and accessories
Manufacturers of interior doors produce lines with standard dimensions. It must be said right away that these standards differ depending on the country of production. This is due to the architectural features of different states. The width of domestic constructions ranges from 60 to 90 cm (in 10 cm increments). In some European countries, this figure is 69 cm. This must be taken into account when purchasing doors from foreign manufacturers.

The width of domestic door designs ranges from 60 to 90 cm
Buying a European door without a box is recommended only if its dimensional standards correspond to domestic ones. In any other situation, it is necessary to purchase a door-frame kit. This will allow you to fit the structure to the domestic doorway and perform a competent installation. Interior doors with a size that do not match the opening are still not very popular.
The choice of width is made depending on the purpose of the door. For example, for a bathroom, you need to choose products according to individual indicators. The standards for the width of the canvases installed in the living room vary from 60 to 120 cm.The height of such doors, as a rule, is 2 m. The minimum door width for the kitchen is 70 cm, and the height is similar to the models installed in living rooms. The doors for the bathroom most often have a standard width of 60 cm, and the height of such products ranges from 1.9 to 2 m.
Installation of the door frame of the interior door requires strict adherence to the dimensions. It should be noted that the doorway can be enlarged if necessary. No special permission is required for this operation. However, it is recommended that you study building codes that specify the size limits of doorways for each room.

The choice of the width of the interior door is made depending on its purpose
Helpful information! To determine the width of the door, before purchasing it, it is required to measure the same indicator of the old door with a construction tape. If, along with the door, the door frame will be replaced, then you need to calculate the dimensions of the opening.
In this case, it is recommended to buy the canvas together with the bows. This will avoid the error. This is especially important if the bathroom door is being installed, since moisture can affect the performance of the door, and its use in an opening made of a different material can become difficult.
When calculating the dimensions of a box that will be installed in a specific opening, it is necessary to measure its narrowest point. After that, a margin of several centimeters is subtracted from the resulting figure. An example is an opening with a width of 78 cm, for which the ideal solution would be to purchase a 70 cm door frame.
Door installation interior: configuration options for installation
Today, there are three options for door designs, which differ in configuration. The simplest of these is a regular door leaf, sold separately from the frame. In this case, you need to know exactly what width and height is required to install the door in a particular well.

Notching corners and hanging interior door hinges can be a problem for beginners.
The second common configuration option is a door with a hood. It is important to remember that the door leaf is recommended for people who want to install the door on their own. The only drawback of this option is that the door frame is delivered disassembled.Therefore, you will need to independently perform both the assembly and installation of the interior door. Notching corners and hanging hinges can be a problem for beginners.
The last type of equipment is called a door block. It is an improved version of a door with a frame. In this case, the structure has already been assembled by the manufacturer and is ready for installation. The only thing you need to do with your own hands is to cut the side elements, level them and fix them.
The complete set has a great influence on the cost of the structure. This is especially noticeable when you compare three different options made from the same material. The choice of the type of equipment is an individual decision of the owners.

The door block is a structure already assembled by the manufacturer, ready for installation
DIY interior door installation: step by step instructions
Before starting the installation work, it is recommended that you read the step-by-step instructions. It contains a sequence of actions and their detailed description. The work plan for the installation of the interior sheet consists of the following stages:
- dismantling the old structure;
- purchasing tools and materials;
- preparation of the opening;
Related article:
Interior doors: photos of original designs in the interior of the room
Varieties of products. Manufacturing material. Installation methods. Color palette. Interior style doors
- door frame assemblies;
- installation of the box;
- hanging the door;
- fittings inserts.
Note! During work, it is required to observe safety precautions. If you need to widen the doorway, it is recommended to wear safety glasses to protect your eyes from dust. Installation work is carried out in protective gloves.

Before proceeding with the installation work, it is recommended to thoroughly study the composite door frame
In some cases (to avoid replacing the structure), do-it-yourself restoration of the interior door is performed. It is made using special tools, the choice of which depends on the condition of the canvas. To improve the appearance of an old door, you can simply varnish it.
Separately, it should be said that the work on the installation of the door structure may include the organization of the threshold. It can be done in two ways - with a brick or a screed. At the end of the installation of the interior sheet, you must carefully check it for cracks. There should be no large voids between the box and the edges of the structure.
Do-it-yourself interior door installation: preparatory stage
First of all, before starting the installation of an interior door, you must prepare the appropriate tools. A construction tape and a simple pencil are used to carry out the marking. Direct installation work is carried out using a plumb line and level.
The final stage of installation requires the use of additional tools. These include a hacksaw and a miter box. With the help of these devices, the strips for the extensions are cut. These elements are not necessary, however, they are often used for finishing the door structure.

Before starting the installation of the interior door, you must prepare the appropriate tools
For self-installation of interior doors, you will also need to prepare electrical tools. First of all, you need a drill with a set of drills. Drills are needed for both concrete and wood. In addition, you should purchase a screwdriver. In order to carry out a selection on a tree, it is recommended to use a milling cutter, which will greatly simplify the work. This can be done manually with a chisel and a hammer.
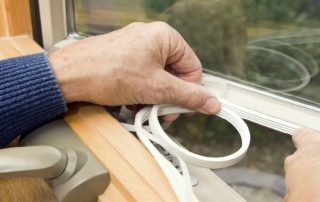
After preparing all the necessary tools that will be used for the installation of the interior structure, you need to purchase materials for work.To seal the voids between the door frame for the interior door and the opening, it is customary to use polyurethane foam. Wooden wedges are used as spacers. They are needed to expose and fix the door in the desired position. Do not forget about self-tapping screws.
Helpful information! In case of need for concealed installation of the door, you will need to additionally purchase suspensions. The bow itself can be fixed by means of anchors, which are subsequently sealed with putty.

Spacers are needed to expose and fix the door in the desired position
How to install an interior door: preparing the opening
The preparation of the doorway is a key step in the installation of the interior sheet. If such work is done independently, it is necessary to study the sequence of actions and pay attention to some of the nuances. First of all, you need to remove the old door from the hinges.
After removing the old structure, dismantle platbandsleft after her. Then you need to remove the voids filled with insulating material, located between the door opening and the gutter. All these manipulations are very important. They allow you to correctly install an interior door with a frame. As a rule, the next step is to prepare the cuts in the side elements of the well. It is important to remember that they are performed from top to bottom.
In addition, the preparation of the doorway includes adjusting the dimensions of the structure for it. The more accurately this action is performed, the more convenient and effective the door will be used. The reliability of the structure also depends on how correctly the box is fitted to the size of the opening. It is worth remembering that it is much easier to enlarge the doorway than to reduce it.

Preparing a doorway includes adjusting the dimensions of the structure for it
Brick and cement mortar are most often used to narrow the opening. In the event that a slight reduction in size is required, you can use a regular frame. With it, you can narrow the opening by a few centimeters (up to 5). Such a frame can be made of wood or metal.
This instruction will help you install the interior door yourself. How to finish finishing? The last step is finishing the doorway. It is produced sequentially. First you need to level the surface of the opening. After that, its surface is smoothed with a cement mortar. At the final stage, it is recommended to treat the doorway with a primer. This will increase its strength characteristics.
How to install an interior door with your own hands: box assembly
A ludka is a frame of a door leaf, which is its support and is fixed to the doorway. This structure is made from different materials, but the most suitable solution is dry wooden profiled beams.
 is its support and is fixed to the doorway")
The frame of the door leaf (ludka) is its support and is fixed to the doorway
Note! The boxes used for installation can be of two types: in the shape of the letter "P" and rectangular. The second option is used for installation in bathrooms that need a threshold.
How to install an interior door with a box yourself? First of all, you need to assemble the box. Most of the companies that manufacture interior doors and openings produce ready-made pieces of timber for assembling the box. Experts recommend focusing on the dimensions of the door leaf when self-assembly. Today there are two methods of connecting the individual elements of the ludka with each other:
- washed down at an angle of 45 °;
- washed down at an angle of 90 °.
In the first case, you must have minimal carpentry skills, since this method is more complicated. The parts themselves are docked by means of ordinary self-tapping screws.It is important to remember that the holes for these products are made perpendicular to the cut. To get an answer to the question of how to properly install the door, you need to read the recommendations on specialized sites.

When installing an opening in the shape of the letter "P", it is necessary that the gap between the edge of the leaf and the surface of the door does not exceed 1 mm
In order to make the cut at a right angle, you can use a regular hacksaw (with fine teeth). To determine the dimensions of the bar in the vertical plane, it is necessary to add 6 mm to its length (3 mm from each end). This rule applies to interior designs that include a threshold.
If a door is installed into a living room, where the presence of a threshold is not necessary, then 10 mm is added from the bottom of the vertical bar. The upper horizontal jumper is fixed to the vertical post by means of two self-tapping screws. A right angle cut is the only possible if the design provides for the presence of a threshold.
Compliance with these rules is considered a very important point, since they allow you to correctly put the interior door. How to assemble the box yourself and maintain the correct gaps, you can find out by watching the corresponding video materials.
During installation, it is necessary to check the gaps between the roof and the door. Existing standards indicate that the free space on each side should be 3 mm. When installing an opening in the shape of the letter "P", it is necessary that the gap between the lower edge of the leaf and the surface of the door does not exceed 1 mm.

During installation, it is necessary to check the gaps between the roof and the door.
How to install an interior door with your own hands: connecting the elements of the box
The docking of individual elements of the box is done, as mentioned above, using ordinary self-tapping screws. It should be noted that the length of these products is selected taking into account the standards and most often is 6 cm, however, there are exceptions. With the help of screws, it is necessary to connect the posts, as well as the upper crossbar.
Note! It is very important not to be mistaken with the number of screws. For example, in order to tighten one joint, it is customary to use at least 3 screws. Of course, their final number depends on the width of the individual elements of the box, which must be connected to each other.
When assembling an interior door with your own hands, assembling the bow is a key step. The performance of the entire structure depends on this. In order to achieve a high joint strength, a small part of the element must be removed. This operation can be done with a hacksaw. The length of the part to be cut should approximately correspond to the thickness of the bar itself, adjacent to the part.
In some cases, the size of the canvas is smaller than the dimensions of the opening. In such a situation, the build process is somewhat different from the classic one. For example, it takes into account the installation of lintels across the entire width of the opening.

When assembling an interior door with your own hands, assembling a bow, using self-tapping screws, is a key step
How to install the door between rooms: inset hinges
The number of loops is calculated for each cut separately. Their number depends on the dimensions of the door, its weight and the material from which it is made. Most often, such structures are mounted on 2 hinges, however, the number of these elements may be greater (for example, 3).
The hinges are installed taking into account a certain indent from the edges of the door leaf, which is 25-30 cm. It is important to remember that a door made of natural wood may have knot cuttings. It is absolutely not recommended to mount hinges at such points. The installation of these elements begins with their fixation to the interior door. How to put the loops correctly? To answer this question, you need to study the order of work.
First of all, it is necessary to select the necessary points at which the hinges will be installed. Next, a part is applied to the desired place, marking is performed. A regular, well-sharpened pencil is suitable for marking. After finishing the marking, the layer of wood should be removed from the inner side of the door (in those places where the hinges will be attached). The thickness of the wood layer to be removed is calculated from the thickness of the loop.

The number of hinges is calculated for each door separately, taking into account its dimensions
The next step is to install this hardware for interior doors. The door hinge, after fixing with screws, must be located on the same plane with the wooden surface. If the product is below the general level or, conversely, higher, then this indicates an installation error.
Helpful information! After the hinges are fastened, it is necessary to lay the assembled canvas in the well and set the correct gaps. On the side to which the hinges were screwed, the gap should be about 5-6 mm. On the opposite side, the gap should be approximately 3 mm. The same distance is maintained between the top of the canvas and the crossbar of the box.
After adjusting the web, the marking of the places in which the mating parts of the loops will be located is performed. Next, you should make a recess and install the element, fixing it with self-tapping screws.
How to put an interior door: mounting the door frame
A crucial step in the installation of this structure is the installation of the door frame in the opening. In some cases, it is not required, but now most often a complete replacement of the door kit is performed. Therefore, it is worth focusing on this stage. It is important to remember that the trough is mounted in an opening without a door leaf, as this greatly simplifies the task.

When installing the box, you must constantly check the accuracy of its location using a level
How to insert an interior door? When installing the box, it is necessary to constantly check the accuracy of its position. It should be placed strictly in a vertical plane. To do this, use a level and a plumb line. During installation, it often happens that an already adjusted opening is skewed. To avoid this, wooden wedges are used, which function as spacers.
The plane of the door must completely coincide with the wall. Otherwise, the structure will not open. However, it is worth considering that the wall may be uneven. All this must be checked in advance. If the wall is not strictly vertical, the door still needs to be positioned in the correct plane.
After adjusting the door frame and determining its correct position, you can start fixing the structure. The bow is fixed by means of special wooden wedges, which have a triangular shape and are an obligatory attribute of self-assembly of an interior door. A video containing visual instructions for placing the wedges will help you better understand the process.
First, the wedges are placed on both sides of the lintel. Next, you need to fix them over the racks. This will fix the bow in relation to the doorway. After installing the wooden wedges, it is necessary to check the evenness of the position of the box, as it can easily move.

An important stage of installation is the installation of the door frame in the opening
Then the wedges are placed at the bottom of the racks and on the sides. The spacing of the wooden spacers is approximately 50-60 cm. It is recommended to check the accuracy of the door frame installation after each wedge. The cross bar must also be fixed with a wooden piece. For this, one wedge is used, which is attached to the center of the bar.
How to install an interior door frame: instruction
Installing a door frame requires learning the stages of work.Currently, there are two options for fixing this structure: through to the wall and by means of mounting plates. The first method is simpler, but from a visual point of view, it is not the best option. This is due to the fact that the heads of the fasteners will be visible from the outside of the bow. The use of the end-to-end method allows achieving high structural reliability.
Note! Before proceeding with the fixation, it is recommended to study the photographs illustrating the installation, which make it possible to quickly understand how to insert an interior door with your own hands. The videos also showcase the installation process.

You can fix the structure of the door frame in the cutouts for the hinges
You can use another method to fix the door frame. It involves fixing the structure in the cutouts for the hinges, as well as under the plates of the counterpart of the locking mechanism (lock). In this case, it is necessary to make additional holes in the grooves that are intended for the hinges. Self-tapping screws are screwed in so that their caps do not interfere with the installation of the hinges.
How to install an interior door yourself? For self-fixing of the interior structure, it is recommended to use the simplest option. Especially when you have no experience of such work. It should be noted that the hats of the through fasteners can be decorated with special decorative plugs.
The second option for fixing the door frame involves the use of plates. It is called hidden because the fasteners are not visible in this case. This method is more complex. In order to perform such an installation, it is necessary to fix special plates on the back of the door. These elements are most often made from drywall. Installation of MDF interior doors and other structures in this case requires more time.

The holes located between the bow and the doorway are filled with polyurethane foam
After fixing the door frame, all voids and gaps are foamed. As a result, the niches located between the bow and the doorway are filled with polyurethane foam. In order to play it safe, special spacers are often installed, which are removed only after the foam has completely solidified.
Installation of platbands for an interior door: final stage
Installation of platbands refers to the finishing of the door. These elements are fixed directly to the door frame. Before starting the installation, you must study this process in stages. The first thing to do is to determine the dimensions of the platbands. After calculating their size, cuts should be made on the longitudinal strips.
At the next stage, through holes are made into which the retaining elements will be installed. Next, you need to bait vertical strips (along the pipe). Then it is necessary to install the transverse casing. It is wound from above for the longitudinal cladding elements.
Note! You can independently decorate the entire door leaf. For this, there are special MDF panels. Installation of this facing material on the door is quite simple, so it will not be difficult to carry it out yourself.

Platbands are fixed directly to the door frame
After installing the transverse casing, it is required to cut the horizontal strip. At the last stage platbands, obtained earlier, are fixed to the door frame. The final finishing includes the installation of accessories for interior doors. It is recommended to calculate the sizes of these elements in advance. They are mounted as desired.
In order to correctly determine the length of the planks, which are installed in the vertical plane, it is necessary to measure the distance from the floor to the junction point of the longitudinal and transverse bars of the bow.The mark obtained in this way will be the starting point of the cut. The saw itself is performed at an angle of 45 °. In order to fix the ready-made cashing to the pipe, you can use two means: glue and small nails.
How to install an interior door with your own hands: video and recommendations
To facilitate door installation, it is recommended to order ready-made kits that do not require door frame assembly. It is important to remember that watching videos on this topic greatly simplifies the understanding of the editing process.

A complete set of interior doors includes all the necessary fittings and cladding materials
Before purchasing this design, you should measure the old door and its door. Guided by these dimensions, it will not be difficult to correctly complete the design order. A preliminary plan and step-by-step instructions allow you to organize the process and answer the question of how to put the interior doors with your own hands. The video can also serve as an installation guide.
A complete set of interior doors includes all the necessary fittings and cladding materials that are installed at the last stage of installation. Such elements are already adjusted to each other, which greatly simplifies the work. It is quite difficult to do this on your own, especially in the absence of proper experience.
Interior doors are classified by material of manufacture, size and purpose. Before purchasing such a design, it is recommended that you familiarize yourself with the range of models. You can install the interior door yourself, but for this you need to study the instructions and clearly follow all the recommendations. When installing the door frame and door leaf, it is very important not to forget to carry out measurements after each action, establishing the evenness of the structure.