A doorbell is an essential attribute of any front door or wicket. He notifies the hosts about the arrival of guests. The correct operation of the device depends on the correct connection. The doorbell circuit is very simple. However, the sequence of actions depends on the type of device. Before connecting a call in an apartment or a private house, you need to familiarize yourself with the features and types of the element, which determines the choice of the installation scheme.

Bell is the main attribute of doors to apartments or private houses
Content
- 1 Types of calls to the door to the apartment or to the gate of the house
- 2 Characteristics of modern electric apartment bells: wired and wireless
- 3 Key benefits of wireless calling patterns
- 4 Features of installing a wireless call on the door to an apartment or house
- 5 The subtleties of connecting a wired type call
- 6 The choice of model and features of the installation of the bell in the apartment
- 7 How to choose and connect a doorbell in a private house
- 8 How to connect a wired doorbell: preparatory stage
- 9 How to repair a doorbell with your own hands
- 10 How to connect a bell in an apartment: diagram, video with instructions
Types of calls to the door to the apartment or to the gate of the house
Doorbells are presented in a wide range. Devices differ in the principle of operation, design, connection option, functionality and cost. Based on the connection option, doorbells for the home can be mechanical, electromechanical and electrical. The first type of device was used in the old days. Such a bell was presented in the form of a bell that was hung inside the house on a string. The other end of the rope was pulled out. Such an element is at the same time a decorative decoration of the hallway.

Modern doorbells can be wired or wireless
The bell made a sound when it hit the free end of the rope or when the front door was opened. This option can be found today on the gates of houses decorated in retro style, which are framed by a low fence.
An improved device is an electromechanical doorbell. It has a simple design, which includes a push button located outside the dwelling, a resonator located inside the room, and an electrical cable connecting the two.
The resonator is represented by a coil that has a wire wound, as can be seen in the doorbell diagram.At the moment the voltage is applied to it, an electromagnetic alternating field arises. This causes the metal hammer to vibrate and strike the metal bowl. This action is accompanied by a characteristic sound.
A core can be located in the resonator coil, which will reciprocate under the influence of an electromagnetic field, striking the plates from both sides, which will be accompanied by a characteristic sound.

By the type of connection, calls can be electrical, mechanical and electromechanical
One or two buttons can be used for such a call. The second option for installing a doorbell is used if it is necessary to send a signal from different places. For example, from the front door and wicket in a private house, at the entrance and door of an apartment in a multi-storey cottage.
Important! The buttons work independently of each other, when you press any of them, the circuit is closed.
Characteristics of modern electric apartment bells: wired and wireless
A modern improved design is an electric doorbell to an apartment or house. The device is assembled on the basis of microcircuits. The call is equipped with a built-in speaker that generates a variety of sound melodies. Such a device has advanced functionality. When closed, the bell is a plastic box, from which pieces of wires for connection or terminal connections come out.
The bell is represented by a magnetic system with a contact group. At the moment the voltage is applied, which occurs as a result of pressing the button, the circuit is closed, which entails the attraction of the armature to the core. At the end of the movable contact there is a hammer, which periodically strikes the metal bowl, initiating the generation of sound waves.

Electric doorbell is the most common option
The electric doorbell can be wired or wireless. The first version of the device is similar to the electromechanical type (they have the same connection diagram). However, there are models of wired electrical calls to the apartment, which will operate on 12 V voltage or from autonomous power sources. In the first case, a step-down transformer must be installed before connecting the device. The second option involves using the power supply included with the device.
Wireless calls for apartments and houses are more convenient to operate. The device button is self-powered. For normal operation of the device, it must be located in the zone of signal transmission to the call. There are wireless models that operate on a 220 V network. They are plugged into a stationary outlet, and the button is powered by batteries. There are options in which the call itself functions autonomously.
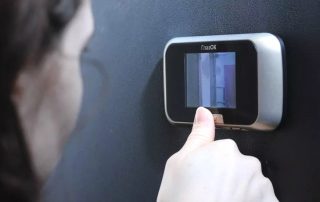
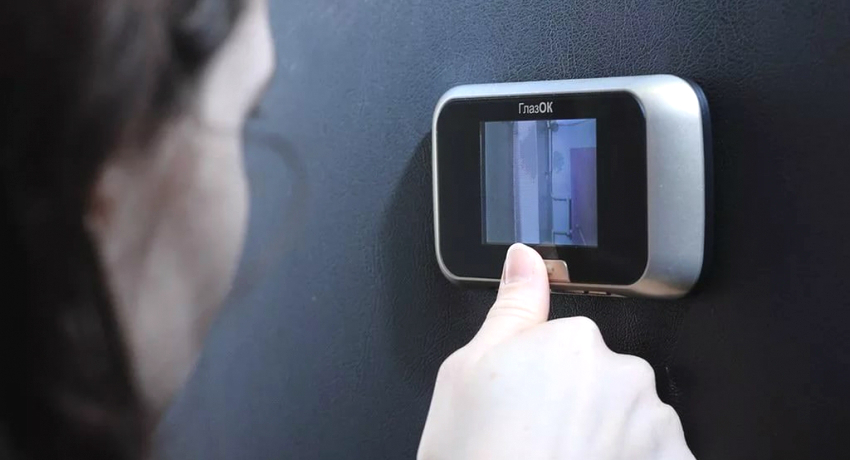
State-of-the-art models of wired and wireless doorbells-intercoms to an apartment or house have advanced functionality. They are equipped with video surveillance and sound recording functions, which start working at the moment you press the device button. Premium models are additionally equipped with remote controls to open doors or gates. This is the most convenient option for private cottages.
Key benefits of wireless calling patterns
The wireless doorbell has specific advantages over the wired model. To install it, it is not required to perform electrical work, which is dangerous to life, requires increased attention and certain skills. If the device malfunctions, you do not need to look for an open circuit. Any breach of insulation can have serious consequences. A wireless ringer is a more secure device.

Wireless calling has not only advantages but also disadvantages
Wireless models are characterized by a simple wiring diagram for the doorbell, which is explained by the absence of wires. This facilitates easy and simple installation, which can be done in a matter of minutes, without the need for additional fixtures or tools. It also makes it easier to dismantle the device in the event of a change in installation location.
Wireless devices have more attractive designs. They are available in a wide range of colors and can be made from different materials. As numerous reviews prove, wireless door calls to an apartment or house have more advanced functionality in comparison with wired options. The most popular models are equipped with functions that allow you to download all kinds of melodies from a flash card or transfer ringtones from a mobile phone.
In addition, it is possible to install a complex system. To do this, you need to purchase additional accessories and speakers that are tuned to the same frequency of receiving and playing a signal.
Weaknesses of Wireless Doorbells
Despite the undeniable advantages, wireless doorbell models are not without drawbacks. The doorbell button is fastened mainly with Velcro, located on its back side. This option is short-lived. An ill-wisher can easily damage or tear off the device. In case of long-term use, the bell may fall off on its own, which will be accompanied by damage to the case and electronic filling.

As a rule, wireless calls do not have reliable fasteners
If the button is at a great distance from the main unit or there are concrete or metal obstacles in the signal coverage area, the device will malfunction or stop functioning altogether.
Battery powered wireless calls consume a lot of power. Frequent battery replacement is required for the device to function properly. Electronic elements fail faster in wireless doorbells. As a result, the signal will disappear, the sound reproduction will stop or will be distorted.
Helpful advice! To reduce the negative consequences, it is necessary to purchase a wireless call from trusted manufacturers, which provide a long-term warranty for the operation of the device.
Features of installing a wireless call on the door to an apartment or house
The scheme for connecting a wireless bell to an apartment is very simple. This is especially true for the version that plugs directly into the outlet. The button is mounted to the wall or on the jamb of the entrance door outside the room. Fastening can be done with self-tapping screws or dowels, depending on the nature of the base. The main unit is plugged into a socket, which should be located in the hallway as close as possible to the bell key.

Wireless doorbell installation diagram
The wireless doorbell is ideal for a private home or country cottage. This is due to the fact that for its installation it will not be necessary to lay cable products across the entire yard.
There are some limitations when choosing a wireless outdoor doorbell. The device must be designed for outdoor installation. Otherwise, the button will quickly fail under constant exposure to temperature extremes, high humidity, ultraviolet rays and other factors.
In order for the wireless bell button to work normally in winter at low temperatures, it is important to select the correct type of batteries in the case of an autonomous type of device. The best are lithium batteries, which are frost-resistant. A suitable option would be a lead-acid battery that will last for a long time even in adverse environmental conditions.
Between the button and the bell, it is necessary to ensure the minimum allowable distance, at which there should be no obstacles in the form of metal or concrete structures that impede the reproduction of the signal.

Installing a wireless doorbell on the door will not be difficult
Helpful advice! The technical passport of the device indicates the range of signal reception, which is 80-100 m, however, you should choose models with a margin of 15-20%.
The subtleties of connecting a wired type call
The main difference between wired and wireless models is that the first version has cable products that connect the button directly to the main bell unit. If the device is installed in an apartment, the button is attached near the front door to the wall or its trim, as in the wireless version. Additionally, it is connected to a cable, which is inserted into the apartment through a hole in the door frame or wall, which contributes to the hidden laying of the wire.
The main unit of the wired doorbell can be installed anywhere in the apartment. Most often it is located in the hallway. Its connection is also carried out by means of cable products, which should be masked in the wall, having previously made a groove in it, which must be putty after laying the cable.
You can also use an open mounting version. For its implementation, the cable is laid in a plastic box on the wall, specially designed for laying wires. The convenience of such a cable channel lies in the fact that it is equipped with a removable part, thanks to which the condition of the wires can be monitored throughout the entire period of operation of the device.

The wired call installation process is more complicated and time consuming
A more complex option is the wiring diagram for an electric bell in a private house, if its button should be located on the gate of the gate. In this case, wires are pulled, which are enclosed in a special corrugated casing-tube. Such a box provides reliable protection of cable products from moisture, ultraviolet rays, fire and other negative factors.
Important! When choosing corrugations for cable routing, you should purchase a model that is designed for outdoor installation, since certain options are designed exclusively for indoor use.
When installing a bell at the stage of reconstruction of the local area, cable products can be laid underground in a corrugated pipe.
The choice of model and features of the installation of the bell in the apartment
Any model of doorbell can be purchased for the apartment. The choice depends on the personal preferences of the owners. The bell button is installed at a distance of 15 cm from the door jamb. The height of the device should be at the level of 150-160 cm, however, you can often find a bell at a height of 120-140 cm, which is convenient for children and the elderly.

For the door to the apartment, you can purchase and connect any type of bell
The main unit of the device is located near the entrance to the hallway at a great distance from the floor. In the case of choosing a wired bell for the door to the apartment, the cable products are laid in the drilled hole in the door frame. You can also drill through the wall. In the resulting passage, it is necessary to draw a cable, cover it on both sides. In this case, in order to minimize damage to the wall, the hole can be made opposite the installation site of the button or the indoor unit.
Helpful advice! To replace the doorbell with a new device in the future (to minimize labor costs), a piece of metal or plastic pipe of a small diameter can be inserted into the hole in the wall, into which two thin cables can fit.
The button for a wired or wireless call in the apartment can be attached with self-tapping screws or Velcro. The first option is more reliable.It is used to install a button on the door frame. When attaching an element to a wall, the use of double-sided tape is a less labor-intensive option. In this case, the surface must first be degreased.
Related article:
Video call to the door to the apartment: types, features, selection rules
Is there a need for installation? Existing types of video calls. Criteria for the correct choice. Features of the installation work.
How to choose and connect a doorbell in a private house
When choosing a doorbell for a private house, it is necessary to take into account some features of street models. Such devices must have an anti-corrosion coating. Some of the bell buttons are additionally equipped with visors that protect against atmospheric precipitation. An outdoor device equipped with a robust case must have increased moisture and dust resistance, frost resistance.

Doorbell connection diagram in a private house
Helpful advice! For the street, it is better to purchase calls with a metal button, which is characterized by better protection of the mechanism from attacks by vandals, but has a higher cost.
When installing a bell in a private house, its button and the main unit are usually located at a considerable distance from each other. When connecting a wired-type doorbell, the degree of remoteness of the system elements does not affect its performance in any way. Here it is only important to choose the cable of the required length. Wires can be routed through the air by fixing them to poles, trees, or building walls. Despite the small laboriousness and quick installation, this option is unreliable, since intruders can damage or steal the cable.
The best solution is underground wiring. At the same time, for models of doorbells that are powered by a 220 V network, the depth of the trench should be about 75-80 cm. A protective film is laid on top. If a doorbell is used, which requires 12 or 24 V power supply, such a cable should be laid at a depth of no more than 35-40 cm.
Helpful advice! When installing the cable underground, mark the place where the wire passes to exclude the possibility of damage to it in case of work on the site using a shovel.

For wired calls, it is advisable to lay the cable underground
When connecting a wireless doorbell to the wicket, the button must be located in the signal reception area relative to the main unit, which should be taken into account when choosing the installation location for the elements. When using such a bell, if the area is fenced off with a solid metal fence, a problem may arise. In this case, when the button is located on it, the sheet of metal will screen the signal from the receiver, as a result of which the system will not work properly. You can solve the issue by making a hole in the fence for attaching the button.
How to connect a wired doorbell: preparatory stage
Before connecting a wired bell, you need to prepare tools and materials for work. You will definitely need indicator screwdriver to determine the zero and phase of the electrical network.
There are various modifications of the instrument: instruments differ in design and display option. Despite this, all indicator screwdrivers have the same operating principle. They show the presence of voltage in the network and the relative position of phase and zero. For this, a screwdriver metal probe is applied to the protected end of the electrical cable. If the light on the indicator lights up, this indicates the detection of a phase. The indication does not work on the zero contact.
To implement the scheme for connecting a 220 V doorbell to an apartment, you need to take a regular screwdriver, pliers with insulated handles, a terminal block or clamping clamps for connecting wires, a stripper for stripping conductors, insulating tape, plastic clamps.

In the process of installing the bell, you will need an indicator screwdriver
An important step is the choice of the optimal cable for wiring. Its cross section should not exceed 1.5 mm². It is impractical to use a cable with a larger diameter, since the power consumption of the device is small.The wire must be made of the same material as the cable products for wiring in the apartment. Copper wires are most often used, since aluminum cable has several disadvantages.
How to install a doorbell: getting started
Before connecting a call to 220 V, you must de-energize the house or apartment. To do this, turn off the machine on the switchboard. If there is an old bell, it is completely dismantled, which consists in removing not only the button and the main unit, but also the cable products.
After the necessary tools and materials for work have been prepared, at the first stage of the implementation of the 220 V bell connection scheme through the button, the speaker is installed. The device is usually equipped with mounting holes and an inlet for electrical wiring. First of all, the element is placed on the wall to make holes for conductors. The evenness of fixation is checked by the level.
The ends of the prepared sections of the connecting wire are stripped. According to the connection diagram for the call to the apartment, one end of the cable is passed through the prepared hole and pulled to the location of the button. Both elements should fit together in the junction box.

Before installing the bell, you need to turn off the electricity on the switchboard
It is convenient to place the button at a height of no more than 1.5 m. For this, a hole is made in the wall or door frame. The cable from the bell is threaded into it so that it comes out from the outside by 10-15 cm. The end of the wire is stripped with a stripper, and no more than 2 cm is exposed.
How to connect a call in an apartment or house: installation of cable products
When connecting a wired bell to an apartment, it is most convenient to work with color-coded wires. The blue cable points to zero. A yellow or green wire identifies the protective earth loop, and red, black, white, or brown indicates a phase. If there is no color coding, the location of zero and phase is determined using an indicator screwdriver.
How to connect a bell in an apartment? The diagram will help you understand the details of installing the device. The zero wire through the terminal must be directly connected to the cable that goes to the call. The phase wire is connected through the terminal with the cable routed to the button. The second conductor of this cable product is also connected via a terminal with the second conductor going to the bell. Both cables connected to the button must be stripped and clamped in its terminals. After that, the button is closed with a cover, which is fixed with a screw.
Cable products that come out of the junction box and go to the side of the bell are clamped in its terminals or connected to the wires coming out of its housing. The commutation takes into account the location of zero and phase.

Wired type doorbell connection diagram
Important! For budget models, the position at the output of zero and phases is not important, however, for doorbells with extended functionality, the location of the L and N conductors is specifically indicated on the terminals.
In the case of using a doorbell in a metal case or installing a button on the street, a protective grounding wire is mandatory. When connecting cable products, you can not only use terminals, but also twist. This is allowed when special contact caps are used.
How to set up a bell in an apartment or house through a transformer and without it
If a bell is connected to an apartment through a transformer, it is necessary to make technological holes in the switchboard panel to fix it. The device is securely fastened with screws. Outside, a wire is connected to it that goes from the bell.It has two ends, which can be fixed regardless of where zero and phase are, since after the transformer both contacts are equivalent to phase.
The wires are securely fixed in the terminals. After the transformer, the supply voltage is no more than 20 V, which makes it safe. The cable products should be fixed to the brush. If the wires are too short, additional pieces of cables are added to them using pads or clamps. The ground wire is connected first. Next, a zero, and then a phase cable is connected.

The doorbell can be connected with or without a transformer
How to connect 2 wires of a doorbell without using a transformer? The process is carried out on a principle similar to the installation of the device. However, in this case, one cable from the button goes directly into the machine and is connected to the phase. The second wire is assigned to the main bell unit. From here comes another cable, which is connected to zero to the machine.
Non-standard doorbell connection schemes
In practice, there are cases when it is necessary to install two buttons on one bell or two main units. The first option is implemented by means of parallel connection of bell buttons in apartments. The installation diagram clearly shows this. The phase is fed to the first button, from where the cable is diverted to the second button. From it, from the second free contact, a conductor enters the same input of the first key, from where it goes to the main bell unit.
Important! The cable that will connect the two buttons should be the same color as the wire that comes out of the junction box.
There are situations when you need to connect two doorbells. This option is often implemented for a private house. For example, calls can be located on different floors, in different corners of the house: one inside the cottage, and the other outside. The simplest solution in this case is to purchase a wireless call, the connection diagram of which was described above. The device is equipped with two elements that are tuned to the same frequency.

Wiring diagram for a doorbell with two buttons
When using wired options, the main units are connected in parallel according to a similar scheme, which was considered earlier. The phase wire of the button is connected to the first block, from where it is diverted to the second. The neutral cable from the junction box is connected to the free conductors of both bells.
How to repair a doorbell with your own hands
The main symptom of a door bell malfunction is the absence of a sound signal when the device button is pressed. It is also necessary to check the operability of the device when the volume of the melody playback is reduced or when the signal sounds intermittently, with some pause.
The reason for the malfunctioning of the device can be natural wear and tear of the device or incorrect installation of the doorbell, resulting from an incorrect connection to the electrical network. The noise or button block may fail, which must be checked for operability. First of all, you need to figure out how to turn off the bell in the apartment. For this, a number of manipulations are performed.
Before turning off the doorbell in the apartment, it should be de-energized for safe work. Next, you need to make sure that there is no voltage. To check the health of the main unit, you need to remove the top cover from it, squeeze the wires from the screw clamps and check the presence of current in them using a multimeter. If the device displays an electrical signal, the speaker should be replaced.

Do-it-yourself doorbell repair
To check the functionality of the button, the wires are detached from the pressure element. They should be connected together. If there is a sound, the button is faulty.
The reason for the malfunctioning of the button or the main unit may be hidden in the loose contacts. For this, the device is disassembled, the reliability of the wire connection is checked. They should be cleaned if necessary.
Before installing a wireless or wired type bell in an apartment, you need to choose the right device, taking into account its installation location. Any model can be purchased for an apartment. There are special requirements for outdoor devices, which were mentioned above. Connecting a doorbell in an apartment or house is a fairly simple process that requires basic knowledge and skills in the field of electrical engineering. By following the above recommendations, any type of device can be installed in a short period.