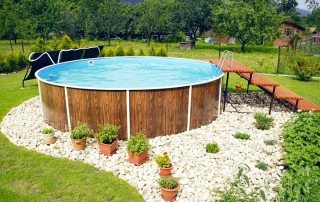
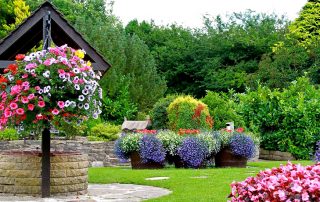
Caring for a summer cottage is not limited to weeding the beds and planting new plants. The aesthetic side of the issue is also worth considering if you want to give the garden a proper look. However, faced with high prices for garden decorations in stores, many abandon the idea, considering it too expensive. Let's consider how you can make original crafts for the garden with your own hands: all the new items and some traditional options.

Garden dolls from flower pots
Content
- 1 What you can do DIY crafts for the garden: all new items
- 2 DIY crafts for the garden from scrap materials with a description
- 3 Crafts from plastic bottles for the garden and garden: photo and description of the best ideas
- 4 The original design of the site: crafts for the garden from mayonnaise buckets
- 5 Crafts from tires for the garden and garden do it yourself
- 6 Crafts from polyurethane foam for the garden and garden with their own hands: photo examples and tips
What you can do DIY crafts for the garden: all new items
Do-it-yourself garden decor is a great opportunity not only to decorate the territory in an original way, but also to get rid of many unnecessary things in the house. For crafts, various unused items are suitable that can find new life as a garden decoration. Here are just a few options for what you can use as a base:
- used tires;
- old unnecessary furniture and vehicles;
- dishes, plastic bottles, jars;

DIY bird feeders
- old household appliances;
- clothing and footwear;
- pieces of pipes or fittings;
- stumps, branches or driftwood.
We are accustomed to throwing all this away as unnecessary trash, while with proper design, any of these elements can become a worthy decoration of the garden.
DIY options for giving, garden, yard
It is worth starting the design of the site by studying the photo of crafts for the garden and vegetable garden with your own hands. Looking through the available options, you can exactly repeat the solution you like, or, on its basis, come up with your own, adapting it to existing conditions, opportunities and preferences.
The simplest traditional design for flower beds involves the use of pots, flowerpots or ordinary wooden boxes. Old tires are also suitable for the same purpose.

Beautiful flowerpots from old shoes
Another garden decoration option is to use garden sculptures made from natural materials or any unnecessary items. Here are some simple ideas that don't take too much effort to implement:
- the easiest way is to use branches and stumps, which are always enough in garden plots. With their help, you can create animal sculptures, castles and more. Such an element will be an excellent decoration for a flower bed, an area near a gazebo or a lawn;
- you can make a sculpture out of concrete or cement, using a special form, into which the composition is poured in liquid form;
Useful advice! Any cement or concrete structure requires additional reinforcement. To avoid the destruction of the sculpture or the appearance of cracks, reinforcement must be laid in the base.
- abstract shapes can be made using wire or reinforcement elements. Two options are possible here: leave the structure hollow inside, or fill it with earth, having previously wrapped it with burlap or netting. In the second case, you can use the sculpture as a basis for planting plants;

Stylish wooden crafts
- a traditional garden scarecrow can be made using unwanted clothing. Contrary to prejudices, such an element may well become a worthy decoration of the site, especially if you use the image of a famous character as an idea for its design.
In order for the made element to retain its original appearance for a long time, it is very important to choose the right finishing materials for it. This primarily concerns the paints and varnishes used. Acrylic paint, cold enamel, or paint designed for glass work is best. A durable varnish will provide reliable protection for the coating.
Check out junk garden craft ideas. So, you can get rid of a lot that is a pity to throw away, giving him a new life and at the same time decorating the local area. DIY garden crafts from computer disks can be an excellent example.

Crafts from stones and flower pots
DIY crafts for the garden from scrap materials with a description
Spring garden crafts differ in what materials you need, as well as in the complexity of the manufacturing technology. Consider a few not too complicated options that can be implemented with a minimum investment of time and effort.
DIY crafts for giving: photos and instructions for creating painted stones
Using stones to decorate a garden is a classic technique that has been used for a long time. However, it is not at all necessary to keep their original appearance. Elements decorated with an original pattern will look much more interesting. For example, you can paint stones like cacti, thus creating an interesting decor element.

Beautiful cacti made of painted stones
Technology for making cacti from stones:
- with the help of dark green paint applied to the stones, the base of the cactus is created;
- then with the help of a lighter shade of green and a thin brush, characteristic stripes and dots are applied;
- dried stones are covered with a layer of varnish and installed in pots or flowerpots, previously filled with stone chips.
Another option involves the use of larger stones to decorate a summer cottage. With the help of paint on their surface, you can depict various animals, houses, cars, etc. The easiest way is to initially apply the drawing with a simple pencil, and then paint it with acrylic paints.
Useful advice! Such elements will be an excellent decoration of the territory if you have a decorative reservoir in your country house.

Stones painted to look like snails
The original design of flower beds and flower beds with your own hands: new items of all crafts
Speaking about decorating flower beds, we mean a number of the most diverse elements that can transform the appearance of even the most ordinary flower beds. Sizes, as well as color schemes, are practically unlimited, and you can choose the option that will look most advantageous on your site:
- using ordinary bricks or stumps, you can create flower beds, which are called "alpine hills". The main thing is to provide the elements with a good connection to each other, so that the structure is strong and reliable;
- using a small motor, you can make a small the fountaindecorated with flowers on all sides;
- crafts from tires for a garden and a vegetable garden are very popular. Design options for flower beds with their help are many, both the simplest and suspended and multi-tiered;
- almost any unnecessary element can be filled with earth and planted inside flowers, including torn boots, ceramic dishes or furniture.

Homemade flower bed of plaster palms
Useful advice! Be sure to consider using hanging elements to decorate your garden. Decorations placed on several levels look much more advantageous.
Crafts from plastic bottles for the garden and garden: photo and description of the best ideas
A huge amount of a wide variety of plastic containers are thrown away as trash, while bottles can be excellent raw materials for making many original garden decorations. Let's consider some interesting ideas for their use with step-by-step instructions for making.
Palm tree from plastic bottles for decorating a summer cottage
In order to make a palm tree from plastic bottles, you will need the following set of materials:
- bottles of brown and green plastic (preferably in several different shades);
- sharp scissors;
- awl;

Palm tree and birds from plastic bottles
- rods for the base at least 25 cm long (you can use metal or willow);
- metal bushings;
- tubes with a diameter of 2 cm;
- high voltage cable (preferably 12-14 mm).
First of all, you need to cut the brown plastic bottles in two to get their bottom plus a small margin. In the lower part, you need to make a hole of such a diameter so that the twig of your choice passes through it. We also cut the green bottles, but in such a way as to separate the bottom and about 1 cm above it. After that, the bottle is cut lengthwise into 3 equal parts (up to the point where the narrowing towards the neck begins). In this case, you need to keep the neck.
In order to give the leaves a resemblance to the real ones, the edges are cut in such a way as to make jagged edges. After that, the finished elements can be put on the cable. As a result, we get twigs, which will later be attached to the trunk. One tree must have 7 branches.

Peacock from plastic bottles
After that, you can start assembling the structure: the rods are securely fixed in the ground, forming a base. The easiest way to achieve this is to pre-weld them to a sheet of metal, positioning them at different angles. After that, tubes are attached to them and sleeves are put on. The length of each twig should correspond to the number of brown parts that will be located in a row and another 3 cm margin for the leaves.
Related article:
Do-it-yourself landscape design of a summer cottage 10 acres: photos of exemplary projects
Photo examples for registration. Plants and garden structures in decoration. Optimal zoning options.
Having assembled the structure, it is securely fixed in the place where it will be installed. Most often, such an element is located near small artificial reservoirs or flower beds.
Useful advice! If you use rods of different diameters, you can create a whole composition that imitates an oasis.
Do-it-yourself gnomes from plastic bottles: photo of crafts for the garden with a step-by-step description
How well the figures of garden gnomes look in the design of plots, we know from fashion magazines and modern films. But not everyone knows that such beauty can be made from scrap materials. Consider how you can make such a decoration without spending a lot of effort and money.

Gnomes from plastic bottles
Since the gnome needs to be large enough to be seen in the garden, a 5 or 6 liter plastic bottle should be used as a base. In addition, you will need paints for decoration, brushes, an awl, glue with which plastic parts can be glued, as well as various little things with which you want to decorate your creation: a beard, eyes, a strap, etc.
First of all, you need to paint the bottle in the main color. This must be done from the inside to avoid washing off and damaging the layer. The easiest way to do this is by pouring paint inside and twisting the container so that only the bottom 2/3 of the container is colored. It is important to wait until the paint is completely dry.
At this time, you can start preparing details for decoration. For their manufacture, smaller plastic bottles are perfect. By applying paint with a brush, you can make a sleeve gnome from small containers. If you paint the bottom of the bottles beige, you can make them look like your hands.

You can create many original decorations from bottles.
The connection of these elements is carried out by cutting holes of a suitable diameter and additional fixation using a wire and special glue. In the same way, we attach the nose to the gnome, made from a regular cap.
Useful advice! The easiest way is to paint the eyes and lips using a regular brush and paints, but for the best effect, you can purchase ready-made elements designed for dolls.
In order for the figure to be stable enough and not fly away at the first gust of wind, sand or earth must be poured inside the barrel.
The original design of the site: crafts for the garden from mayonnaise buckets
You can also make beautiful and original decorations for the street using such an unusual element as plastic mayonnaise buckets. The main condition is that the design is resistant to external factors and looks beautiful. Therefore, it is imperative to open the finished craft with a waterproof varnish.

For crafts, you can use any buckets and jars
Other subtleties that must be observed are to consider the future location of the craft. For example, if it is located under a canopy or in a gazebo, then the use of various fabric or paper elements is quite acceptable.
Installing or securing flower pots from a mayonnaise bucket also makes a difference. They are light enough on their own that they need to be filled or fixed to be stable. If you fill the buckets with earth and flowers, then, on the contrary, they will be quite heavy, so if you plan to hang them, make sure in advance that the rope is strong and reliable.
Useful advice! You can always attach the bucket to be installed to the surface using self-tapping screws or glue, thus ensuring the most secure fixation.

Old teapots can be used instead of buckets
Prepare in advance all the materials necessary for work: paints, brushes, waterproof varnish, napkins, if you want to make decoupage, as well as other small elements that will serve as decoration, for example, beads, pebbles, beads or small figures of insects that can be bought at store.
DIY ideas for the garden and garden: pots from a bucket for mayonnaise
Making a pots from a bucket of mayonnaise is the simplest and most common option that is used to decorate a garden. At the same time, the best design is obtained if you use the decoupage technique.So, you can not only create bright colored pots, but also make whole works of art: unique and inimitable. Moreover, this technique will be an excellent solution for those who are not very good at drawing.
In order to make an original pot in this way, you need to follow the following algorithm:
- the bucket must be degreased by wiping it, for example, with alcohol;
- then use a sponge and apply one or two coats of white paint to the surface;

Pot from a bucket for mayonnaise and burlap
- while the paint dries, prepare the elements of the napkins that you like with the pattern. Thematically, it can be anything: flowers, animals, patterns;
- separate the top layer from the napkin, the one on which the drawing is applied;
Useful advice! For a more aesthetic appearance of the finished pot, it is recommended not to cut the edges of the used napkins, but to carefully cut them off. So, the joints will be almost invisible.
- apply a layer of PVA glue to the bucket and gently apply and spread the pictures from above;
- after complete drying, open the finished product with varnish.
Crafts from tires for the garden and garden do it yourself
The areas in which old car tires can be used cannot even be listed. And the design of a summer cottage is no exception. Homemade playgrounds made with this material, as well as flower beds and flower beds, are very popular. On the network you can find many different master classes of crafts from tires for the garden and garden with your own hands. Let's consider a few simple design options.

Donkey in harness made from old car tires
The most primitive option is a round flower bed made of car tires. It is difficult to call such a creation a masterpiece, however, with proper decoration, it can also serve as a garden decoration. A little more complicated, but much more impressive - a flower bed of several tires, located one on top of the other.
To give interesting effects, you can use tires of different diameters, placing a large one at the bottom and gradually decreasing the size. Suspended flower beds from tires also look great. If the disc is left inside and properly secured, soil can be poured inside. The main thing is to take care of a reliable fastening, since the total weight of such a structure will not turn out to be too small.
Crafts from polyurethane foam for the garden and garden with their own hands: photo examples and tips
Another unusual material that has also found its use in decorating a garden exterior is polyurethane foam. A number of characteristics such as light weight, ease of processing, insensitivity to rain and temperature changes make this material extremely suitable for garden crafts. This solution will be an excellent alternative to plaster crafts for the garden with your own hands.
The first thing you should pay attention to is the manufacturer's recommendations indicated on the cylinder with the purchased mixture. By her own polyurethane foam in a container has a liquid consistency and hardens due to contact with air. As a rule, it takes 10-12 hours to completely dry.

Figures made of polyurethane foam, covered with plaster and enamel
Useful advice! Do not forget about personal safety measures while working with polyurethane foam. How exactly to protect yourself - you will also be prompted by the information provided by the manufacturer on the cylinder.
Here are some simple tips for working with this material:
- polyurethane foam does not like the cold, therefore it is better to work with it at a positive air temperature;
- shake the cylinder thoroughly before starting work;
- while squeezing out the foam, keep the cap down. So, the gas from the cylinder will not come out, and you can use all the foam that is in it;
- respect the recommended (usually 10-15 minutes) time interval between coats.Otherwise, the uncured foam may fall off under the weight of the following layers;
- to work with the foam more conveniently, you can use a special assembly gun.
DIY foam craft ideas for the garden
Looking through a photo of the garden with your own hands, for the decoration of which figures from polyurethane foam are used, you can see that the possibilities of this material are practically unlimited, and with its help you can create a wide variety of sculptures. However, in order for the figurine to be strong, it is necessary to provide it with a strong and reliable frame. For this purpose, you can use plastic or tin bottles, as well as wood, wire or reinforcement.

Spectacular bird made of polyurethane foam and fabric
For example, to make a snail, it is enough to follow a simple algorithm:
- on a previously prepared surface (you can do this on a regular table covered with oilcloth) apply the first layer of foam, which will become the base;
- after drying, apply a second layer of foam and insert a plastic bottle into it, which will act as the snail's neck;
- cover the plastic bottle with foam and give it the desired shape with your hands;
- the head and horns of the snail are also formed by hands;
- To make a shell, apply foam to the snail's body, giving it a rounded shape. At this stage, you can insert a small bucket or a pot designed for planting flowers into the shell;
- using the same foam, make characteristic curls on the snail shell. Use paint and foam to decorate the resulting craft.
A foam frog can be made as follows:
- use an old saucepan and jar as a base. Cover them with foam and let dry. The saucepan will act as the torso, and the jar will become the frog's head. In order for the structure to be one-piece, it is recommended to fasten the parts with a wire;
- in order for the frog to have legs, use a sufficiently strong wire, also covered with polyurethane foam;
- give a characteristic shape to the still uncured foam with your hands;
- use paint to give the frog the desired color and make its eyes.

Making a lizard from polyurethane foam
To give stability to the resulting figures, sand can be poured inside the containers used. Then it will be more stable and will not succumb to strong gusts of wind. All inaccuracies and extra pieces of foam can be easily removed with a clerical knife, giving the sculpture the most accurate shape. And in order for the foam figure to serve you longer, you can additionally apply a layer of putty on it, which will perform a protective function.
Useful advice! In the process of decorating garden sculptures, you can use LED lighting. So, in the evening, the figurine will glow and create a unique festive atmosphere in the garden.
Decorating a garden yourself is easy, and there are many ideas that can be used for this purpose. After all, not only flowers and trees can help you arrange the territory correctly. Hand-made crafts will be an excellent alternative to purchased models, giving your site a uniqueness and adding a unique flavor to its appearance.