Even in a large apartment, you can face the problem of insufficient storage space, especially if we talk about housing with a small area. A do-it-yourself wardrobe installed on the balcony is considered the right solution to free up space. To preserve the appearance of the room, you should choose the right shape and structure. A variety of materials will help make the wardrobe a functional and attractive part of the interior.

Do-it-yourself wardrobe on the balcony can significantly free up space in the apartment
Content
- 1 What is the advantage of installing a cabinet on a loggia: photos of attractive interiors
- 2 DIY balcony wardrobe: basic design options
- 3 How to determine the optimal cabinet size on the balcony
- 4 Which is better to install the cabinet on the balcony: plastic or wooden
- 5 What you need to prepare to make a wardrobe or shelves on the balcony with your own hands
- 6 Do-it-yourself wardrobe on the balcony: step-by-step photo of the actions performed
- 7 Some interesting ideas for creating a balcony design using a cabinet
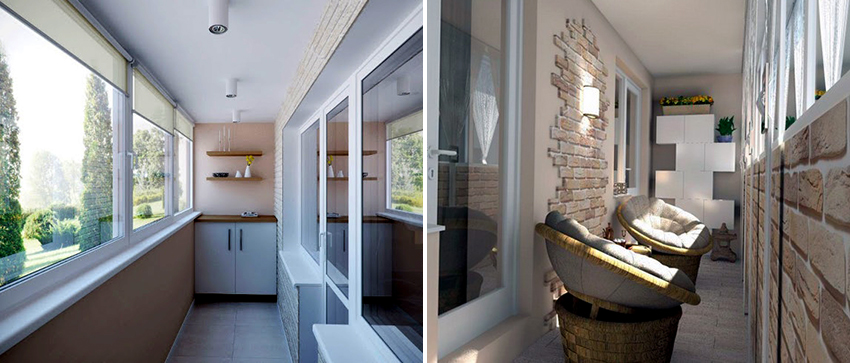
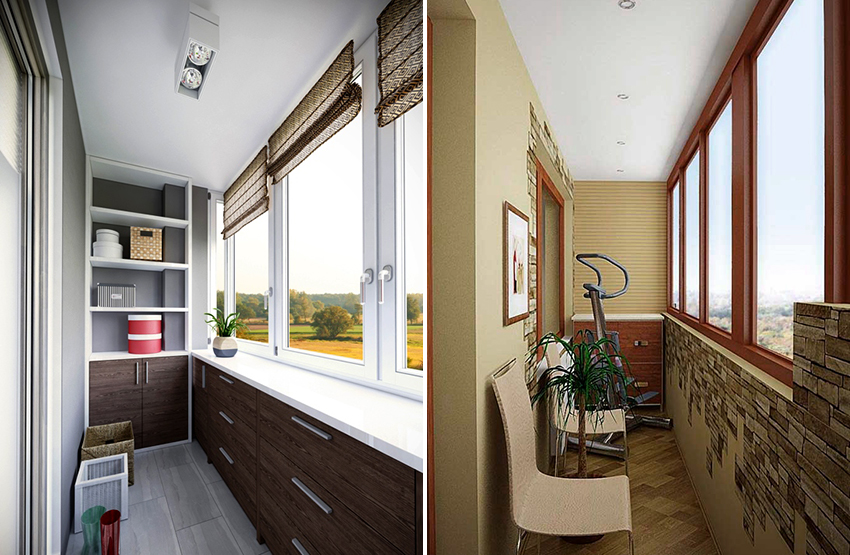
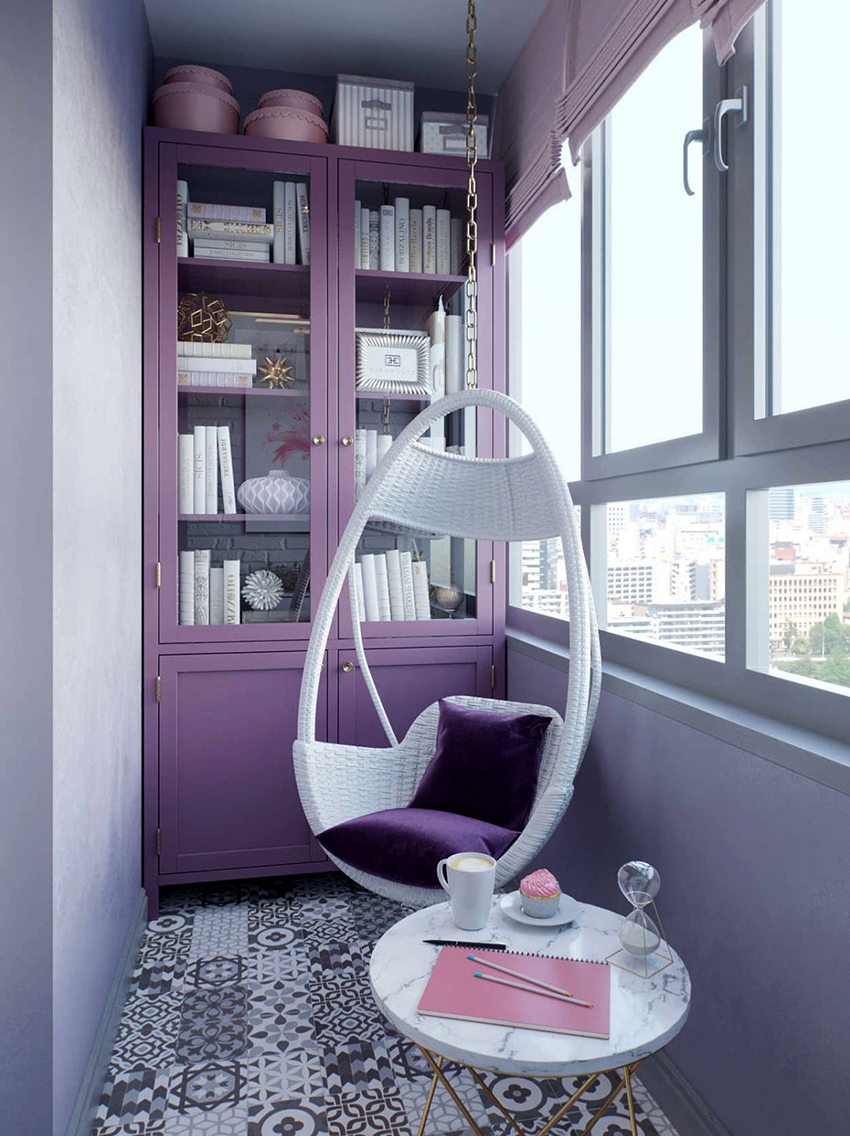
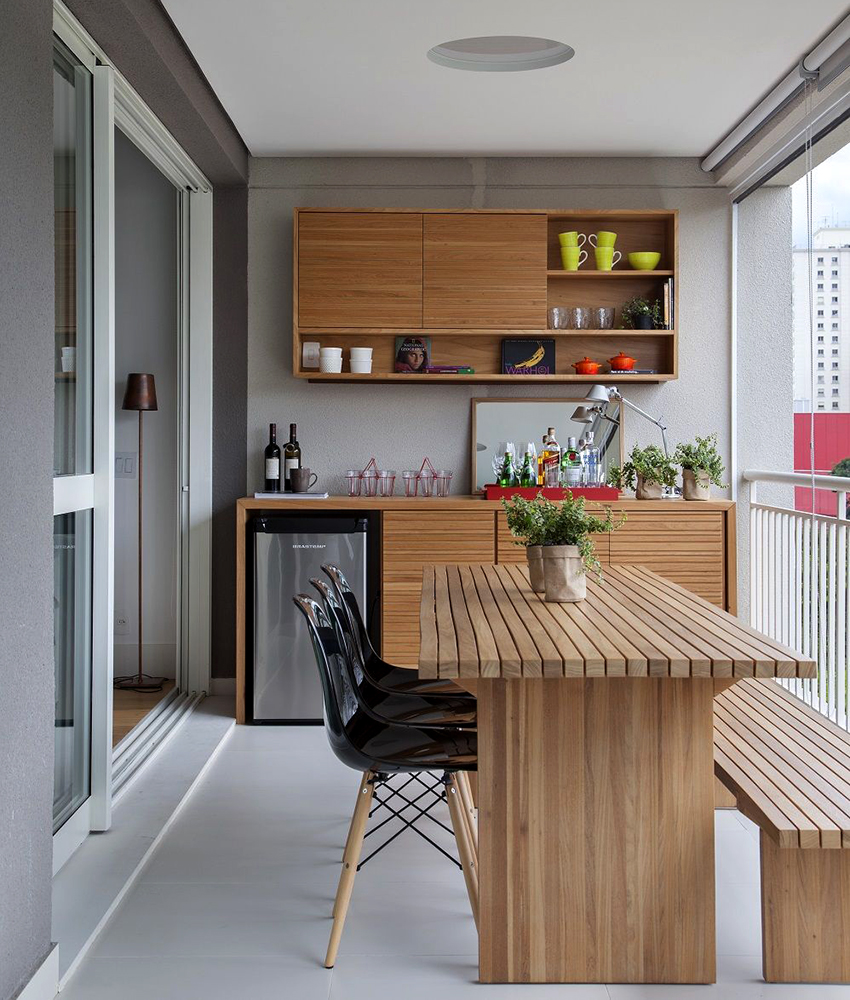
What is the advantage of installing a cabinet on a loggia: photos of attractive interiors
In any apartment, regardless of area, over time, a large number of various things accumulate that do not need to be constantly used, but nevertheless they take up a lot of space. A self-made wardrobe built into the balcony will allow you to neatly store winter or summer things, homework and other items that are rarely used.

Making a wardrobe for the balcony with your own hands, you will be able not only to save money, but also to prove yourself as a designer
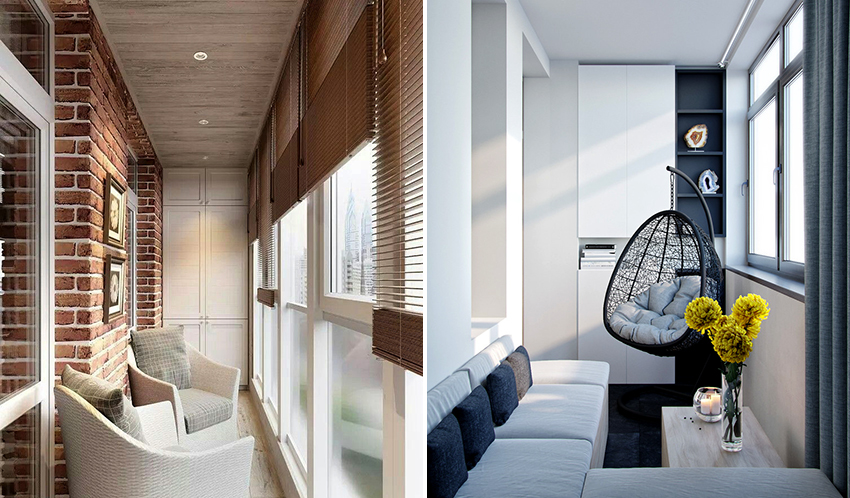
The idea of \ u200b \ u200bmaking cabinets for the balcony became popular in the last century and still has not lost its relevance. Regardless of the size of the balcony, there is always space on it that can be used to great advantage.
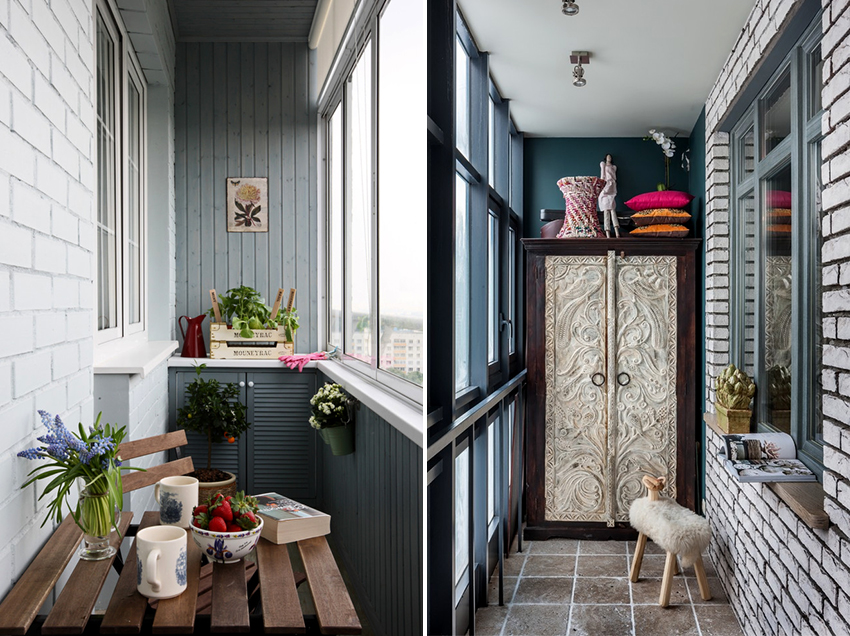
It is considered convenient that it is not required to select facades that match the color of the rest of the furniture in the apartment, because the balcony is isolated from the rest of the area. And also you can not adhere to the general style of furniture in the apartment. This allows you to carry out any ideas for the balcony with your own hands, as well as choose convenient shapes and designs. The main thing is that the design is roomy and meets the needs of the owner.
Useful advice! Making furniture for the balcony with your own hands, you will be able not only to save money, but also to practice your design skills.

Installation of cabinets on the balcony is convenient because there is no need to select a facade that matches the color of the rest of the furniture in the apartment
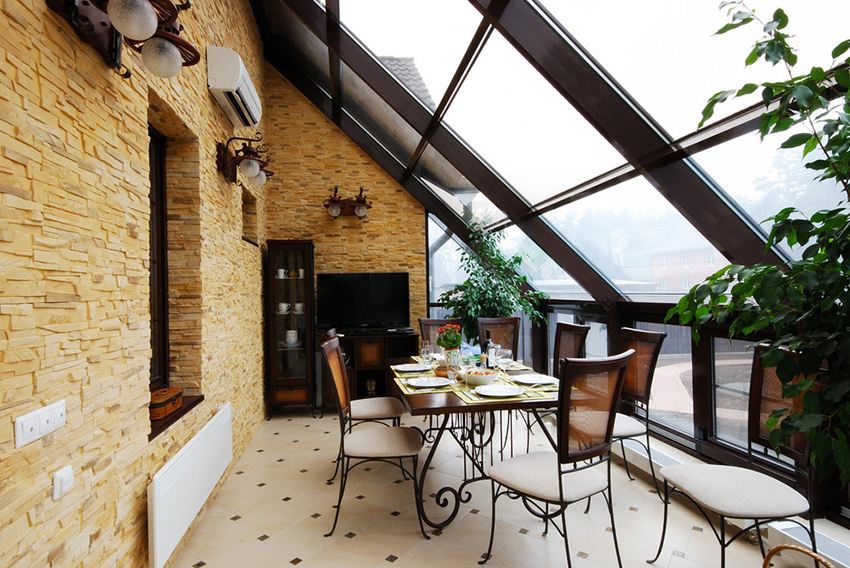
A spacious wardrobe in the room creates additional storage space for various items, which makes it possible to free up space in the apartment. At the same time, the balcony does not lose its attractiveness and even acquires a more neat and well-groomed appearance.
DIY balcony wardrobe: basic design options
Before you assemble the cabinet with your own hands, you need to decide on the desired design. This furniture is divided into built-in and free-standing, in addition, the following options for wardrobes on the balcony stand out:
- open;
- sliding;
- hinged.

There are several options for wardrobes on the balcony - open, sliding, swing
The open version of the cabinet consists of a row of shelves stacked one above the other. At the same time, with equal success, it is possible to place in the room both a pre-made version of the desired size and a built-in cabinet model.
It is important to note that a do-it-yourself wardrobe built on the balcony will cost a little less, because the balcony walls can be used as a frame, especially if there is no adjacent window.
In many photos of balcony cabinets, you can see that in order to reduce the cost of the structure, curtains or blinds are installed instead of doors, which hide the contents of the shelves from general availability.

Combined cabinet, this is when one part remains open, and the second is closed by doors
Useful advice! The number of shelves is determined at the discretion of the owner. It is better if the uppermost shelf is located at arm's length, so that you can reach it without using additional devices.
A swing cabinet, just like an open one, can be made built-in or solid, but in this case, the presence of doors is considered mandatory. Depending on the area and size of the balcony, one or two doors are made. If the space is very limited, you can stop at the sliding door option.
You can also make a combined cabinet with your own hands. In this case, one part of the furniture remains open, and the second is closed by doors. In this case, it is allowed to leave both the side and the top or bottom side open.

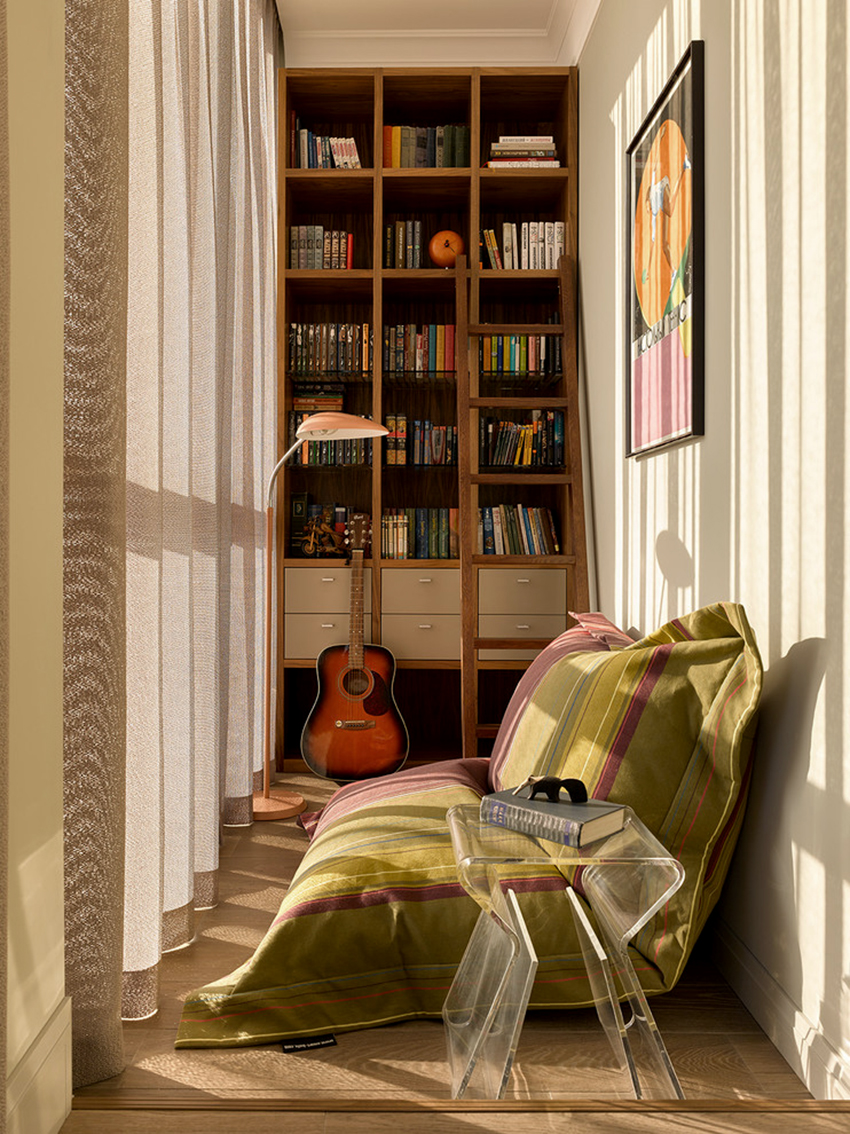
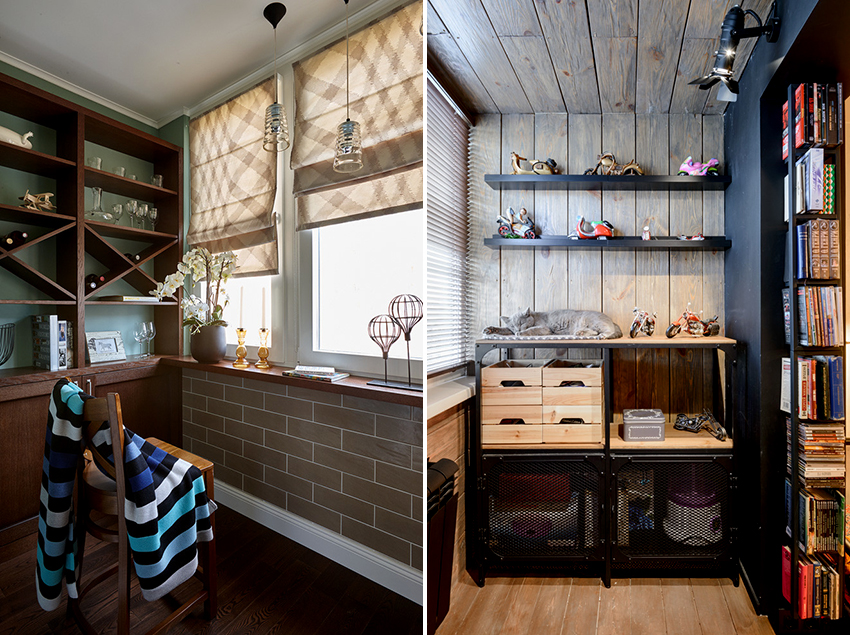
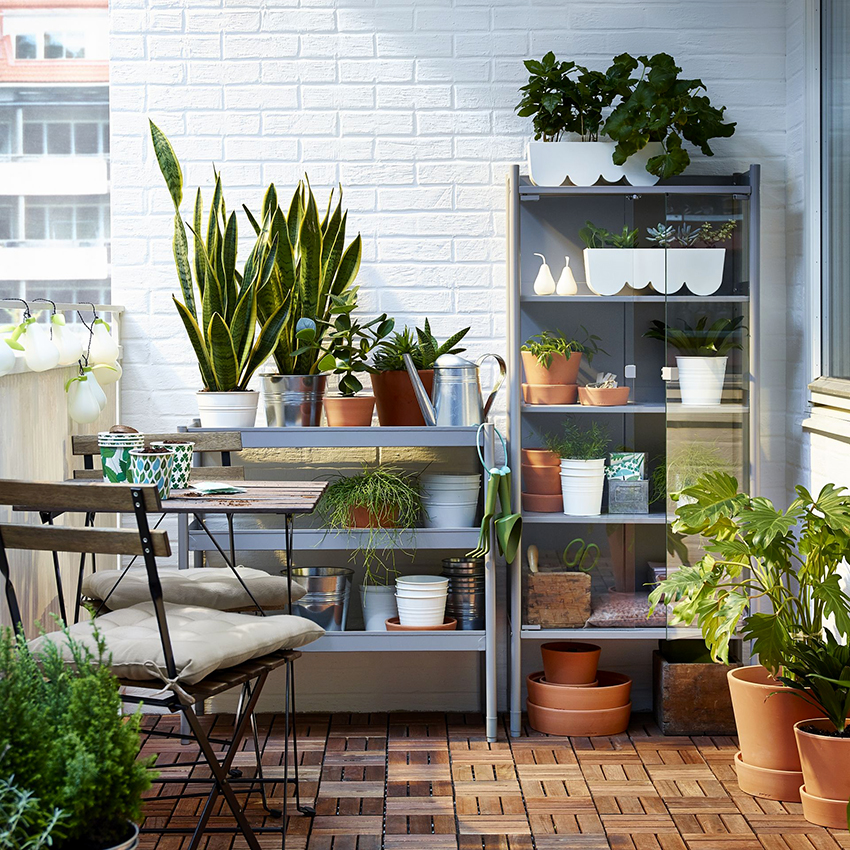
A wardrobe with open shelves is considered convenient, you can immediately see all the contents
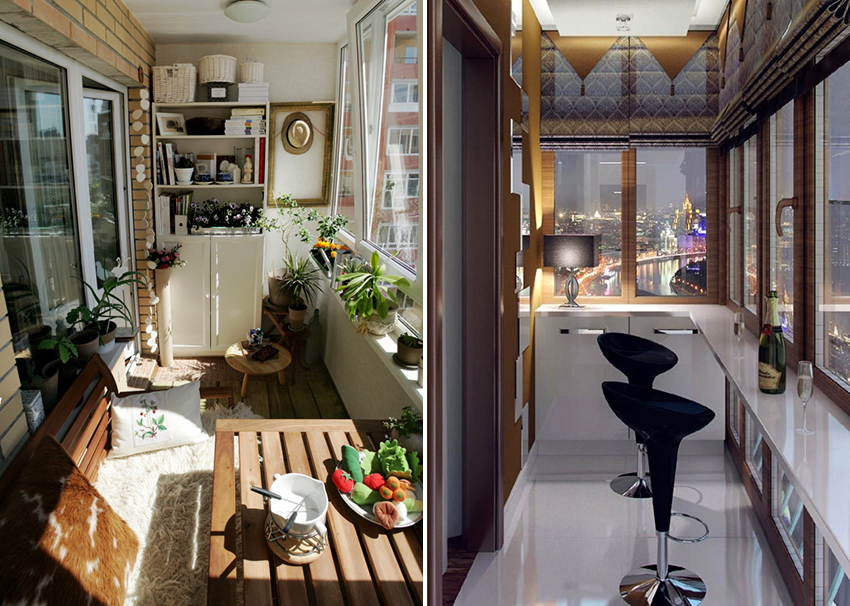
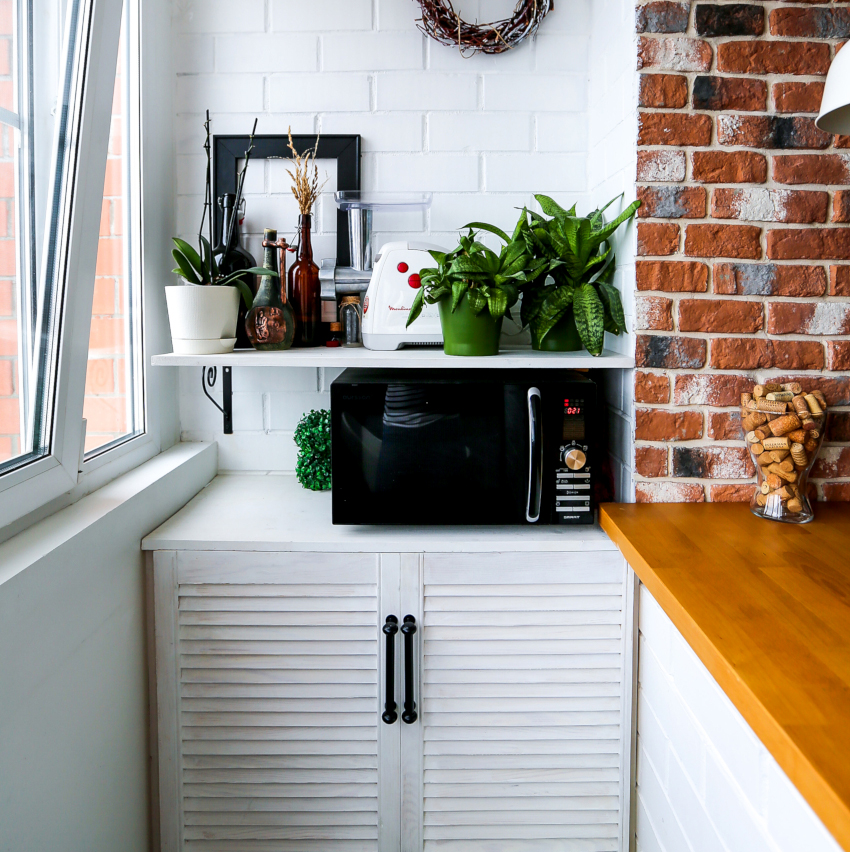
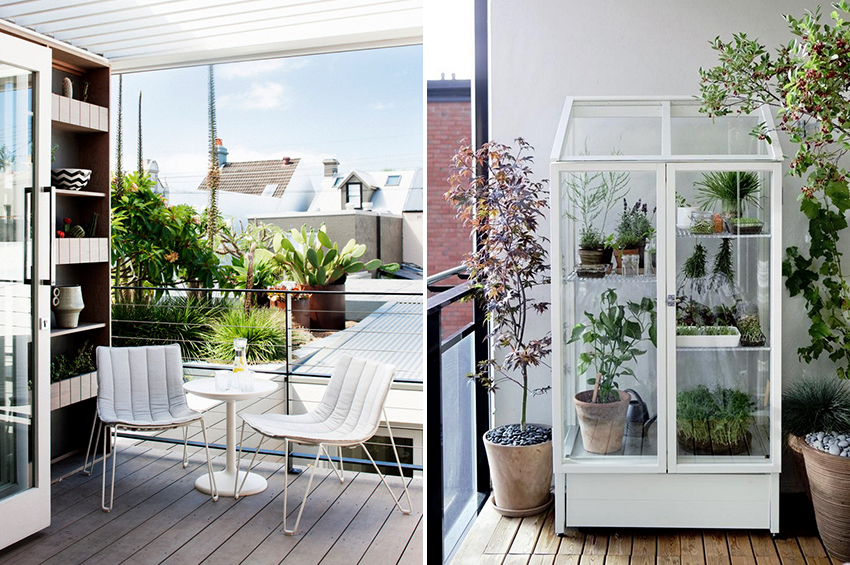
Boxes with small household kitchen appliances can be stored on open shelves, and items that cannot always be stored neatly are folded behind a closed door. Another option for using open shelves is growing flowers or preparing seedlings for the garden season.
How to make a wardrobe with your own hands and choose the optimal type of construction
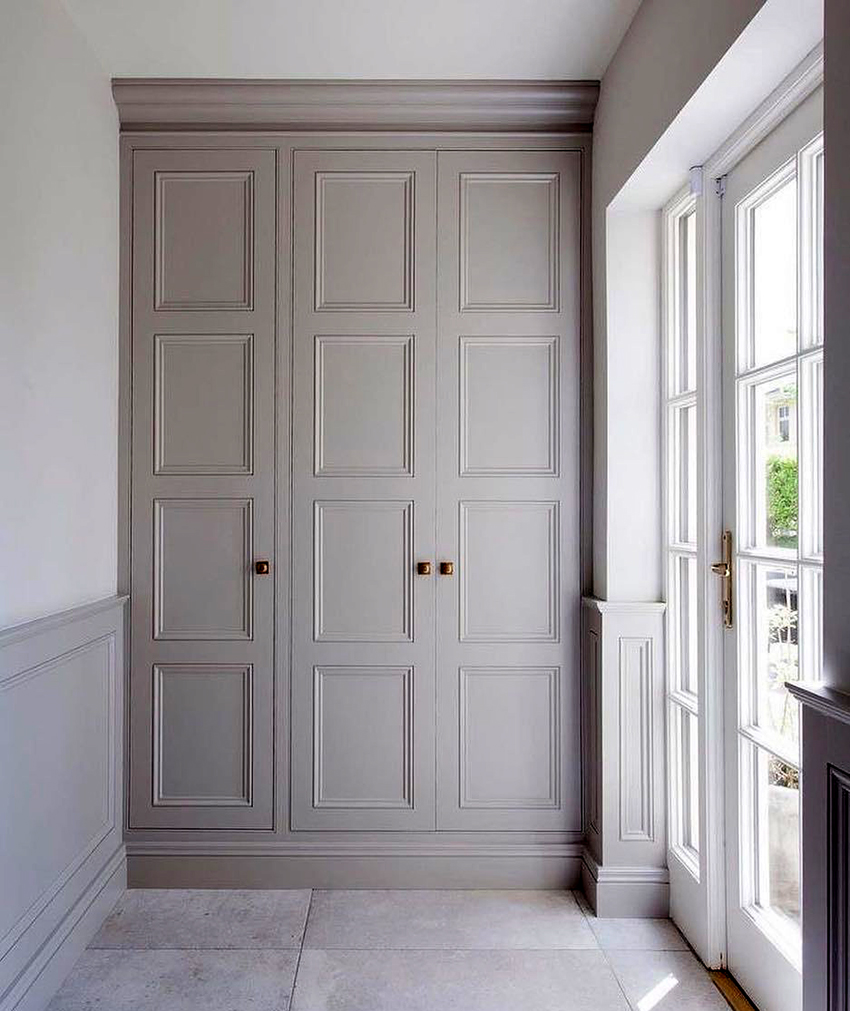
A wardrobe with three independent compartments is considered a standard option for balcony furniture. If you add the furniture with sliding doors that move along runners, this will turn the product into a wardrobe. If the area allows, you can equip the furniture with swing doors. This design takes up significant space, but nevertheless allows for neat storage of a large number of things on the balcony.

With a small balcony area, not a three-door, but a two-door wardrobe will be optimal
With a small area of \ u200b \ u200bthe room, it is better to make not a three-door, but a double-wing cabinet, which will not be so roomy, but will leave enough space for free movement and make it easy to get the things you need. In order to make a wardrobe on the balcony with your own hands, you do not need any special tools or skills, because the design of the furniture is quite simple. How to decorate a balcony? Consider other popular product options.
A do-it-yourself corner cabinet on the balcony is perfect for a small room. In addition to the fact that the structure does not take up much space, it is considered easy to manufacture.Another advantage of the corner piece is that it takes up space that otherwise cannot be used functionally.
The photo of corner cabinets on the balcony shows a large number of options that differ in the use of various materials to create a frame and cladding. If you look at their internal equipment, you can notice a significant number of useful compartments.

Having in hand a drawing of the cabinet, it will be much easier to calculate the amount of required materials.
Other popular types of lockers on the balcony: photos of good options
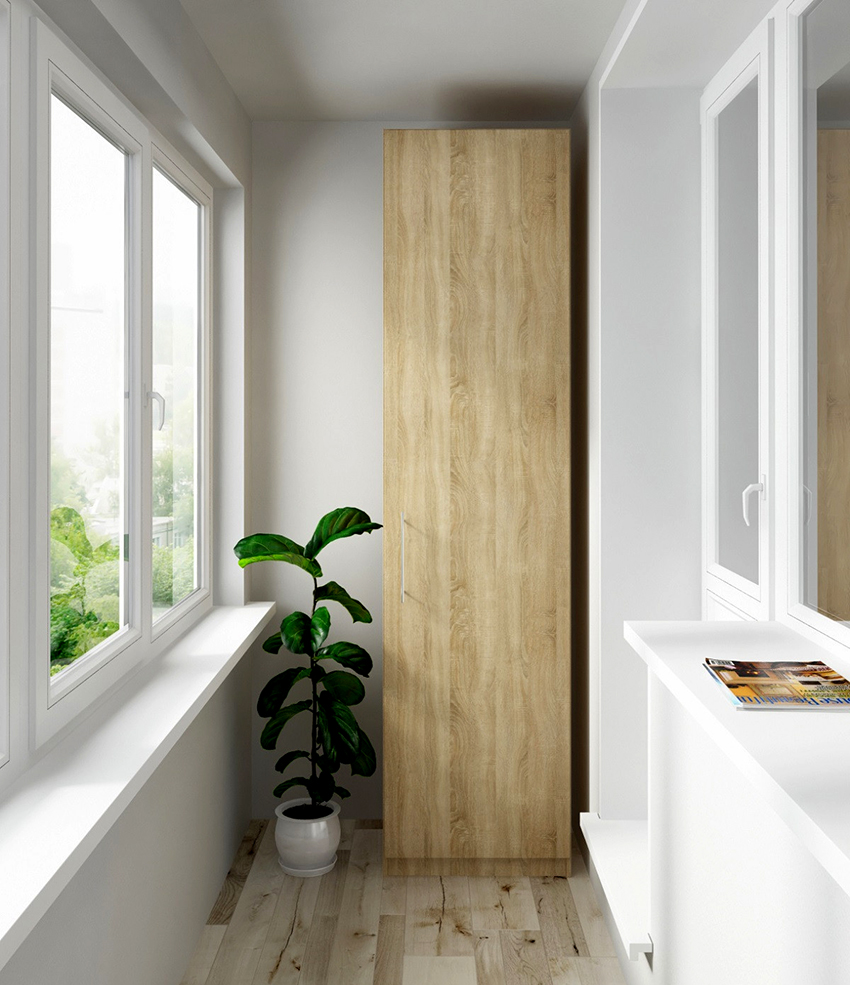
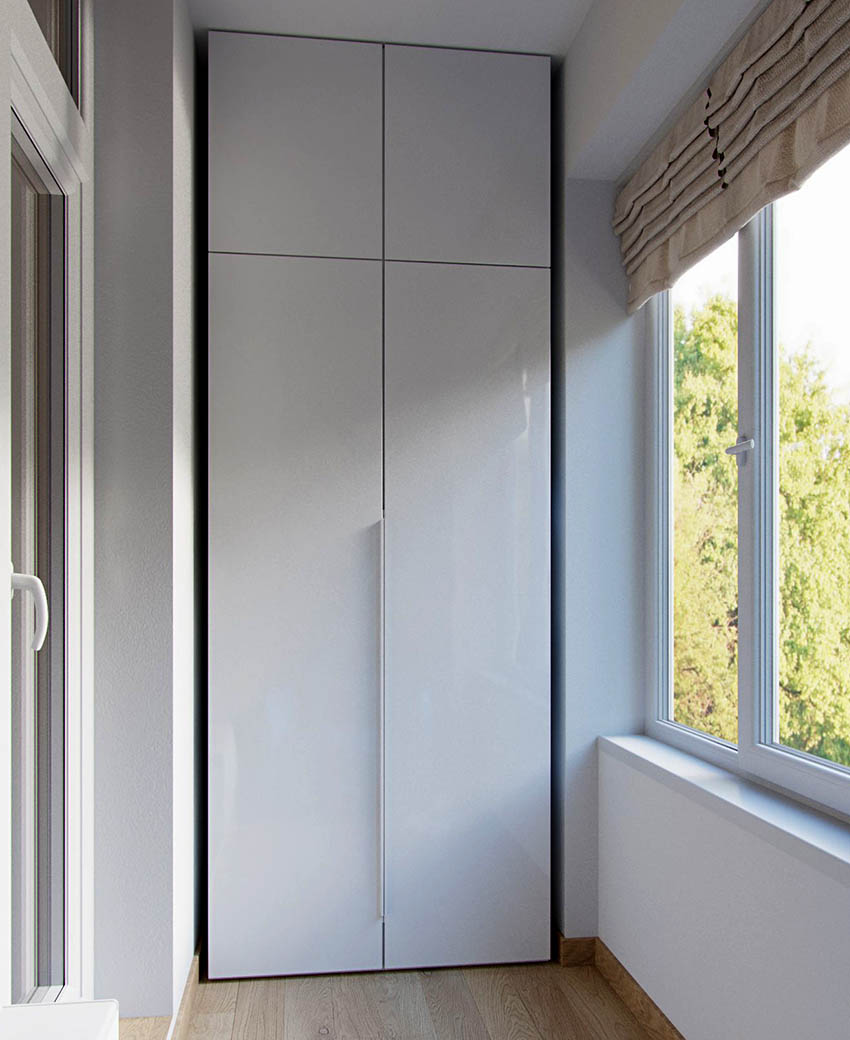
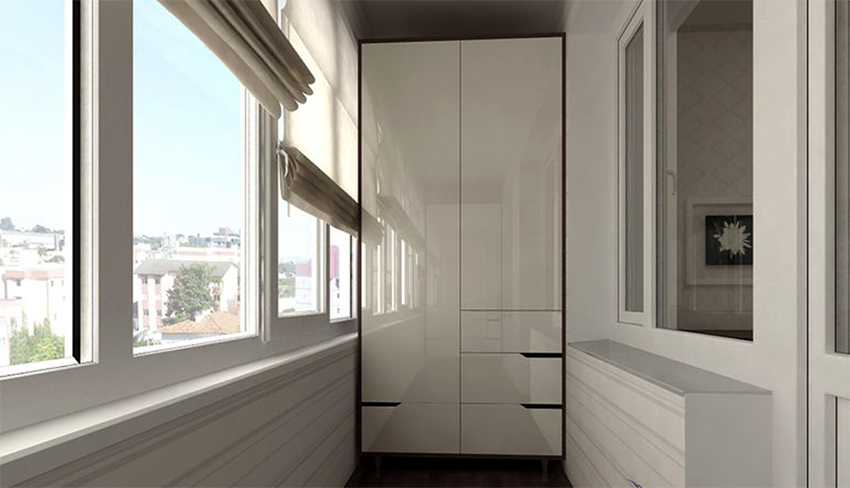
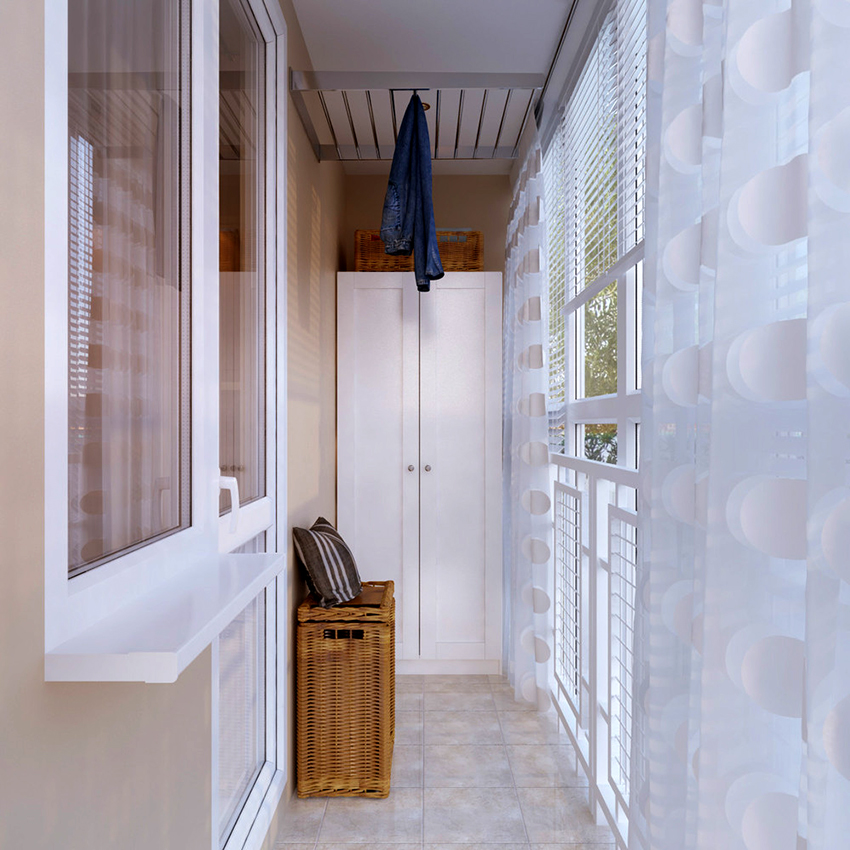
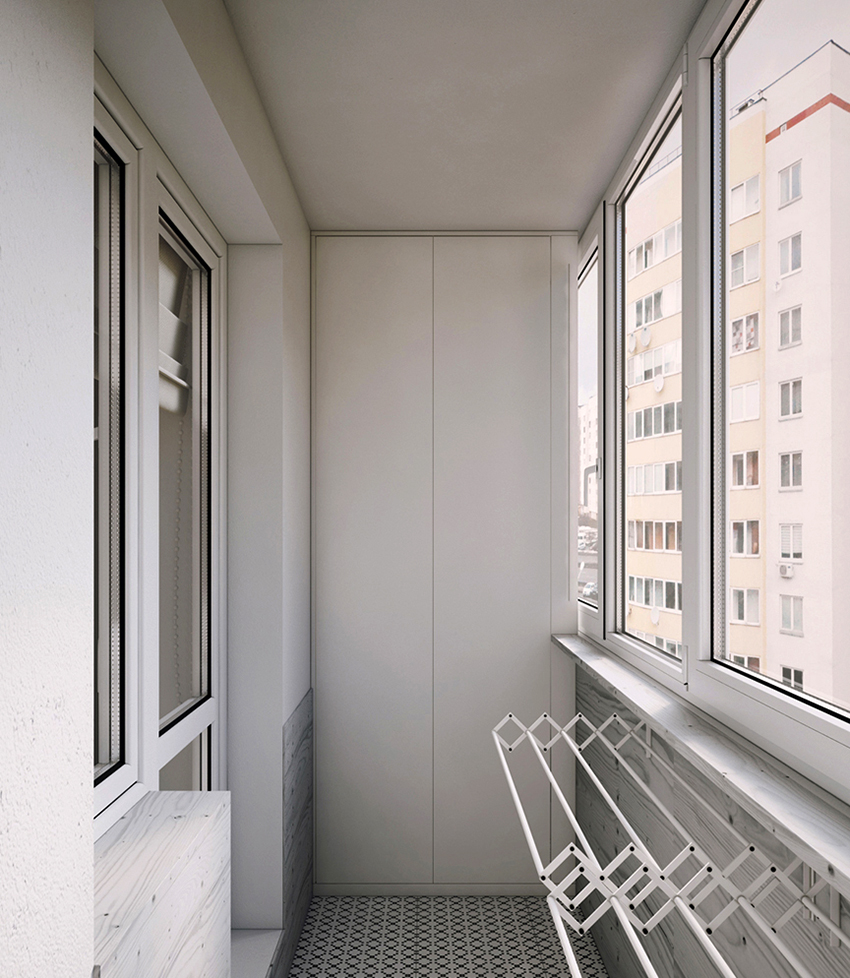
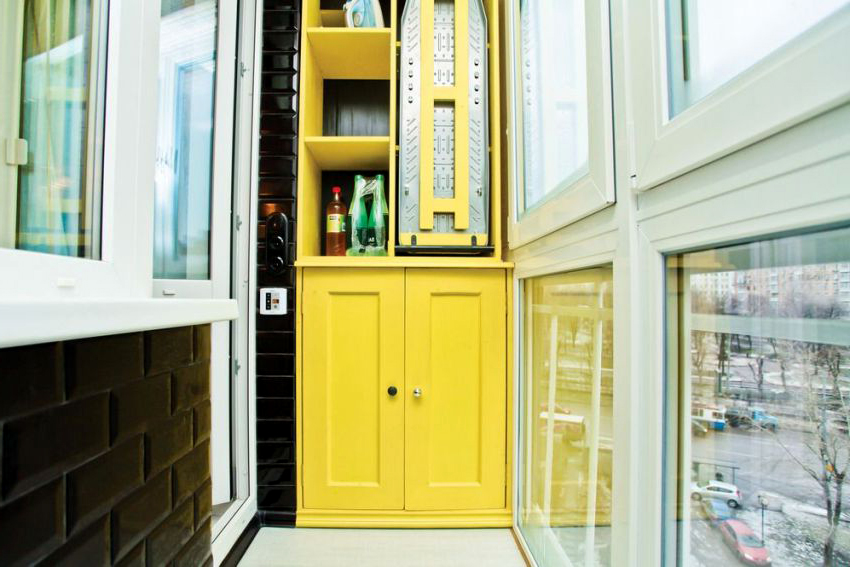
A pencil case is installed in the event that it is not possible to allocate space for a wide structure. Most often, furniture is equipped with a large number of small-sized shelves, compartments or drawers, which allows you to distribute a significant number of necessary things. To add space structures, the cabinet is made to the full height of the wall.
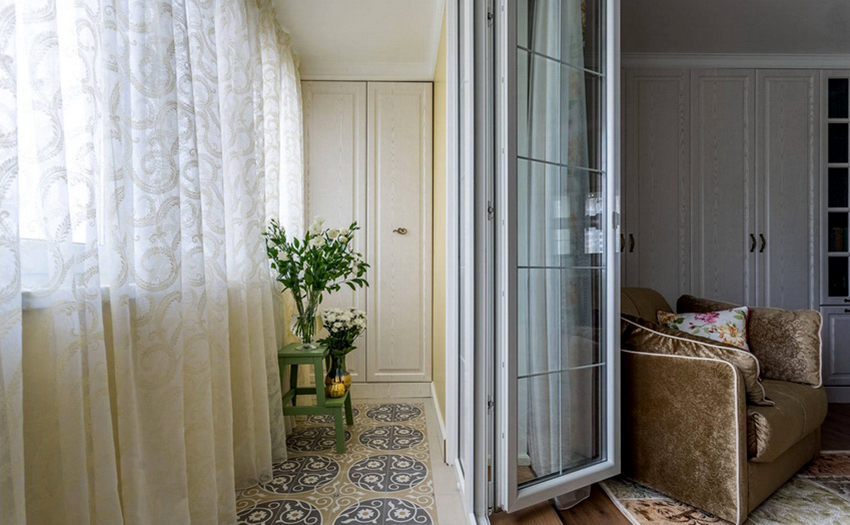
As for the doors, it is permissible to choose any convenient option. Another advantage of the pencil case is the ability to install it in any part of the balcony, where there is a convenient place for it.

A pencil case will be the best solution for a small balcony
A self-built cabinet on the balcony is considered the best option for a balcony in which there are niches or recesses. In this case, the size will depend on the dimensions of the room. It is a wardrobe made by hand according to a certain size that can perfectly fill a niche.
Important! Whichever cabinet design is chosen, the main thing is to ensure reliable insulation of the balcony so that the temperature in the room, regardless of the weather conditions outside, remains constant. You should also take care of the presence of blinds on the windows to protect the material of the frame and doors from burning out.
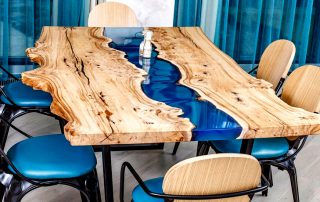
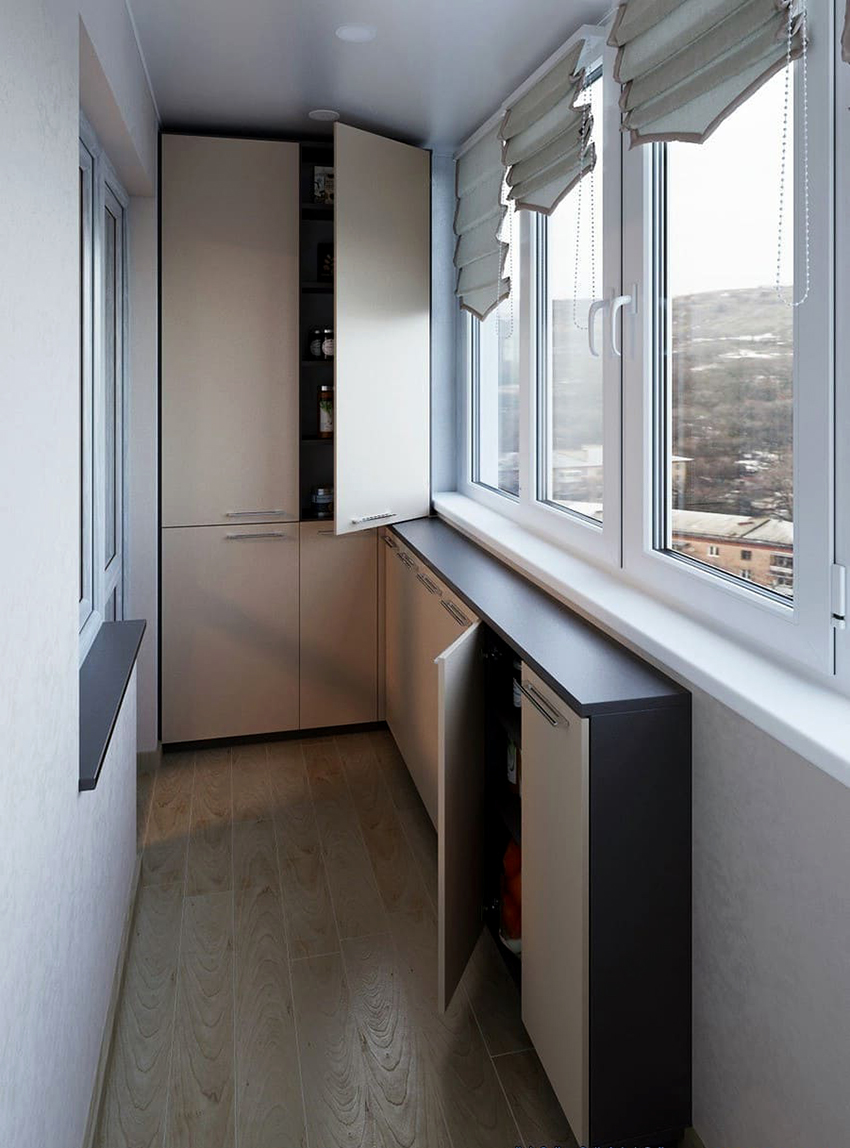
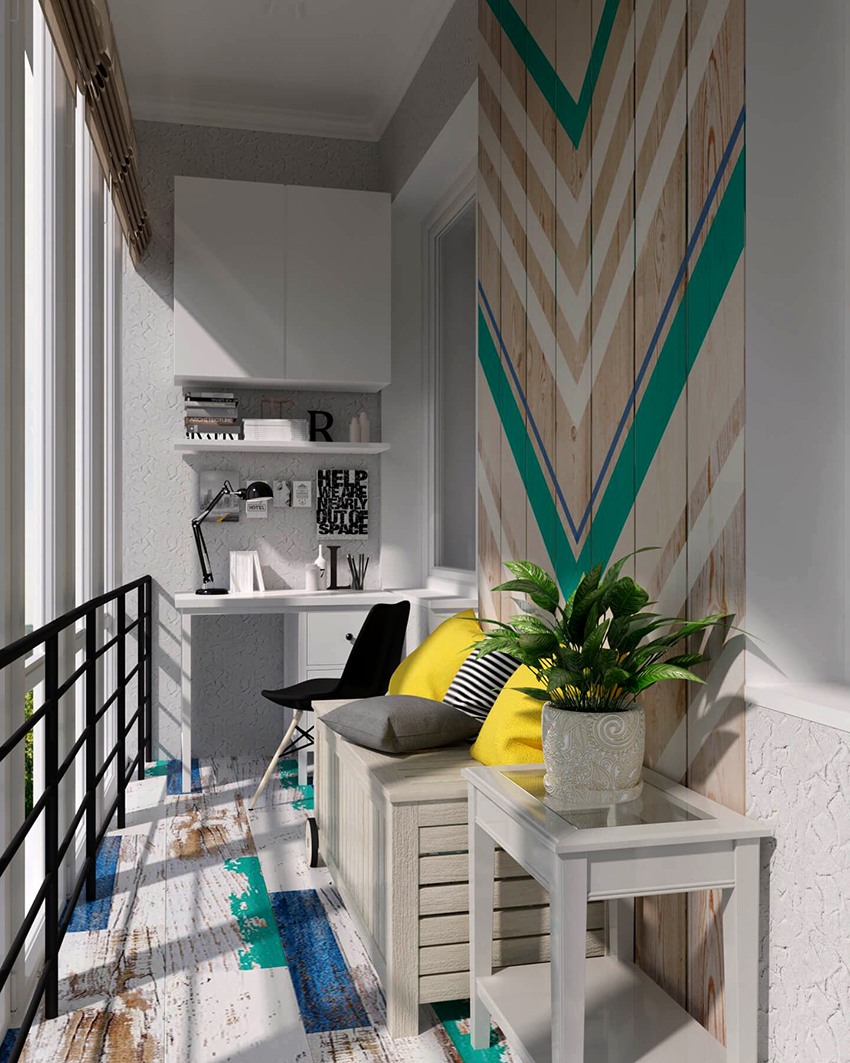
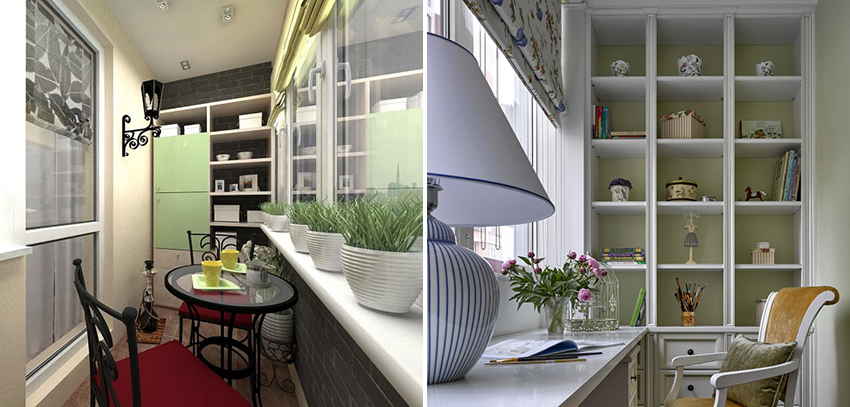
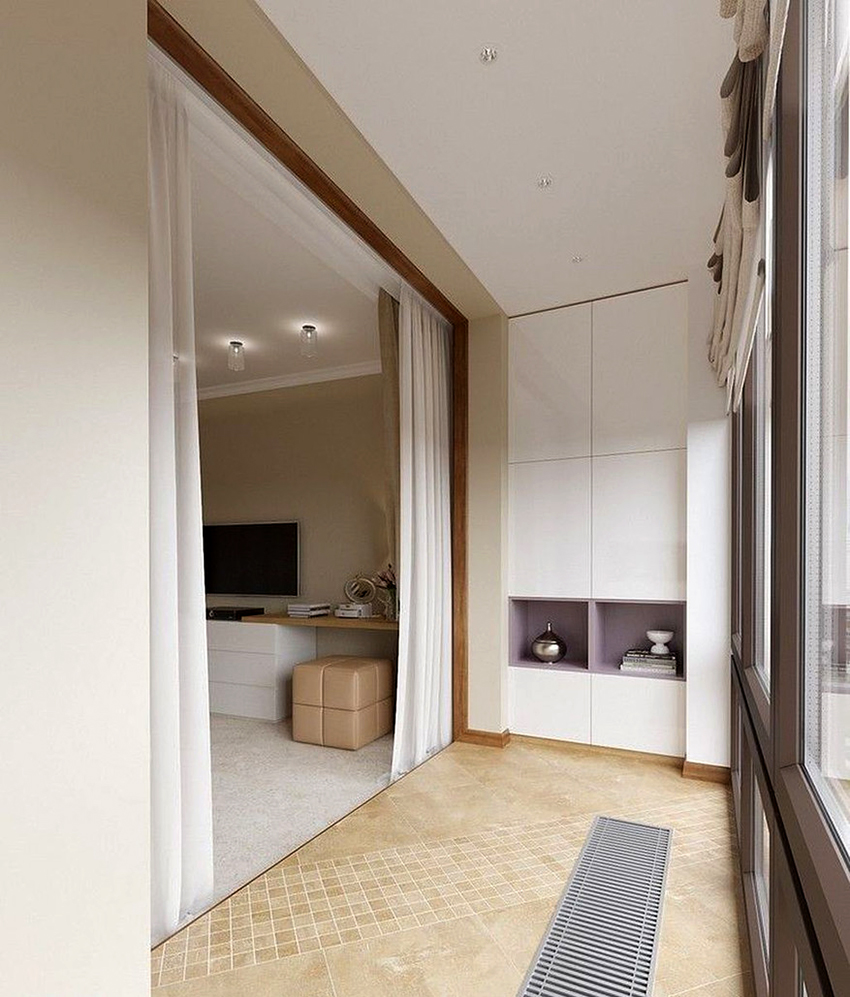
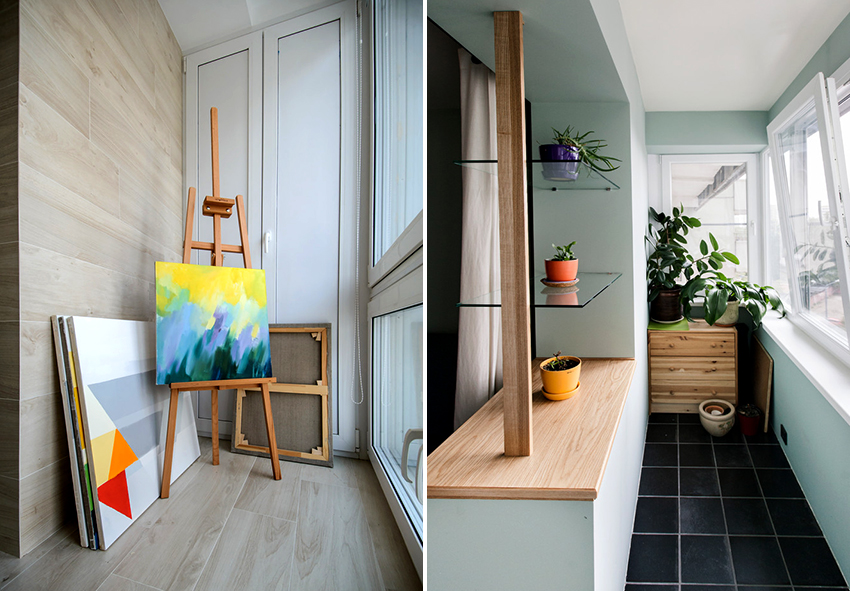
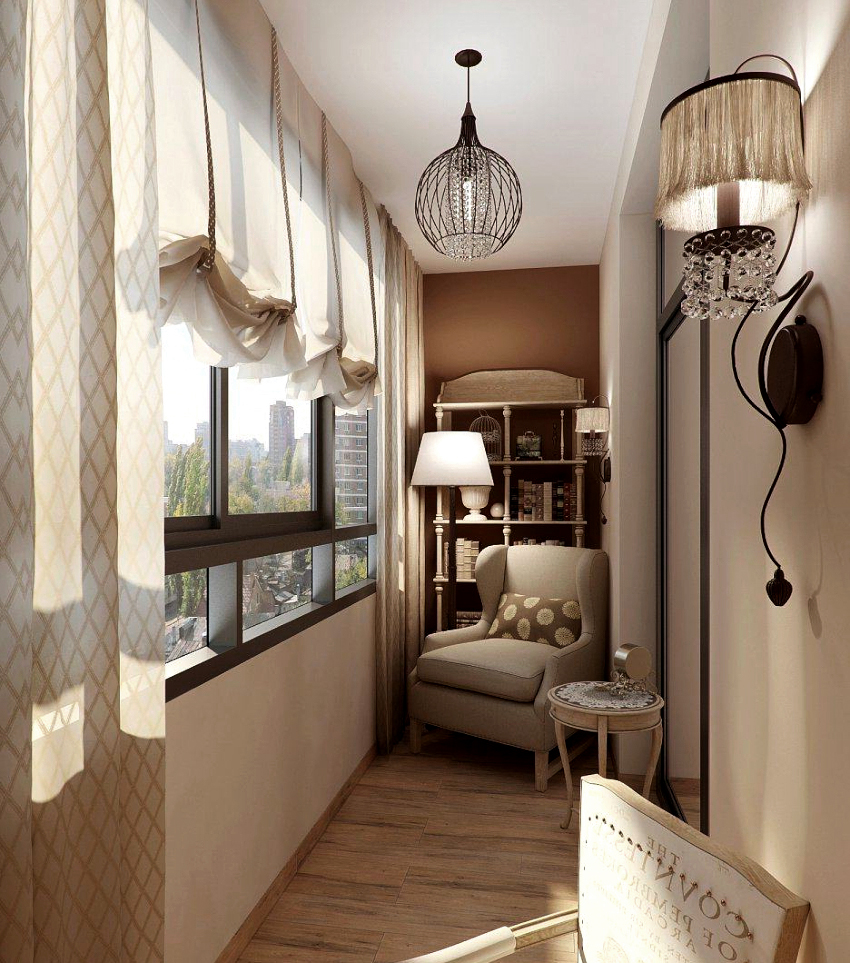
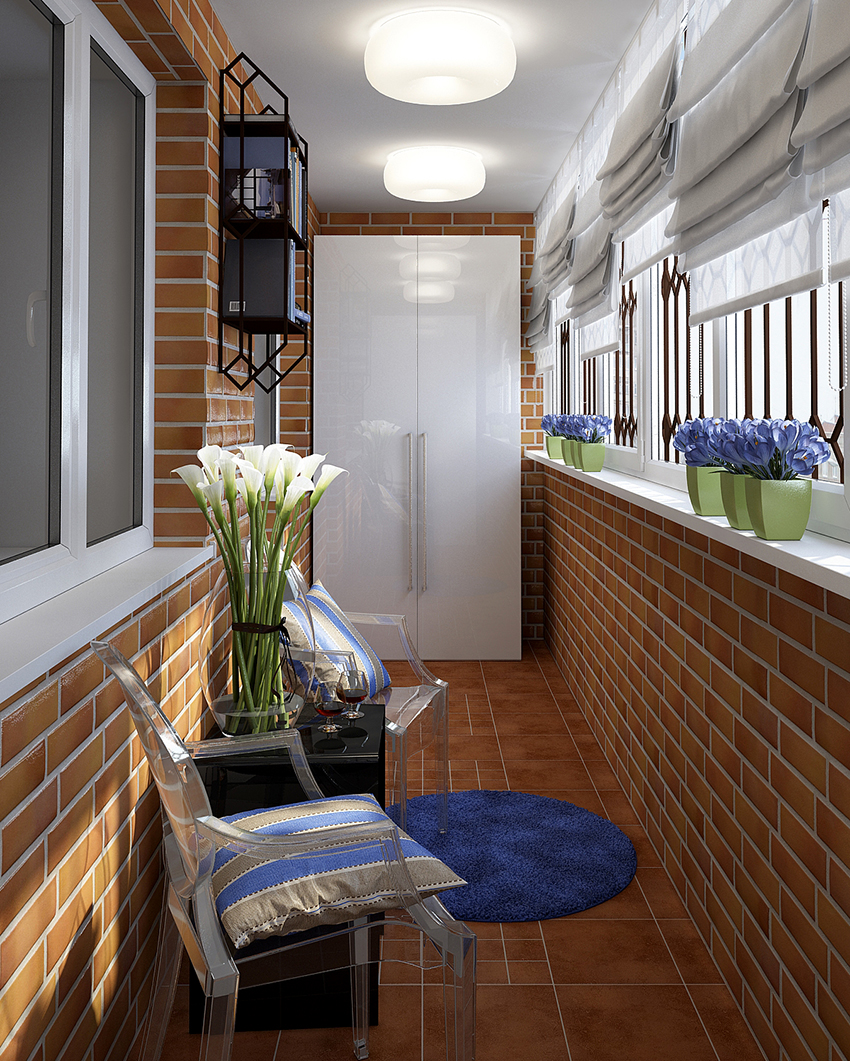
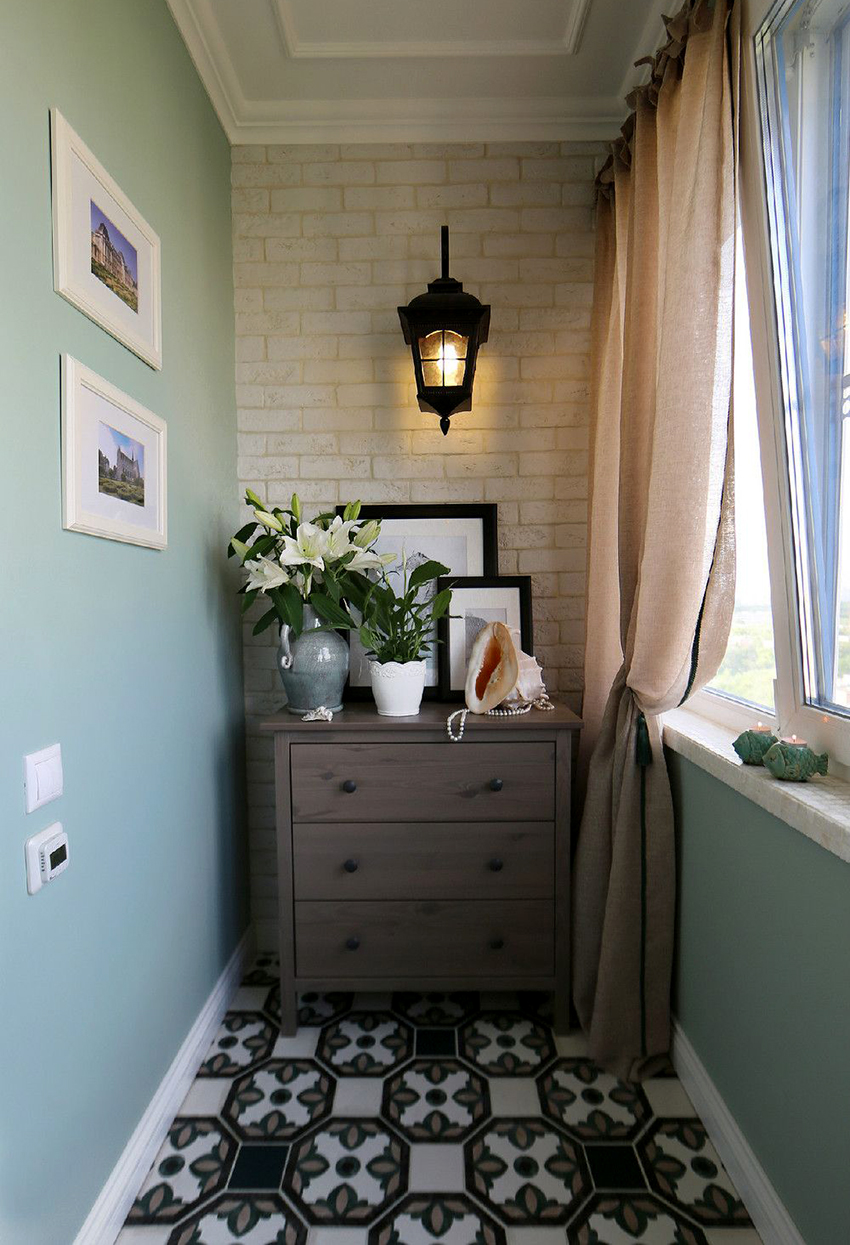
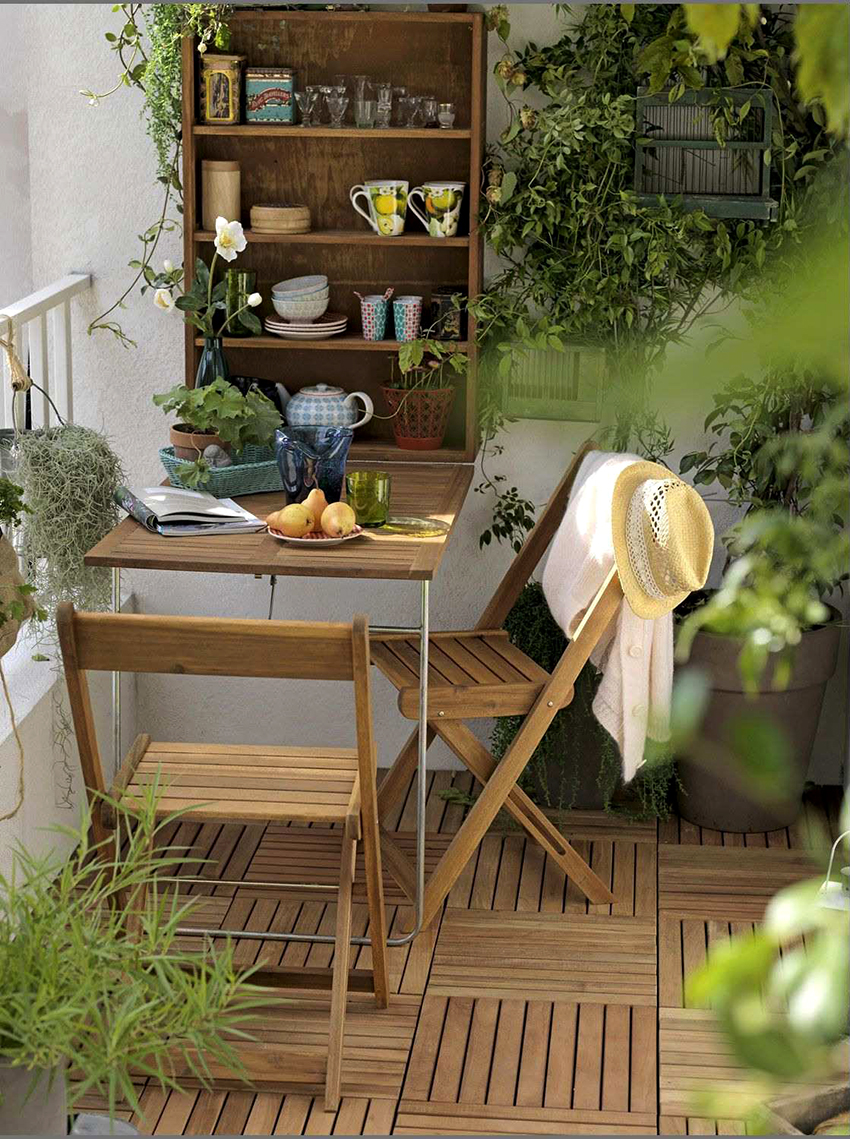
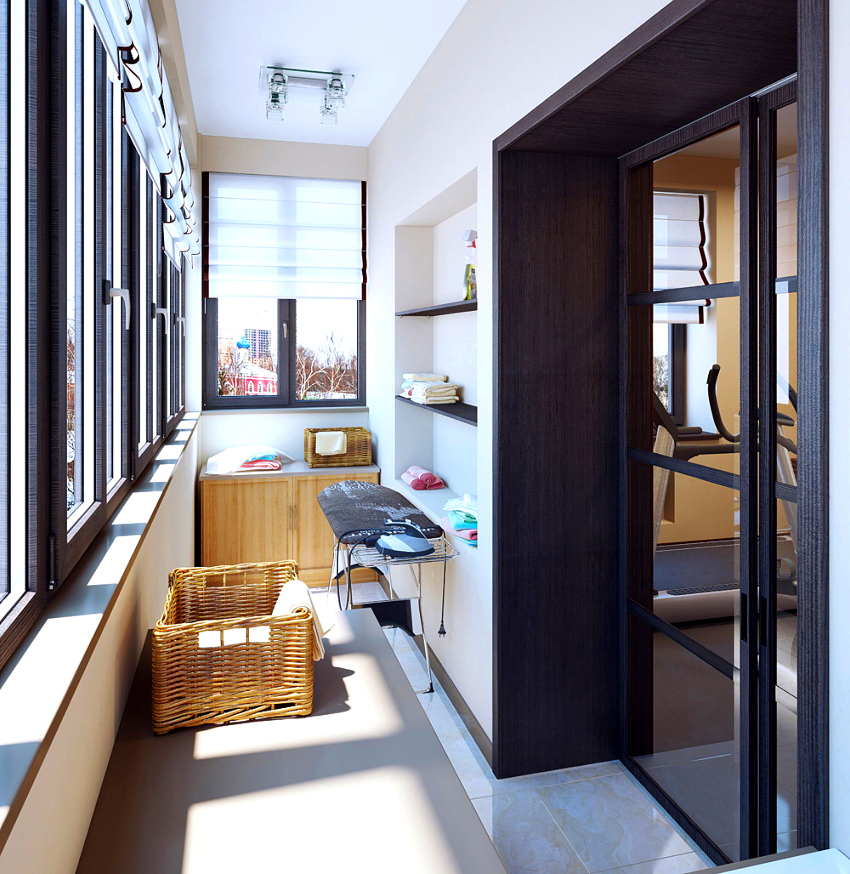
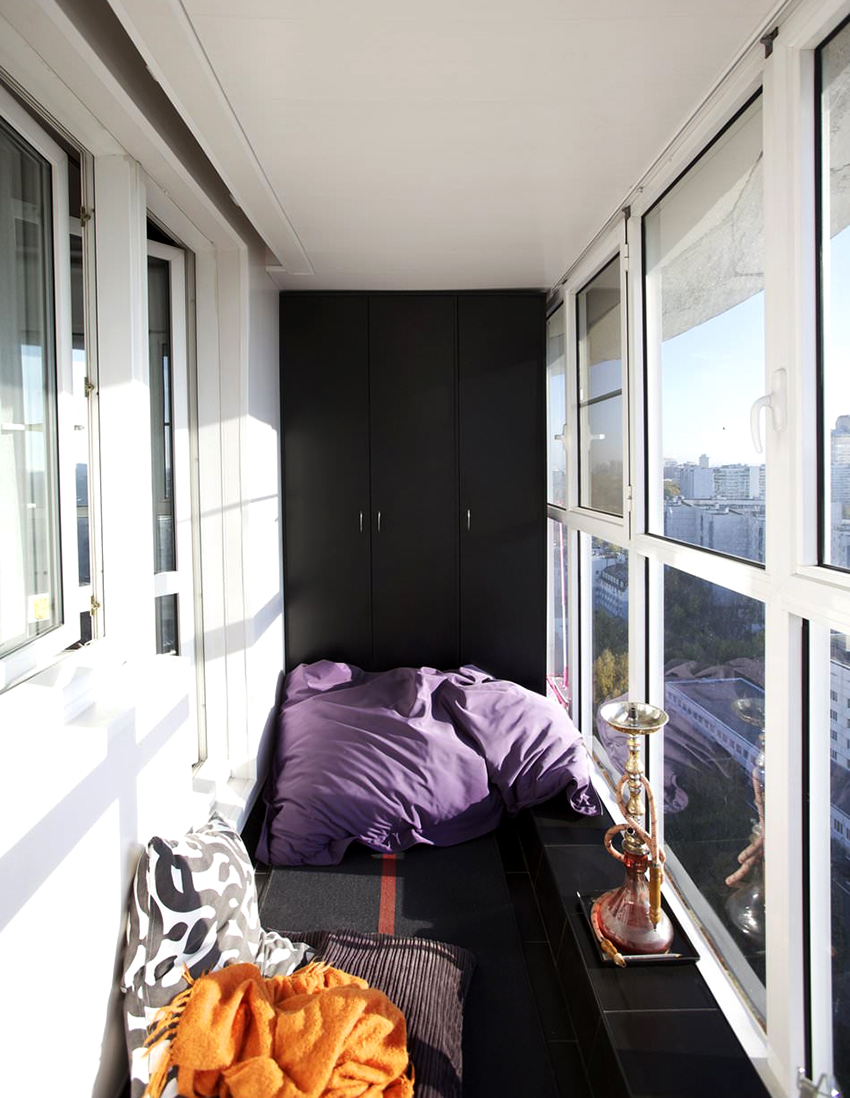
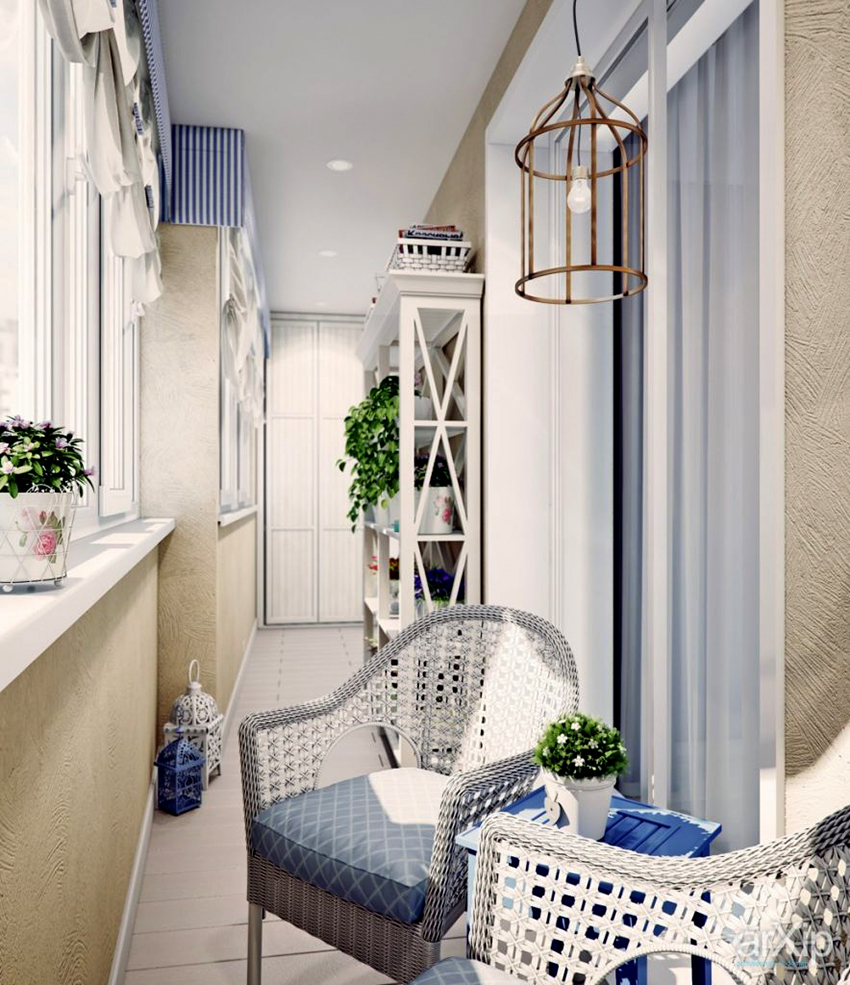
If you don't want to fill the space with a large wardrobe, you can limit yourself to making your own cabinets for the balcony. The optimal solution is to install this type of furniture under one of the window sills, which is increased if necessary. The resulting table top is used either as a work table or for arranging plants. The balcony is full of light, making it an ideal place to grow flowers, and the curbstone will not block any of the windows.

Whatever the cabinet design, the balcony needs insulation to keep the temperature constant
How to determine the optimal cabinet size on the balcony
Before starting work, you should first complete the drawings of the cabinet on the balcony with your own hands in order to approximately calculate the amount of materials, fasteners and other consumables. You can draw a drawing of the cabinet yourself or find a suitable option on the Internet. If you want to do it yourself, it is better to use special programs for this, which make it easy to calculate even minor details and create a structure of optimal dimensions. According to the finished drawing, it will not be difficult to assemble a suitable furniture option.
Related article:
Wardrobe on the balcony: a guarantee of ergonomics and functionality in the room
Product types. Installation options. Materials for the manufacture of the cabinet. Recommendations for the choice of design. DIY wardrobe.
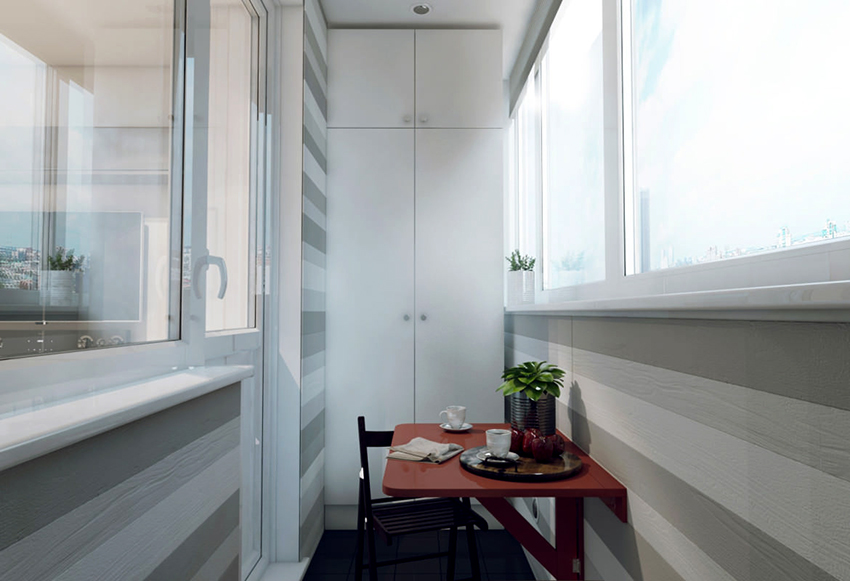
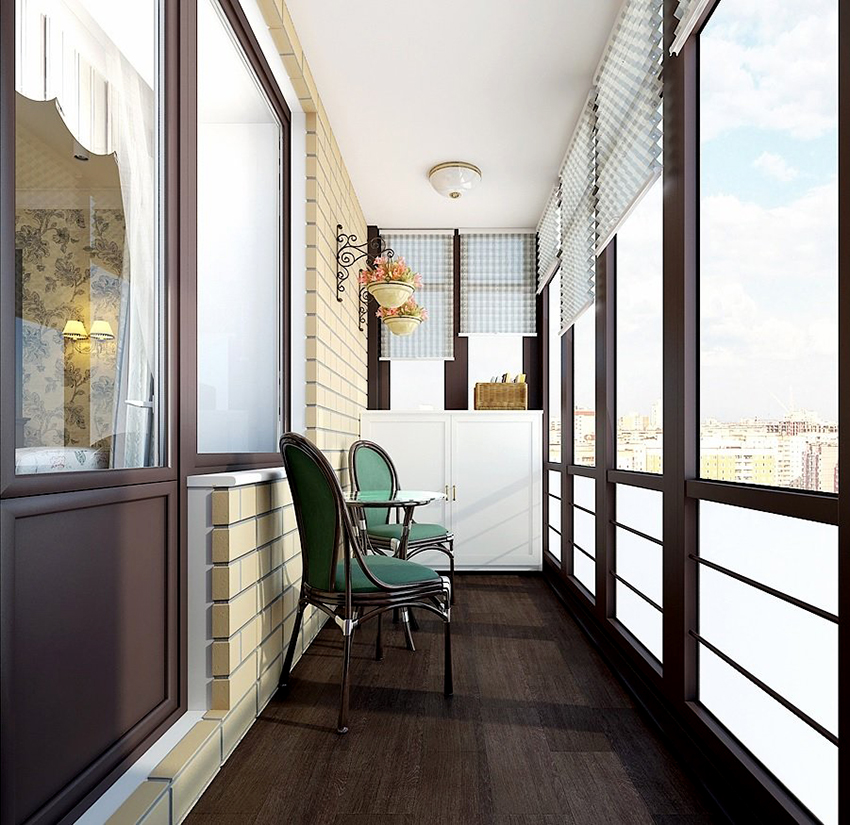
If we consider the layout of the cabinet, the optimal height is 2.5 meters, but in general this parameter depends on the height of the ceilings on the balcony. It is recommended to choose a lower cabinet when the balcony is completely filled with windows and you do not want to close up or block the opening. In this case, it is best to make shelves whose height reaches the window sill and does not block access to the windows.
Useful advice! When drawing up a diagram on your own, it is recommended to immediately make it as specific as possible, so that after combining all the details, you get a holistic version of the furniture. Using a detailed drawing, even a novice master can make a cabinet on his own.
The optimal width parameter is 120-150 cm, but this indicator is also determined by the dimensions of the balcony or niche in which it is planned to be installed. As for the depth, it is most convenient to use a closet, the depth of which does not exceed 45-60 cm, otherwise it will be difficult and inconvenient to get things from the far part. It is best to leave 35-40 cm between the shelves. These parameters are considered universal, but everyone can adjust them for himself based on the characteristics of the room and the purpose of the structure.
Which is better to install the cabinet on the balcony: plastic or wooden
It is better to purchase the material for the manufacture of the cabinet after the balcony is fully equipped, and the facades are selected depending on the general design style. In this case, it will be possible to create a holistic space and a single interior. For example, if the balcony is sheathed with clapboard, it is also better to make the facades plastic.
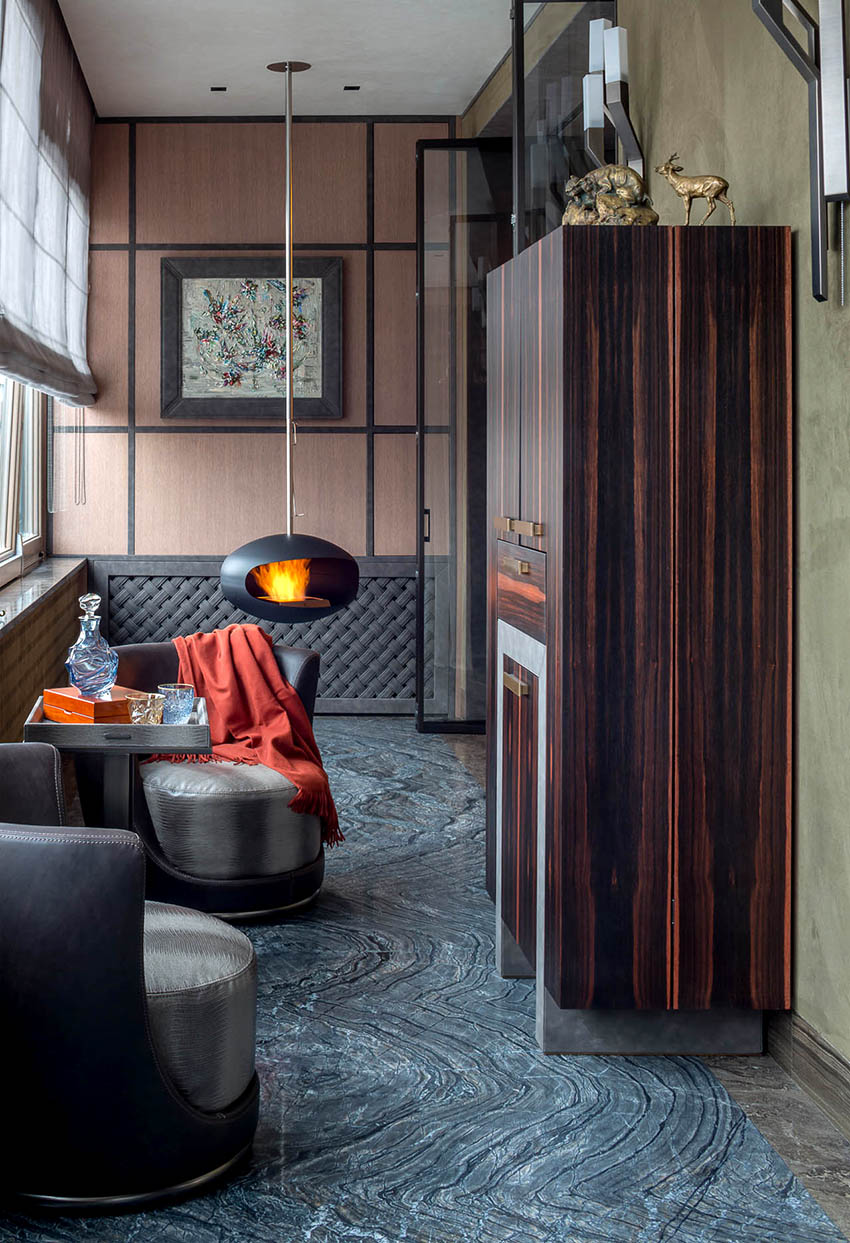
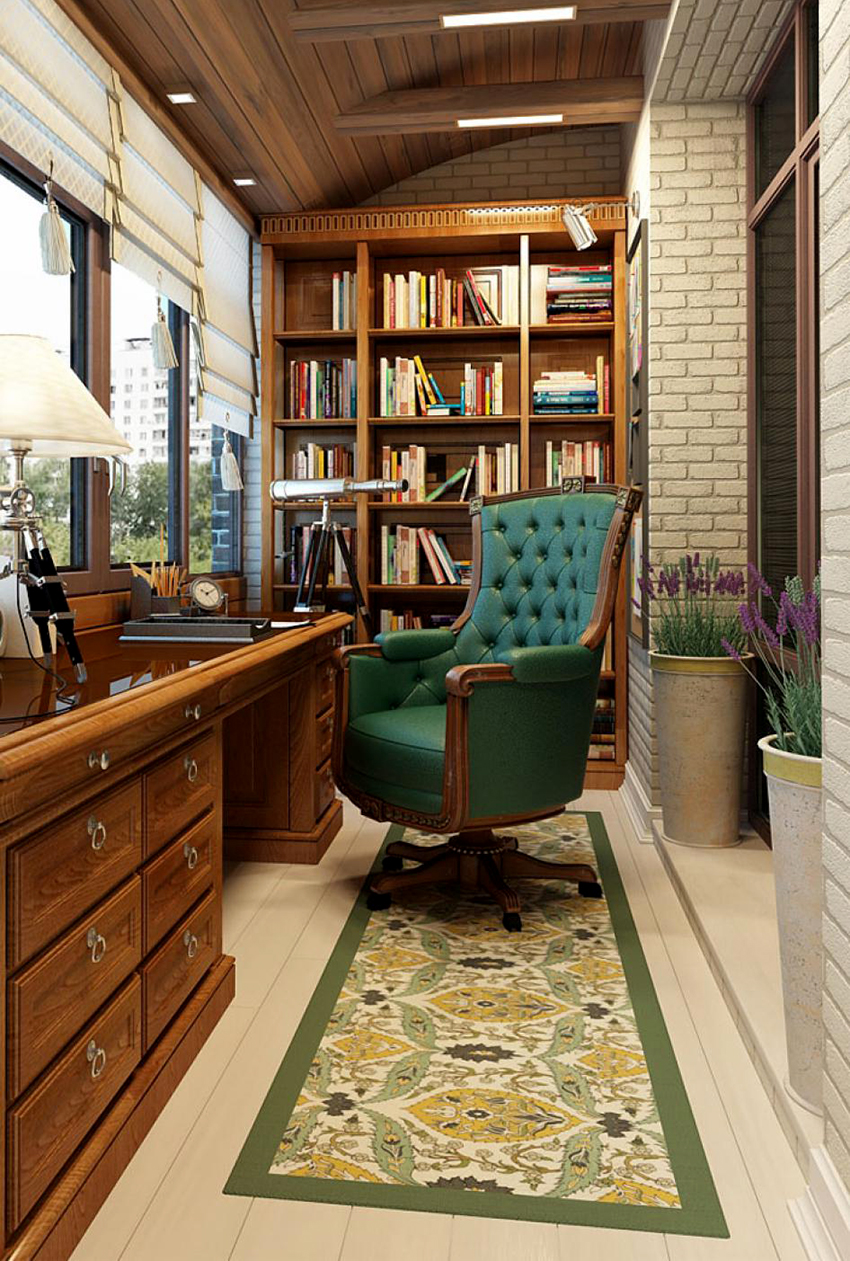
A wooden cabinet always looks expensive and attractive, but it should be borne in mind that all solid wood parts must undergo special treatment against pests and be covered with fire-fighting agents. It should also be taken into account that wood is a whimsical material that does not like too dry or humid air. Nevertheless, a do-it-yourself wooden cabinet will be reliable and will last for a long time.

The wooden cabinet not only looks expensive and attractive, but is also distinguished by its reliability
A plastic wardrobe for a balcony will cost several times cheaper, because the material itself is not as expensive as wood. But if wood can be used both for creating a facade and for making body parts, then plastic is recommended only for cladding. If you make plastic shelves, they will not be able to withstand heavy loads. The main advantage of clapboard cabinetry is the ability to choose any color and facade design, which will competently complement the interior of the balcony.
Useful advice! The disadvantage of a lining cabinet is that the material fade very quickly in the sun. Therefore, if there are a large number of windows in the room, you need to take care that the facades are closed from direct sunlight.
After completing the facades, you need to select the material for the interior equipment and the creation of the frame. Before you make shelves and a frame in the closet, you need to know what you plan to store in it: the heavier the contents, the stronger the material should be.

The optimal material for creating a frame is a wooden beam with a cross section of at least 40x40 mm. If there is no suitable option for the timber, it is allowed to use a metal profile instead, which is subsequently sheathed with panels or any other material that matches the interior of the room. In addition to plastic sheathing, you can choose a wooden lining, the main thing is that its thickness is at least 0.8 cm.
Some owners, in order to reduce the cost of the structure, make cabinets from chipboard with their own hands. You need to understand that chipboard with high humidity or temperature extremes can quickly lose its appearance, and the material does not differ in strength. If you choose for the manufacture of chipboard, you need to take care that all corners are well laminated, because otherwise moisture will penetrate inside and the part can swell and change shape.
Sheets with a thickness of at least 10 mm will last the longest. It is not considered correct to completely make a plywood cabinet with your own hands due to its low strength, but using material to create the back wall will be justified and the cheapest option.
What you need to prepare to make a wardrobe or shelves on the balcony with your own hands
In addition to the choice of material for the frame, you should also worry about the accompanying details that will help create an integral structure.To assemble a reliable frame, you need to use high-quality furniture blanks and fixing elements. You don't have to make fasteners for balcony boxes with your own hands, because there is a large selection of different options in retail outlets. You should also take care of the presence of screws, dowels and nails to secure the elements. Before you make the cabinet yourself, you should purchase the following components:

A screw tie will help to assemble drawers in a quality manner or fix shelves to the side of the cabinet
- Shkant. The detail prevents displacement of the panels and gives the cabinet rigidity. It is not considered an independent part and is used only in conjunction with an eccentric coupler. The dowel is made of natural wood, has a cylindrical shape and low cost.
- Screw tie. A fastener consisting of a screw and a barrel, the main purpose of which is to attract one element to another, for example, to attach a shelf to the side of a cabinet. The main disadvantages of using are the visible screw head on the front side of the wall and the complex installation process.
- Conical coupler. Suitable for fixing thick wood or chipboard panels, unlike the previous version, it does not have a visible head on the front side. Among the disadvantages of such fasteners, there is a small tightening stroke, which means that under heavy loads, over time, the tie will loosen and cease to perform its function.
- Furniture corner. Without this element, making a cabinet with your own hands will not work. It is important that you do not need to make additional holes in the panels to install such fasteners. Metal or plastic corners are installed on the shelves, depending on the load. The disadvantages include only a not very aesthetic appearance of the part.
- Euro screw. Inexpensive fasteners used to reduce the cost of construction. To install the screw, a hole must be pre-drilled. The downside is that the hats will remain on the outside of the side of the cabinet.
- Eccentric. The most popular type of fasteners for assembling cabinets and drawers on the balcony with your own hands. Joint installation with a dowel allows you to endow the furniture with strength (due to the strengthening of all nodes). On the side, it can be easily closed with a plug that matches the color of the facade.

Before you make a cabinet with your own hands, you need to prepare the necessary tools and accessories
If you plan to install doors and drawers, you need to determine the principle of opening and select high-quality systems. To carry out the assembly, you will need the following tools:
- jigsaw;
- drill;
- screwdriver and screwdriver;
- hacksaw with different teeth;
- hexagon;
- Sander;
- chisel;
- building level and plumb line;
- tape measure, pencil and ruler.
Useful advice! In order not to spoil the materials, you should not rush to change the size of any part. If it was decided to reduce the size of the shelf or other part, it is better to re-measure everything several times.
Do-it-yourself wardrobe on the balcony: step-by-step photo of the actions performed
Do-it-yourself wardrobe for a loggia or balcony should be done after preliminary insulation and wall cladding. Therefore, it is recommended to determine the location of the cabinet even at the stage of repair, so that nothing interferes with the reliable fastening of the side parts to the walls.

A frame is formed from the prepared wooden beam, then horizontal crossbars are installed and the shelves are fixed
The easiest way to manufacture is the method of fixing internal parts on a common frame. Work begins with the execution of markings on the walls based on a previously thought out design drawing. The lower boundary of the cabinet is outlined in accordance with the upper markings using a plumb line. This action must be carried out to ensure a level base to prevent skewing of all furniture.
The top and bottom boundaries are connected by vertical lines drawn on the walls using a building level. After marking the boundaries of the frame, horizontal lines are drawn to determine the location of the cross parts. To keep the shelves level, they should also be fastened with a level.
Important! The reliability of the cabinet installation and the appearance of the furniture depend on the correct installation of the frame. Therefore, marking must be done carefully.
Further, using a drawing of the cabinet prepared by yourself for the balcony, they begin to form a frame. If a wooden beam was chosen for its manufacture, the elements are adjusted to the required dimensions using an electric jigsaw, and the base from a metal profile is cut using sharp metal scissors. After preparing the parts, the ceiling and floor parts of the cabinet are fixed, which are connected by vertically arranged racks. Fastening to the wall with self-tapping screws, and the recommended step between them is 35-40 cm, but not more than 50 cm.

The appearance of the cabinet and its reliability depend on the correct installation of the frame
In the next step, intermediate horizontal crossbars are installed along pre-marked lines, which will then be used to lay and fix the shelves. Horizontal fixings also increase the overall rigidity of the cabinet. The crossbars are mounted using self-tapping screws and corners, which are attached to the bottom of the horizontal crossbars.
If a beam or profile of the required length is not available to fill the entire height of the wall, several short sections can be used, fixed to each other. In such a situation, the vertical and horizontal parts must be installed at the same time. It should be borne in mind that this assembly method is only suitable if the structure frame is attached to the wall.
Instructions for fixing shelves and other cabinet elements
The shelves of the cabinet can be made of a solid sheet of plywood, chipboard or MDF, the thickness of which is at least 12 mm, and for this purpose solid boards, laid flush and screwed to the timber, will also work. In any case, the edges of the parts should be well processed with a fraser or grinder.
Useful advice! Using plywood or chipboard for interior decoration will help to reduce the weight of the assembled structure, because the mass of solid wood is much greater than the weight of other materials.

Walls and shelves of the cabinet on the balcony, fastened together using furniture corners
If the walls and shelves of the cabinet are made of chipboard sheets, then they are fastened together with the help of furniture corners. The fasteners are also used to attach the shelves to the frame. When planning a chipboard cabinet, you can calculate the required size, number of parts and order their manufacture in retail establishments that sell components for creating cabinet furniture.
In this case, all parts will differ in the correct cut, and most importantly, reliable edging is performed at the factory, which protects the inside of the sheet from moisture penetration. At home, it will not work well to process the edges.
It is better to do the doors for the cabinet after assembly, taking into account the size of the opening and having completed the markings for installing the hinges. When planning a swing cabinet of two doors, their size is adjusted at the same time so that they do not rub in when opened. Doors in the form of blinds look beautiful, as well as structures assembled from boards installed vertically or horizontally.

If chipboard was chosen for the manufacture of the cabinet with your own hands, the doors are hung using furniture hinges with a round groove
In this case, a wooden lining with a width of 5-6 cm is used. A self-made cabinet made of lining on the balcony will look appropriate when the whole room is decorated in a similar style. The advantages of plastic doors are:
- a light weight;
- no need to make a massive frame from a bar.
Another popular door design option is tongue-and-groove boards or lining. The parts are assembled with glue and tightened with a clamp until completely dry. For greater reliability, the finished shield is reinforced with jumpers installed on the inside across the glued lining. It is important to ensure that the jumpers do not rest against already installed shelves.
For the installation of doors, butterfly hinges are most often used, which, with the help of a chisel, are deepened into the base for the entire thickness of the plate. This is done so that there is no large gap left between the opening and the door, and also so that one part does not rub against the other.

The last step in assembling the cabinet on the balcony is the installation of door handles
If chipboard was chosen for the manufacture of the cabinet, furniture hinges with a round groove are used to install the doors, into which the bowl of the part is then mounted. The hole for the hinge is drilled with a special nozzle installed in a screwdriver or drill. Whatever hinges are chosen, they are fixed to the cabinet walls using self-tapping screws, for which holes of a smaller diameter are pre-prepared.
The last stage of assembly is the installation of door handles. For this, holes are made in the doors, into which a screw will then be inserted, screwed in from the other side.
Some interesting ideas for creating a balcony design using a cabinet
It is possible to properly organize the use of the balcony area for any size and shape of the room, the main thing is to take into account all the features. A built-in monophonic wardrobe with rich interior equipment, which consists of a large number of shelves and drawers, will help to arrange any, even the smallest details.


Useful advice! Do-it-yourself drawings of tool boxes that you plan to add to the cabinet are recommended separately from the general design scheme, but taking into account the size of the frame. Thus, it will be possible not to forget about all, even the smallest elements.
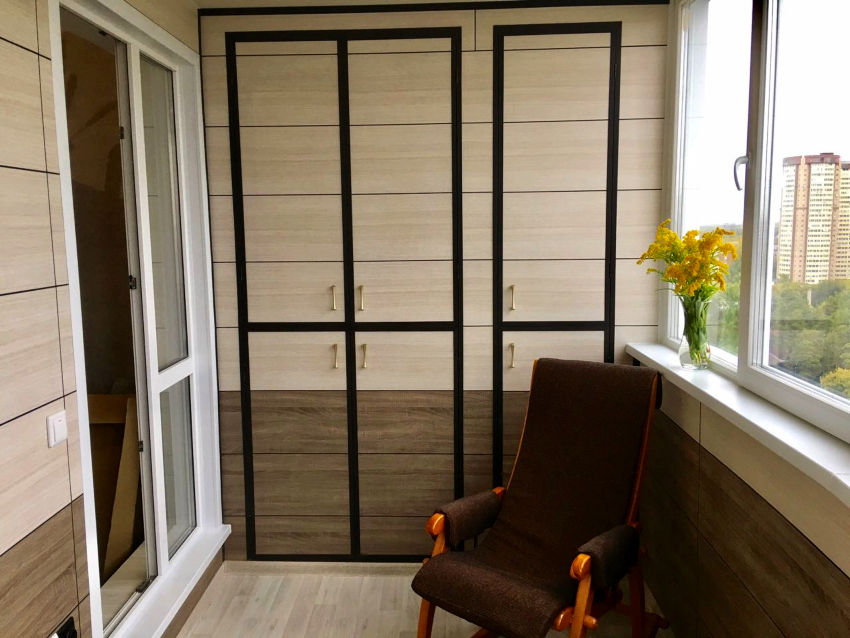
A swing cabinet with two outer doors to the full height of the furniture is also considered convenient, opening which, you can immediately see all the contents. This saves time when checking individual closed elements.
If the balcony is an extension of the kitchen, the doors are complemented with frosted glass inserts that match the design of the kitchen facades. In this case, it will be possible to visually connect two adjacent rooms. Having installed a self-made wardrobe on the balcony equipped with mirrored doors, it will be possible to visually increase the size of the room. The advantages of installing different types of storage on the balcony:

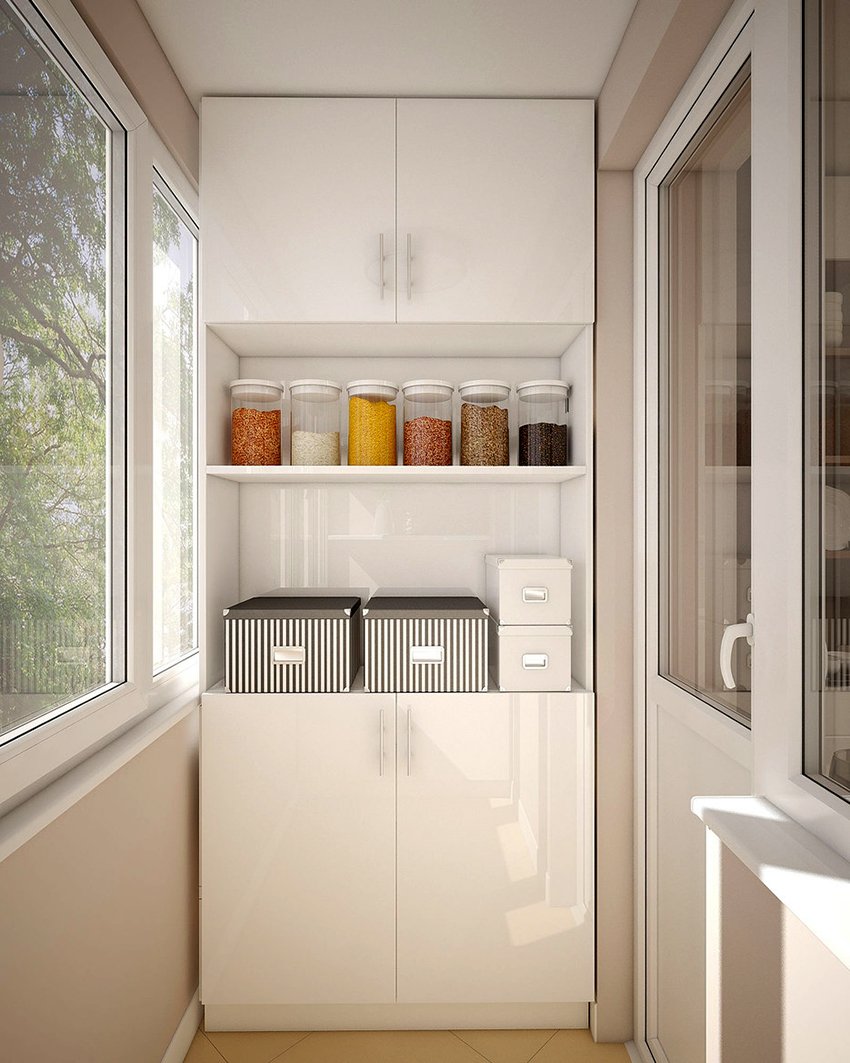
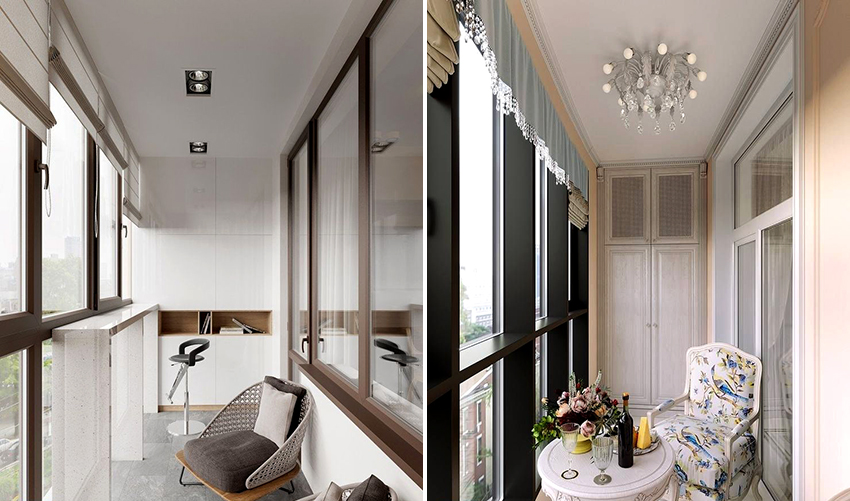
A solid-colored built-in wardrobe with a large number of shelves and drawers will help to hide a lot of unnecessary things
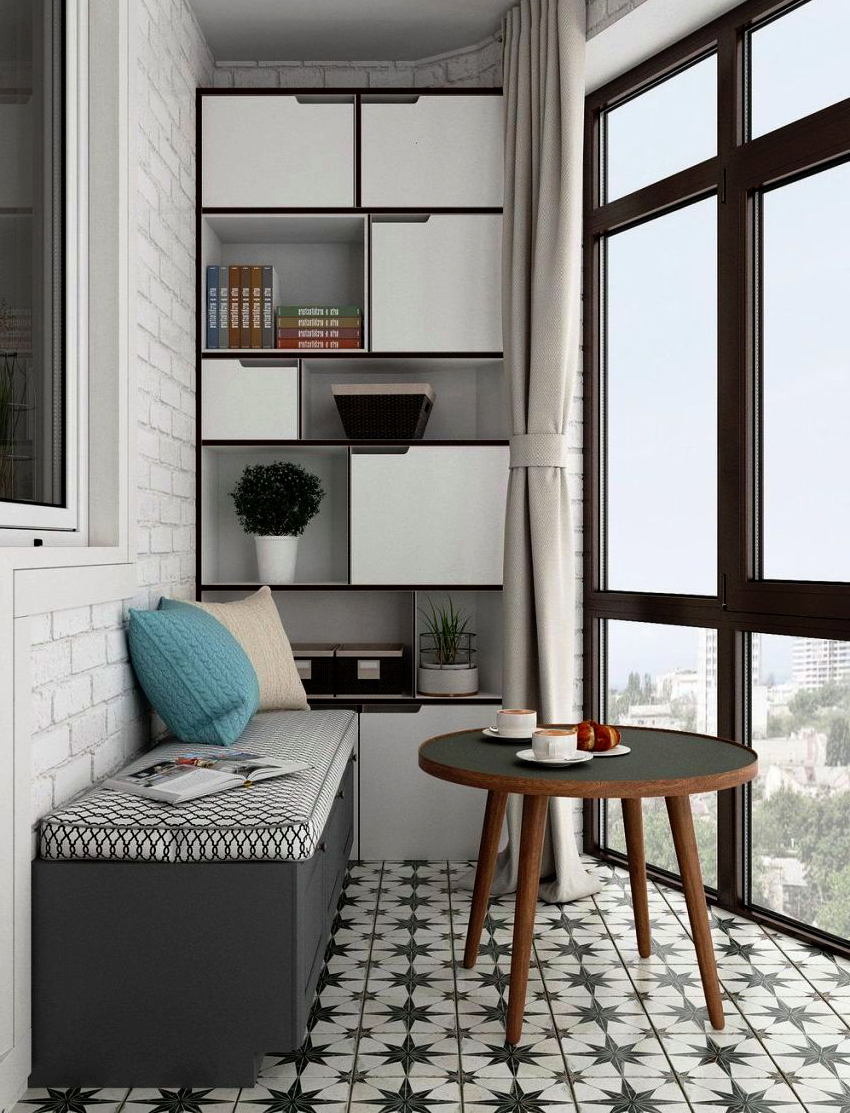
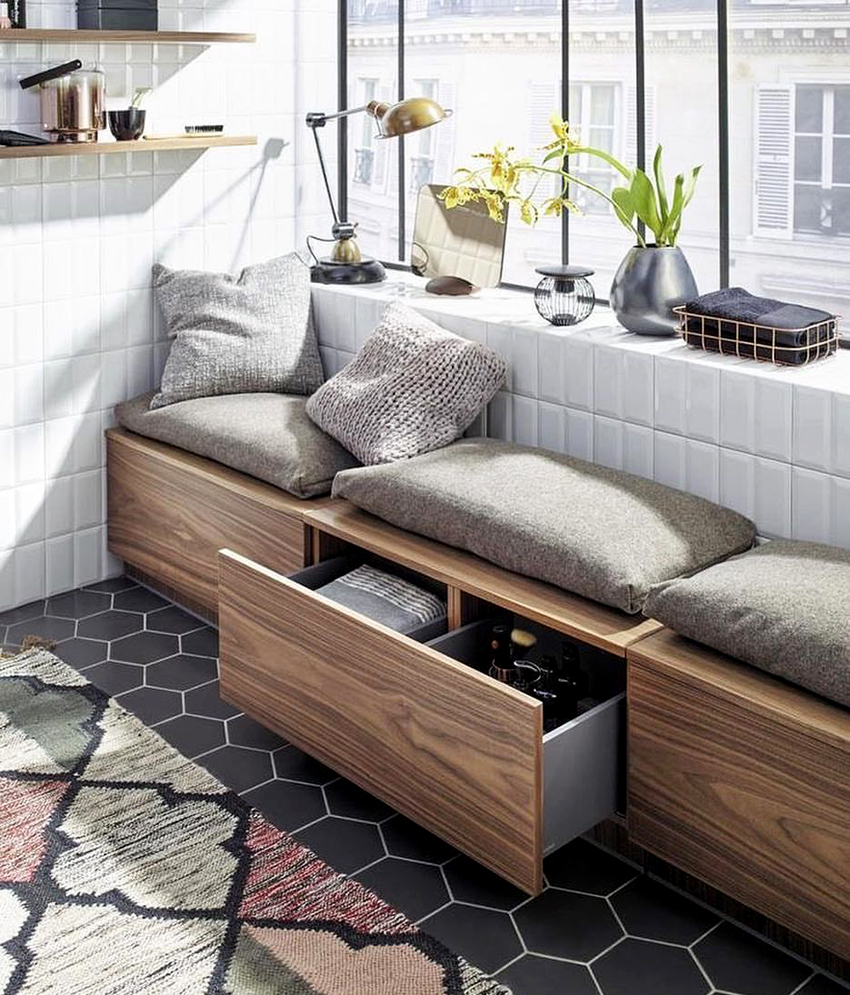
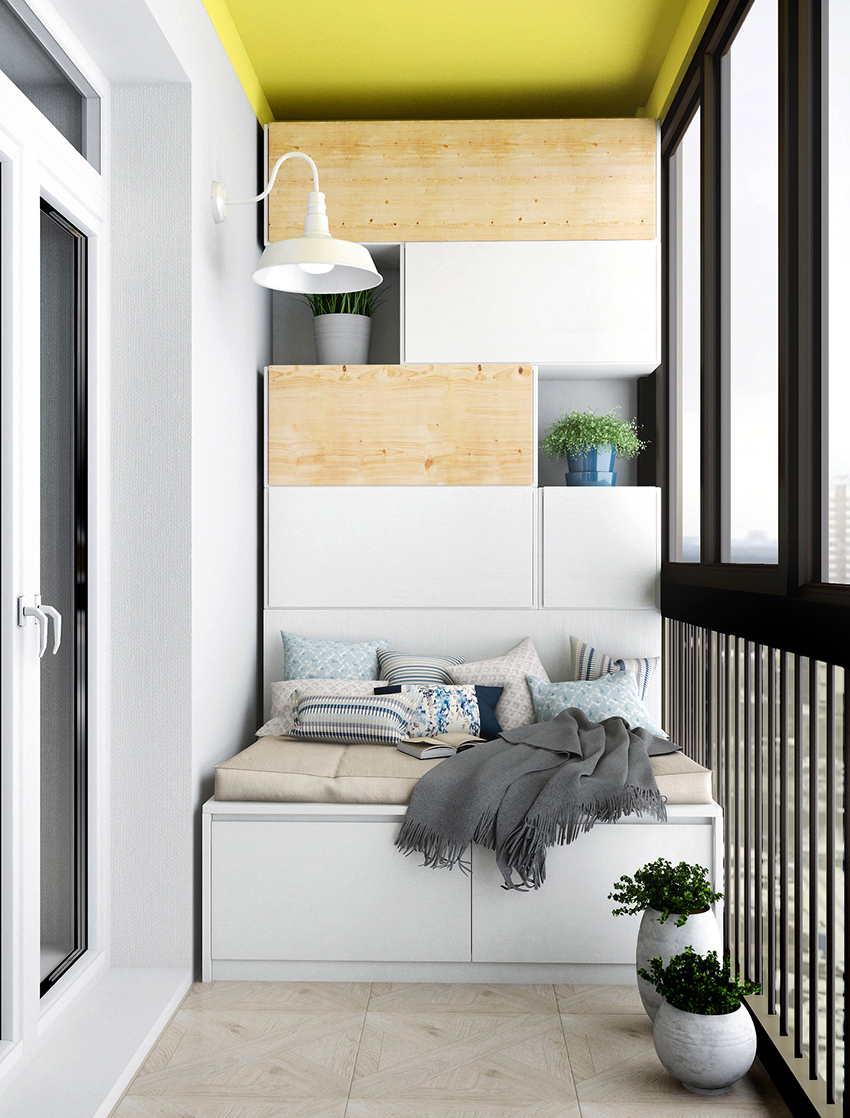
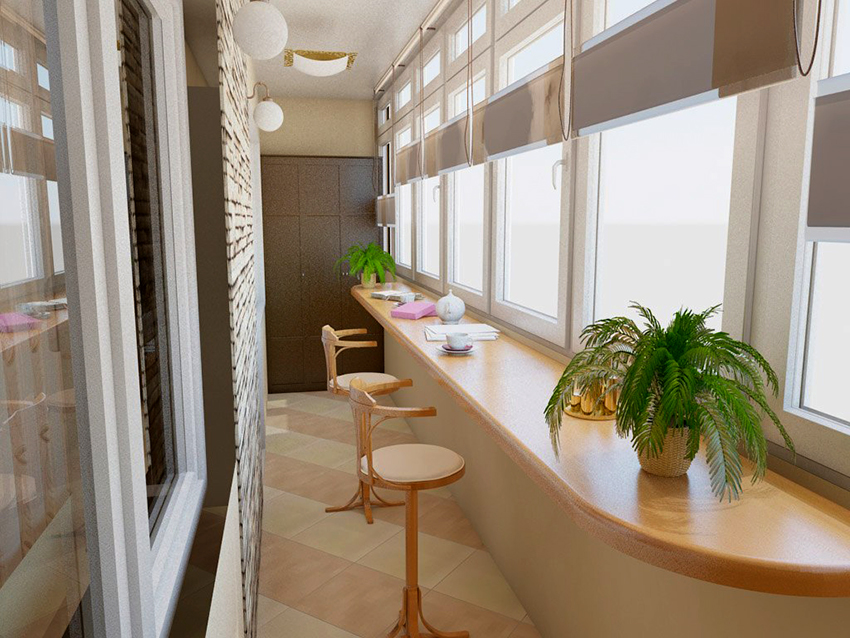
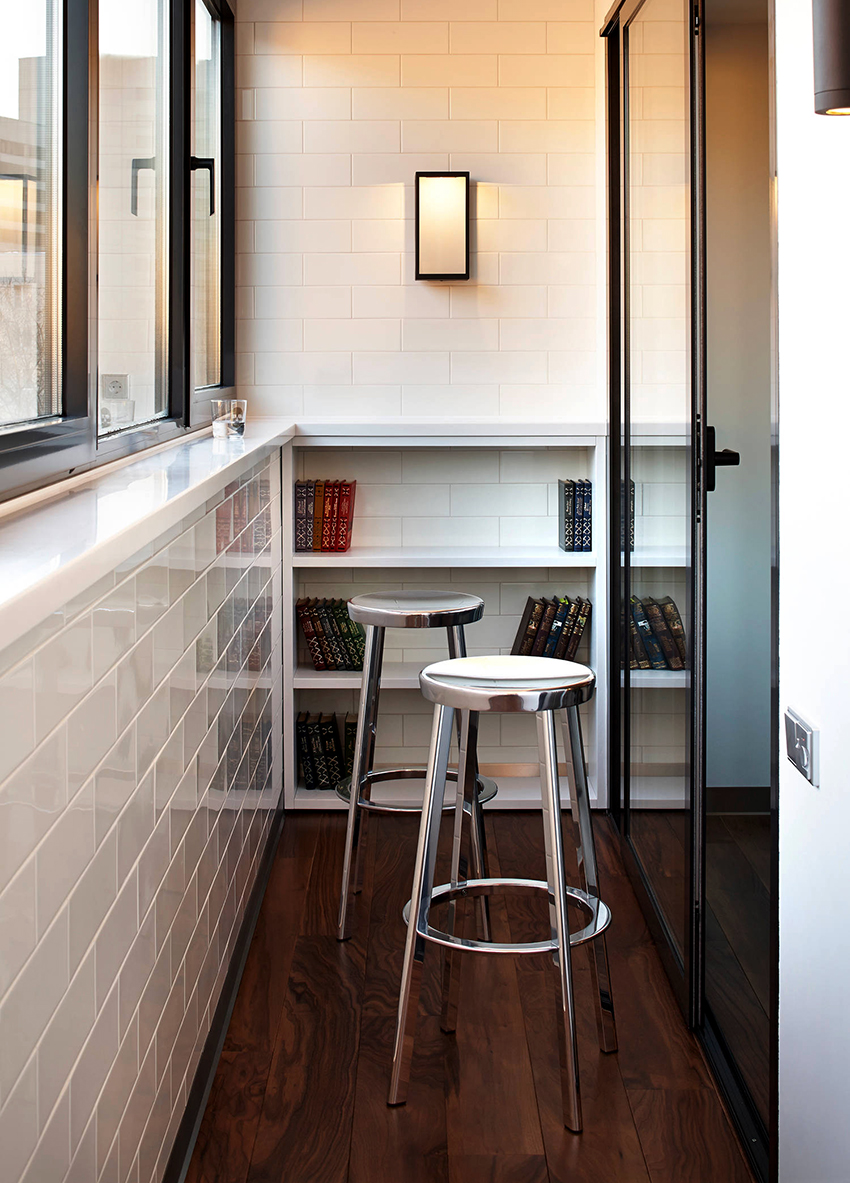
- A spacious bedside table that takes up all the space under the windowsill. Almost invisible, but at the same time very roomy.
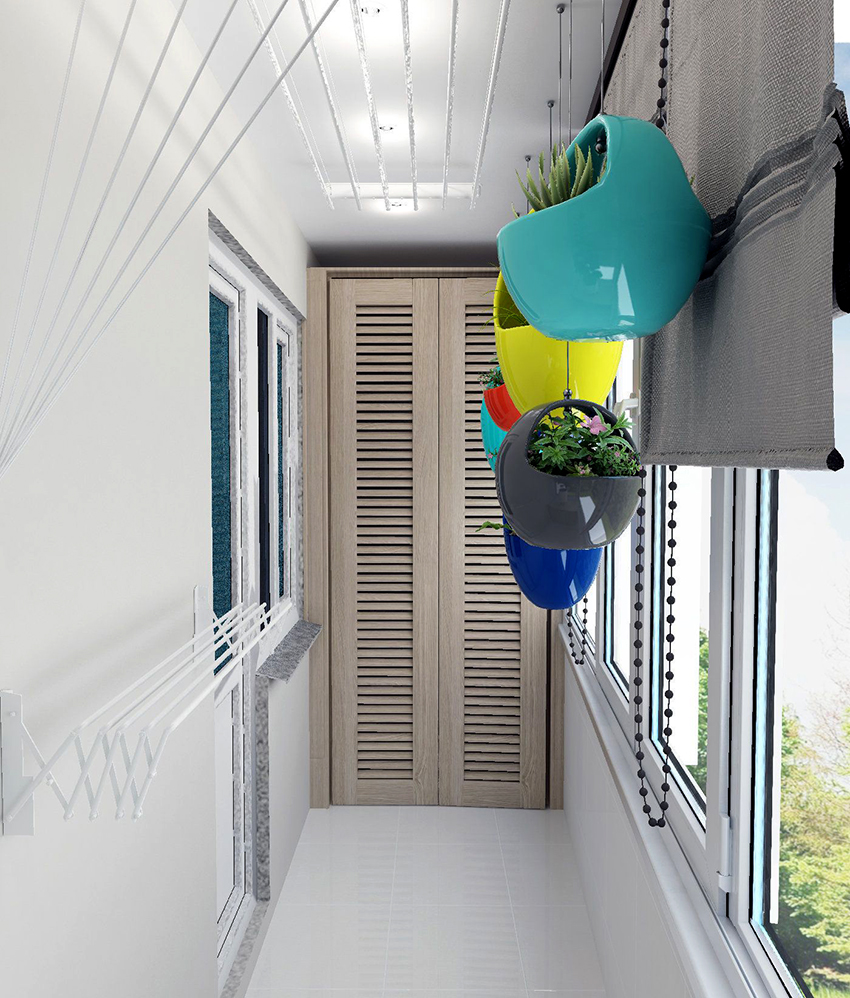
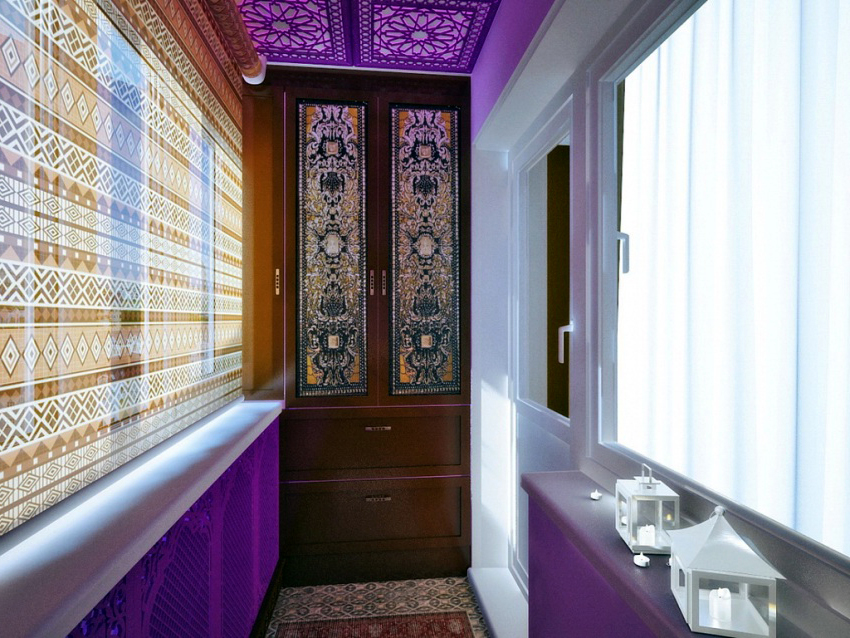
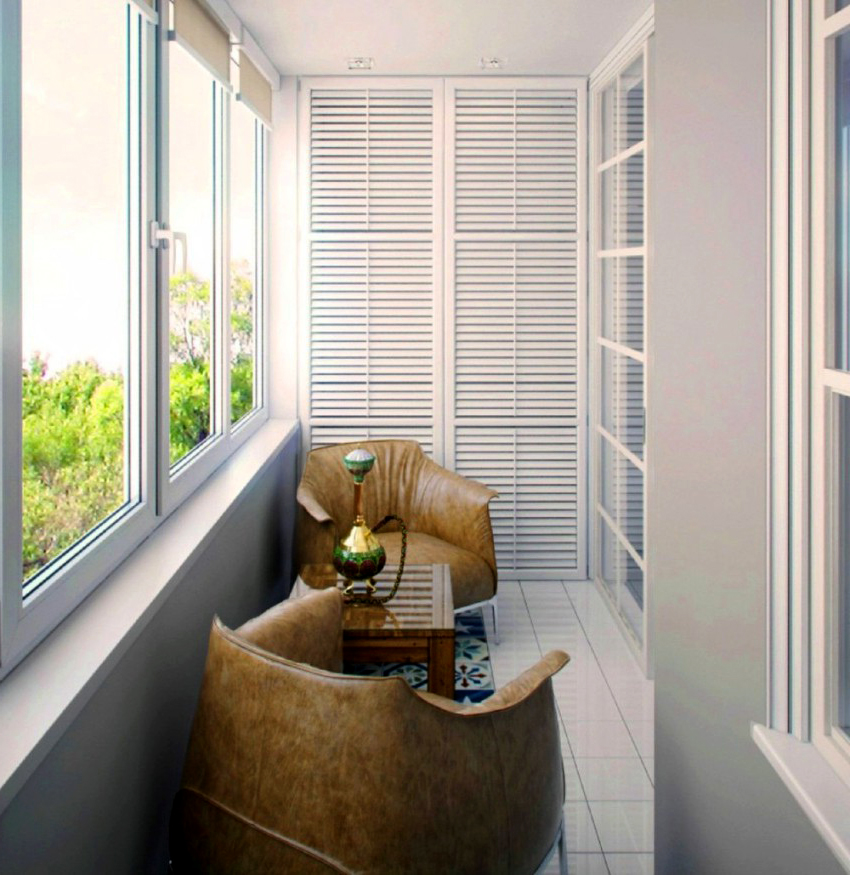
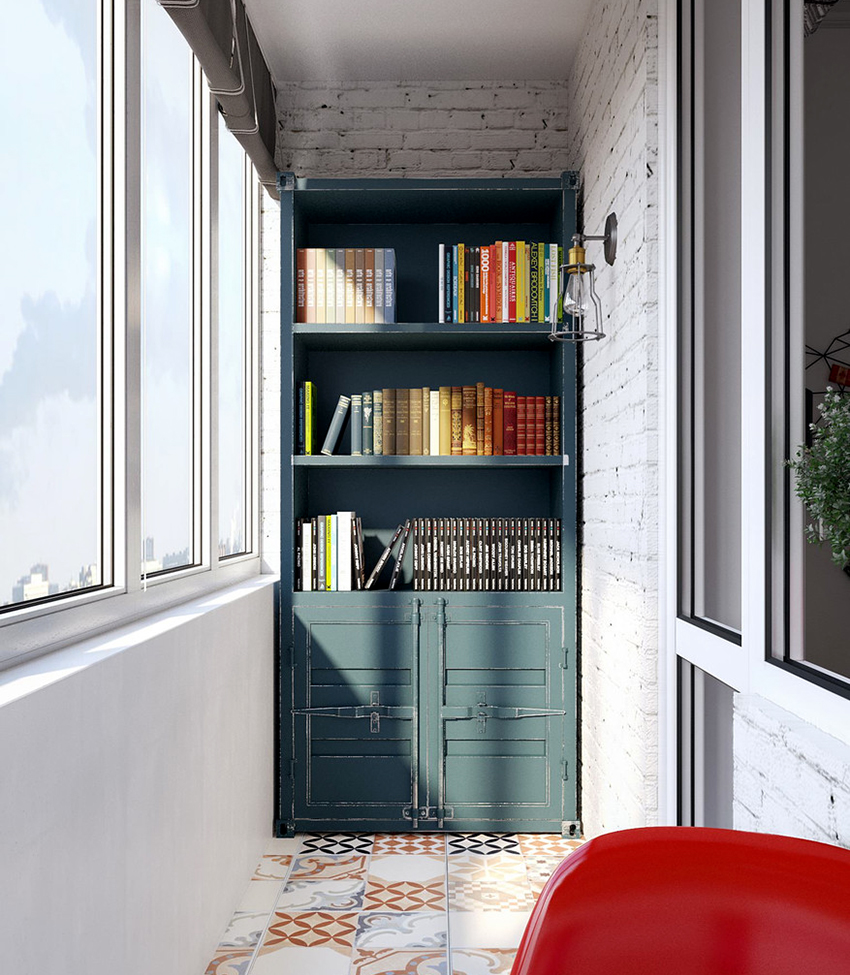
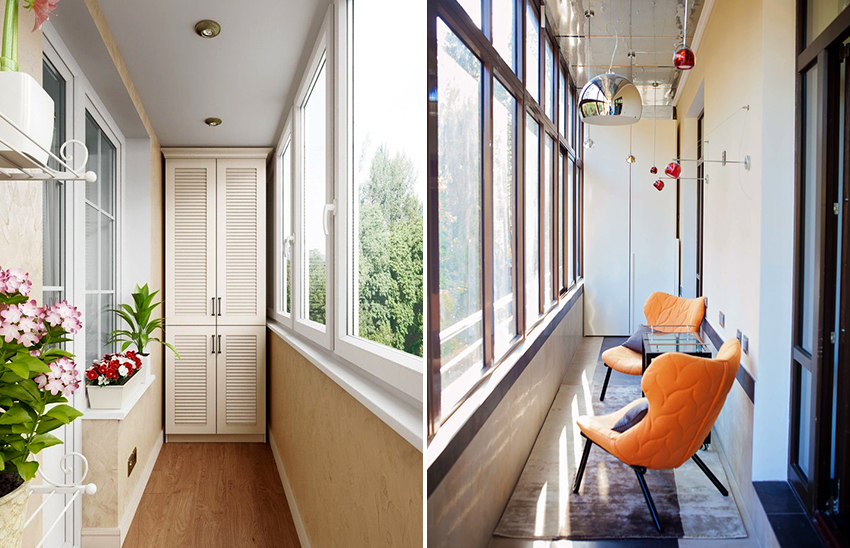
- Cabinet with louvered slatted doors. Not only looks light and aesthetically pleasing, but also allows air to circulate freely inside the cabinet. This prevents moisture build-up, mold and odor formation.
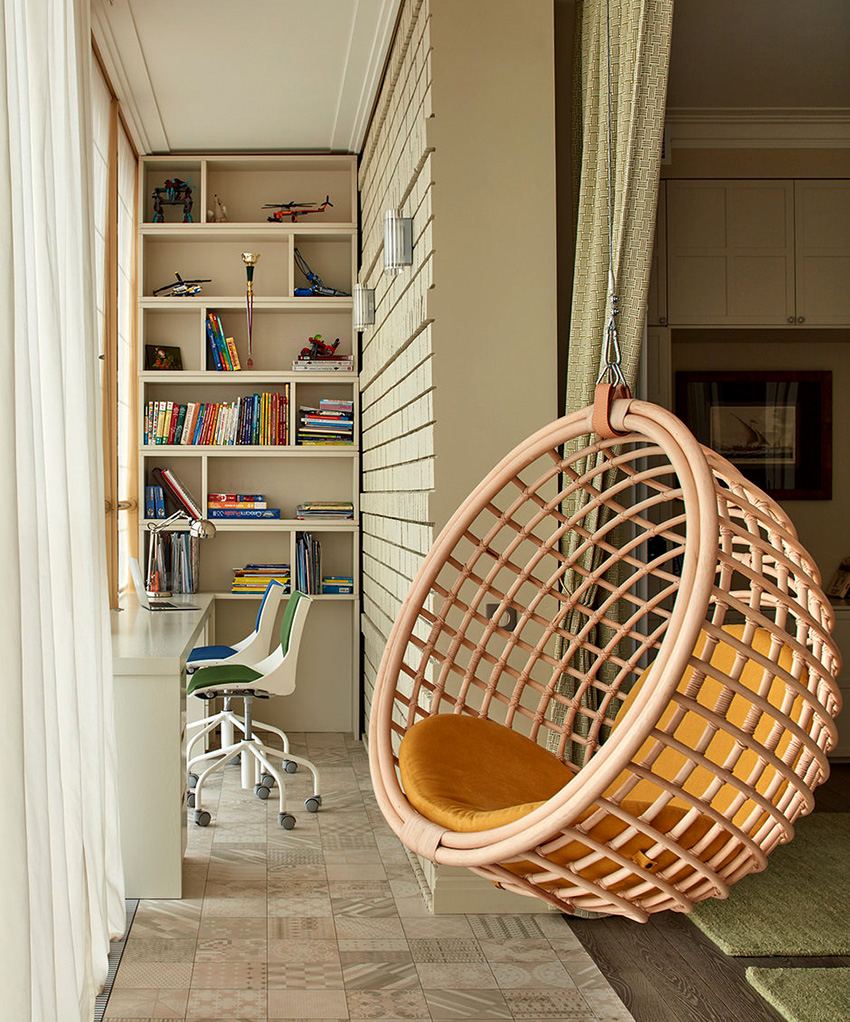
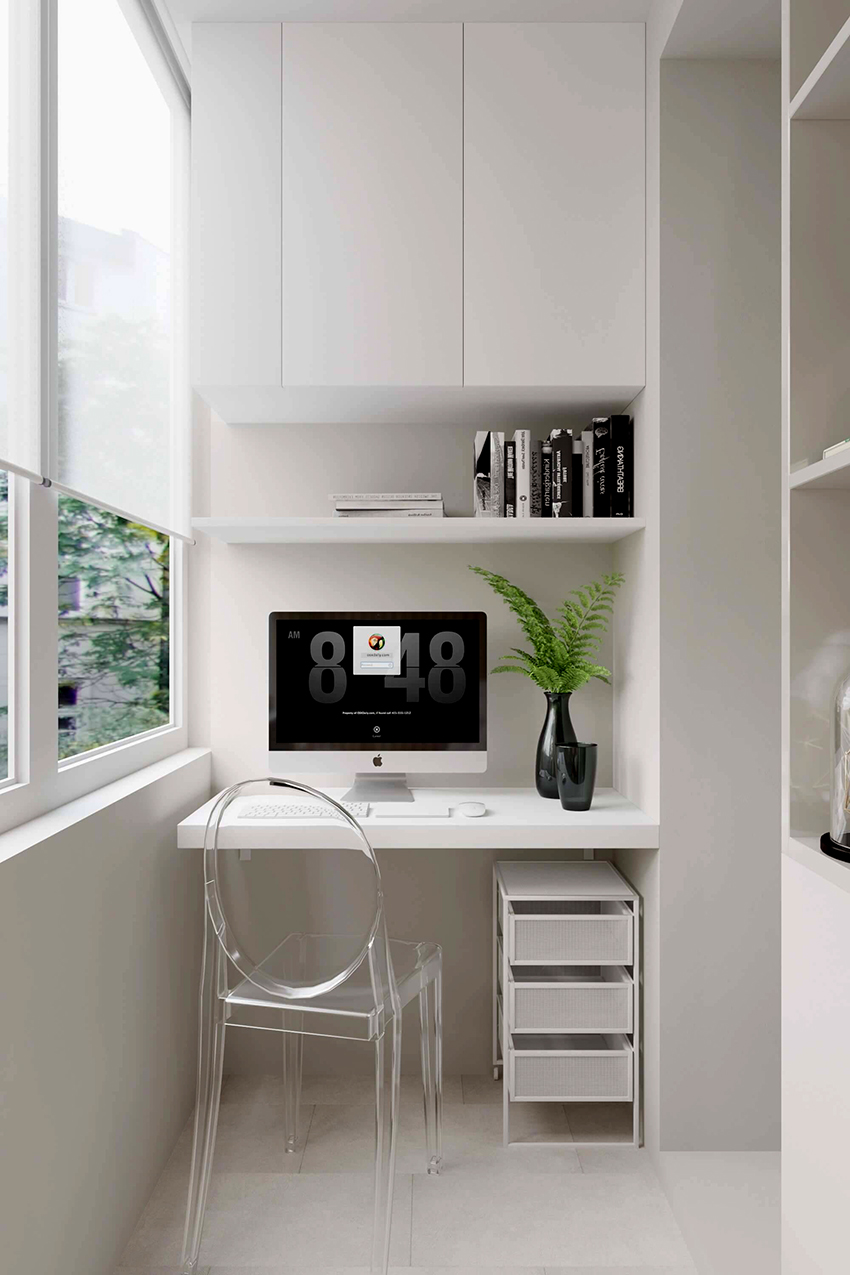
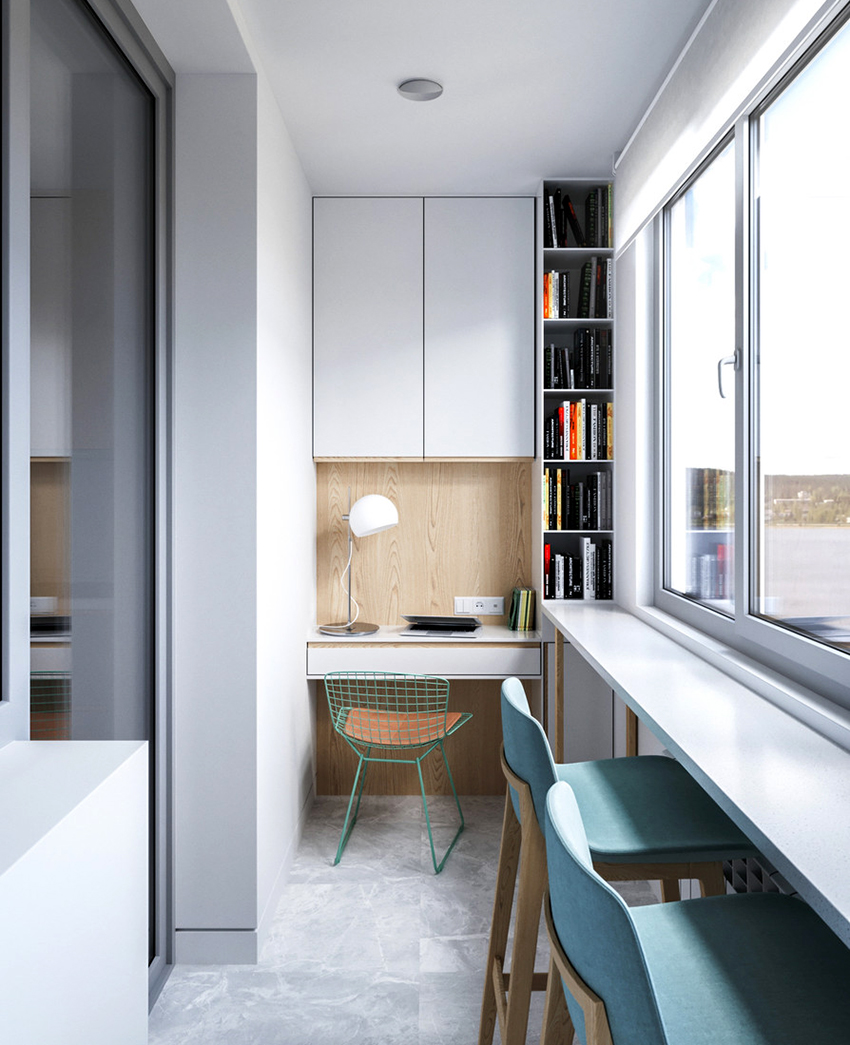
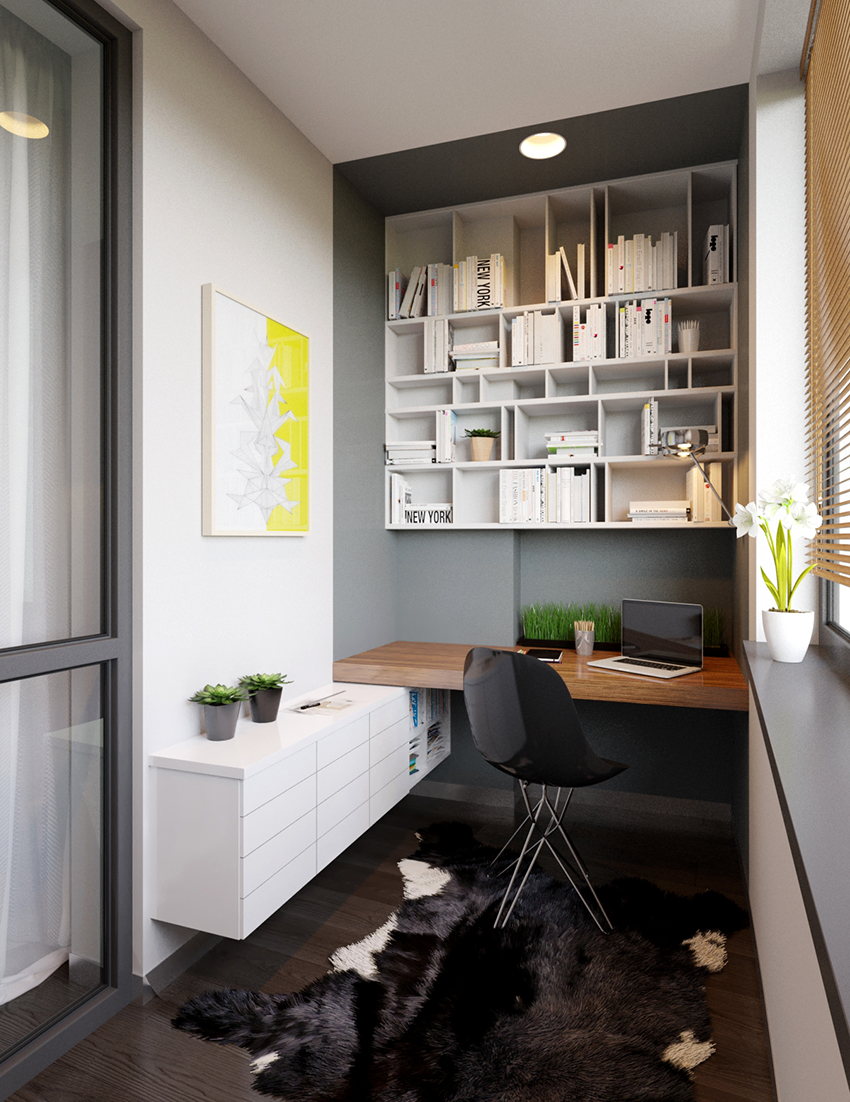
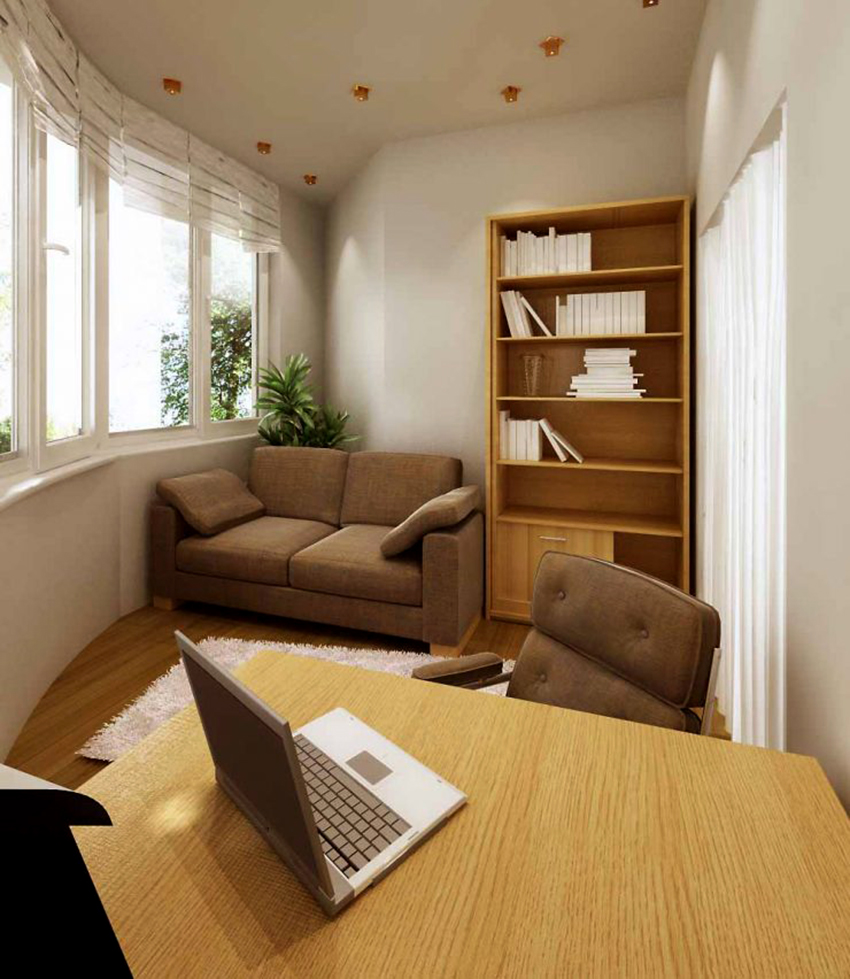
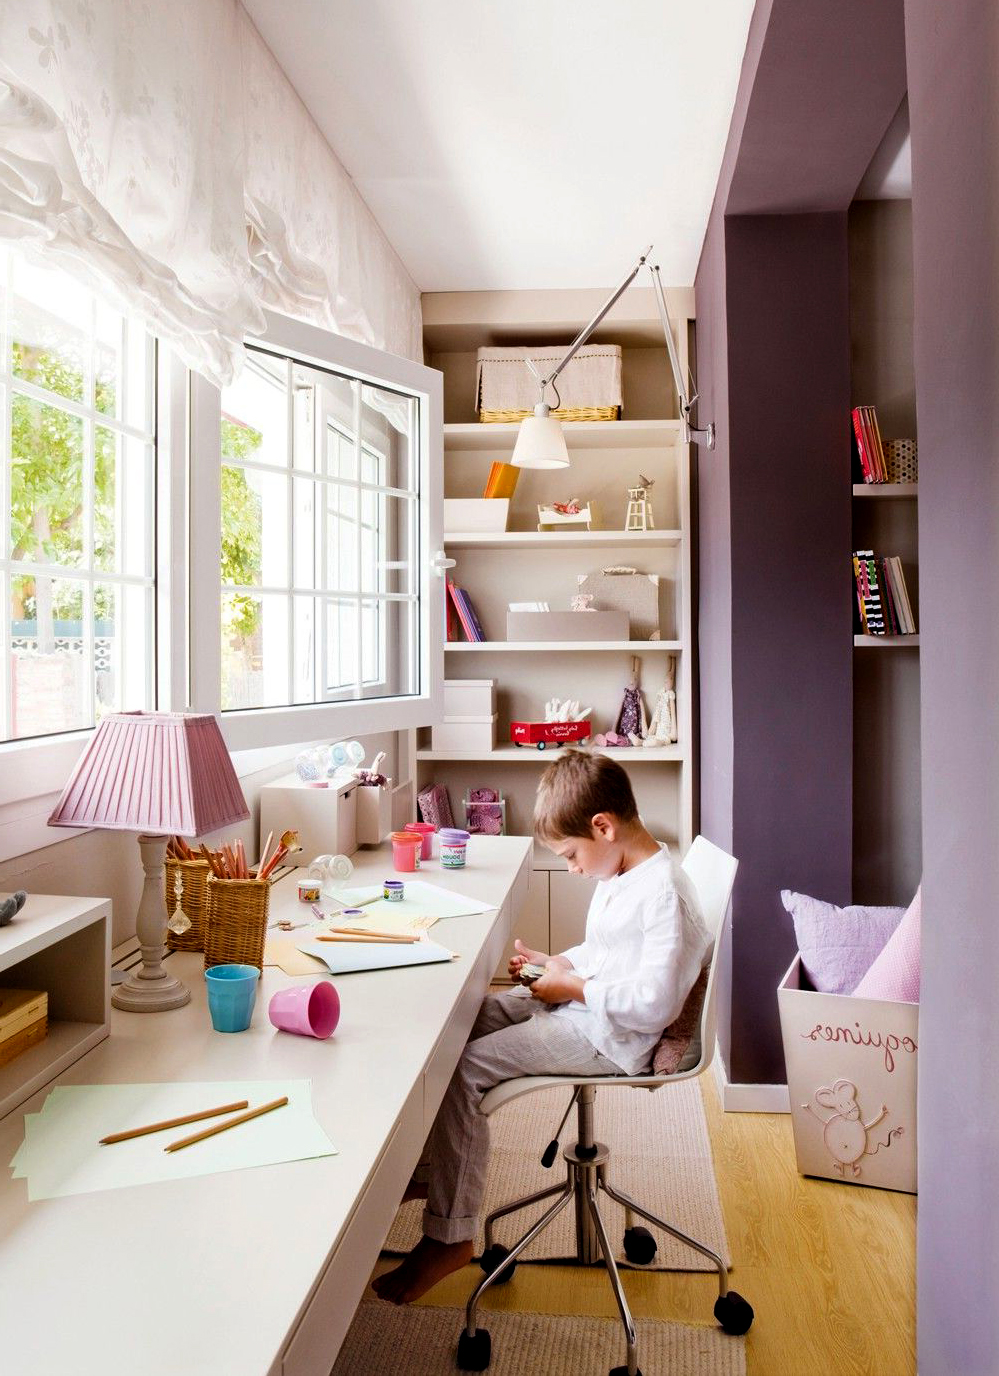
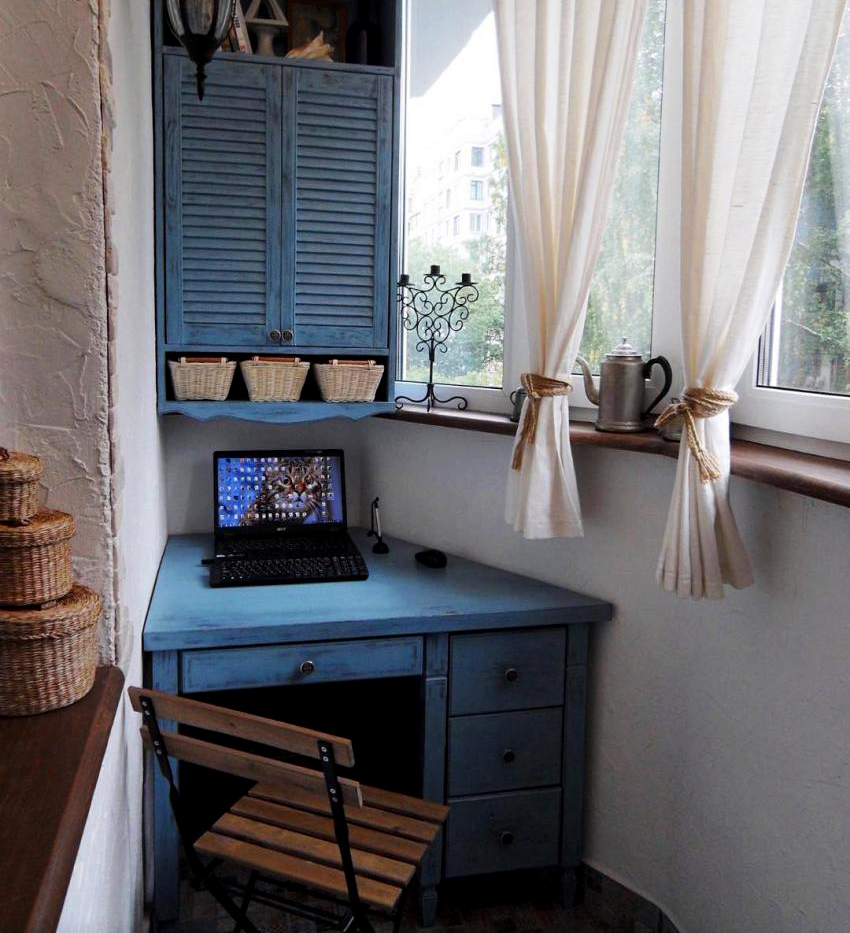
- Built-in work space. With the doors closed, the design is no different from the cabinet, but everything inside is located in such a way that you can put a laptop or a stationary computer and arrange organizers for the necessary documents.
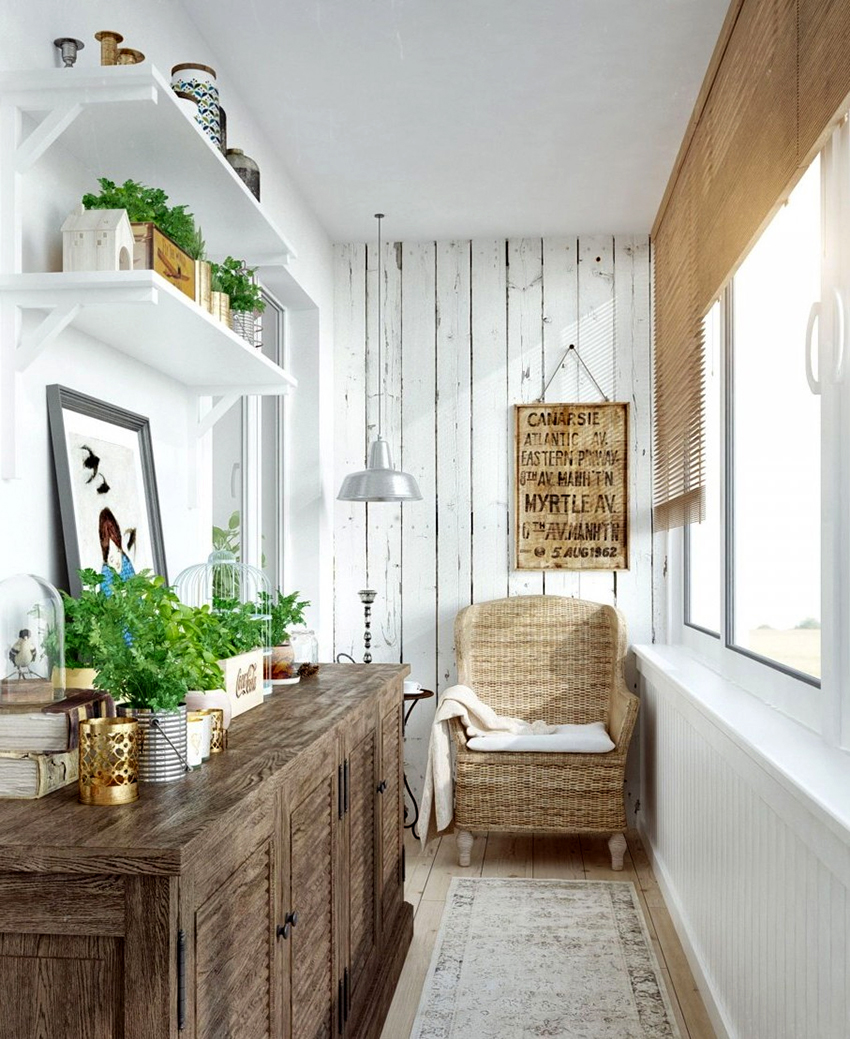
- Wall cabinet. This option is good only with a large balcony area; its structure resembles a standard room wall. Here you can place many shelves and a wardrobe for storing winter outerwear in the warm season.
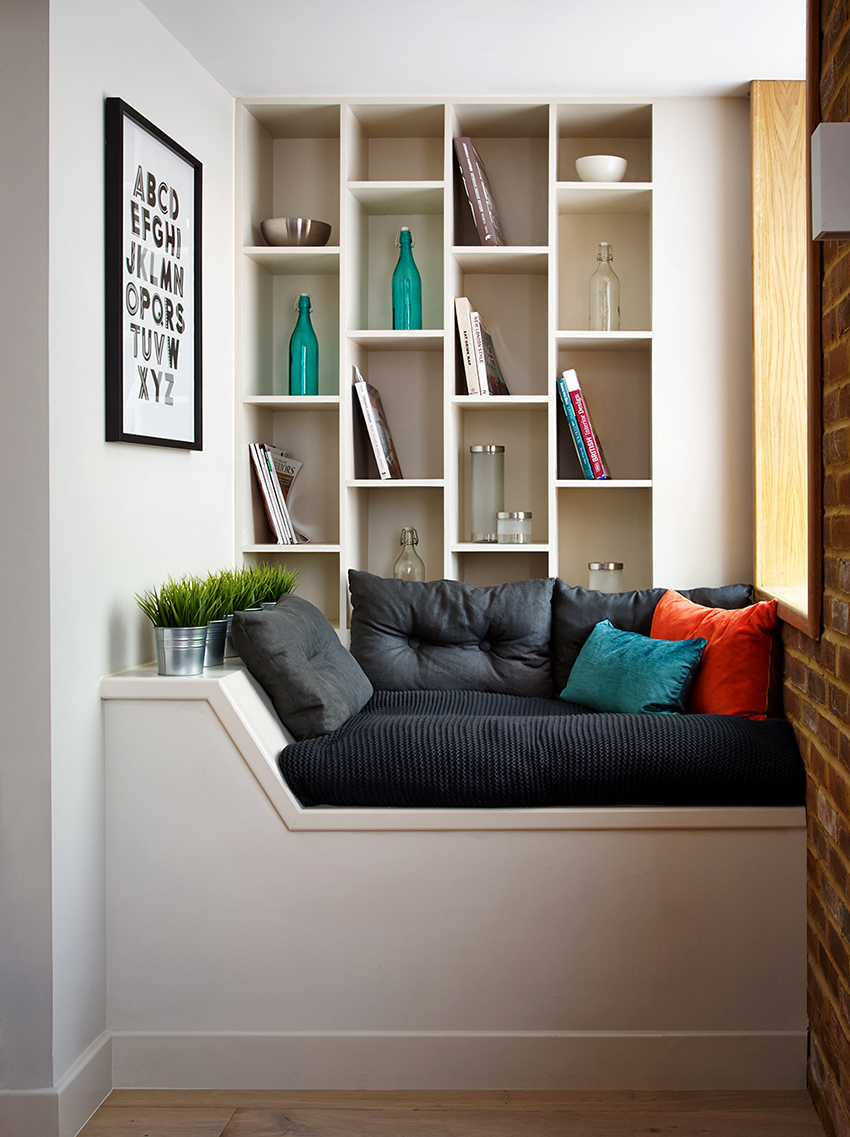
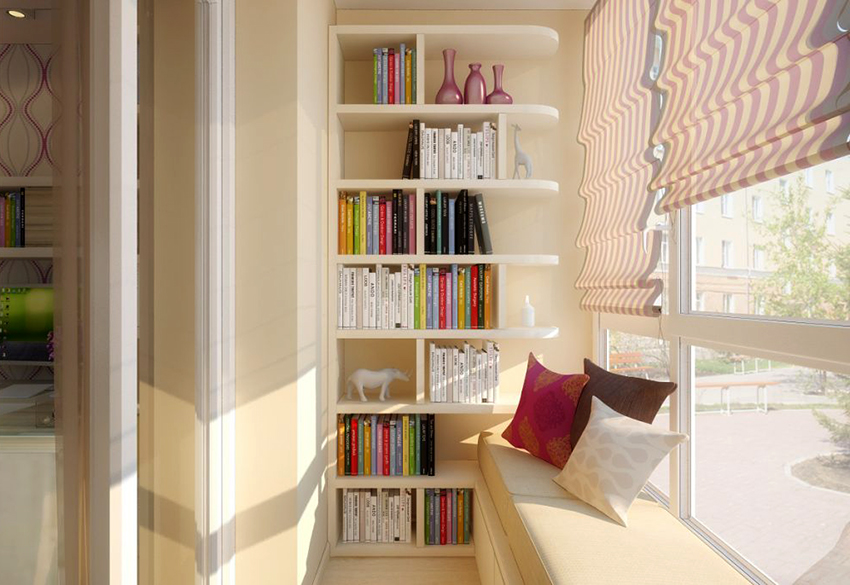
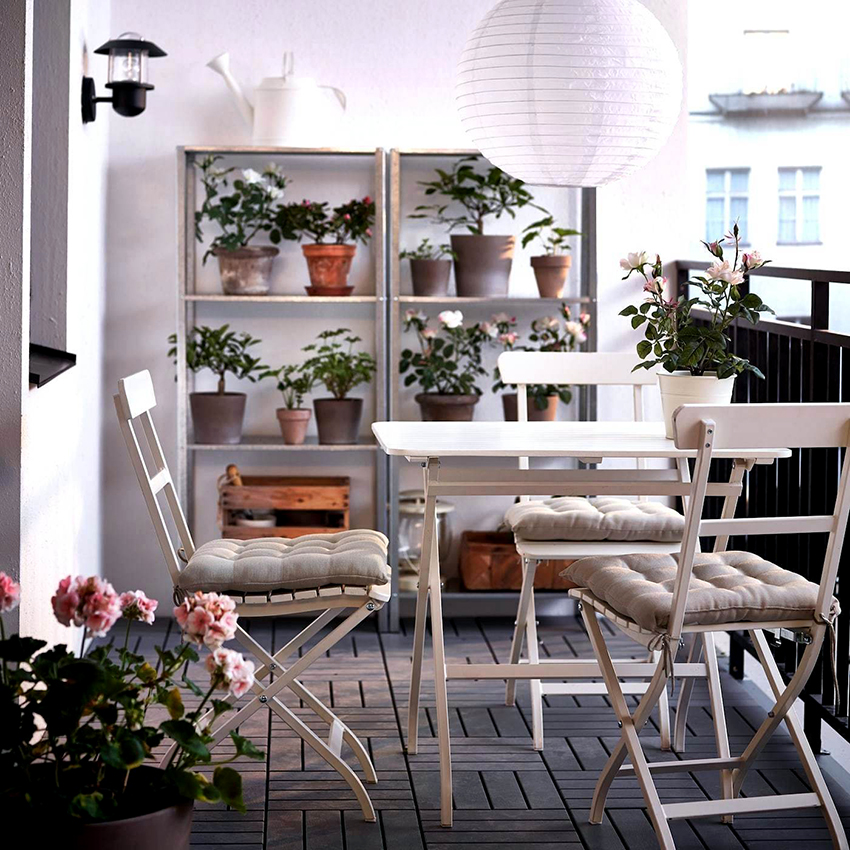
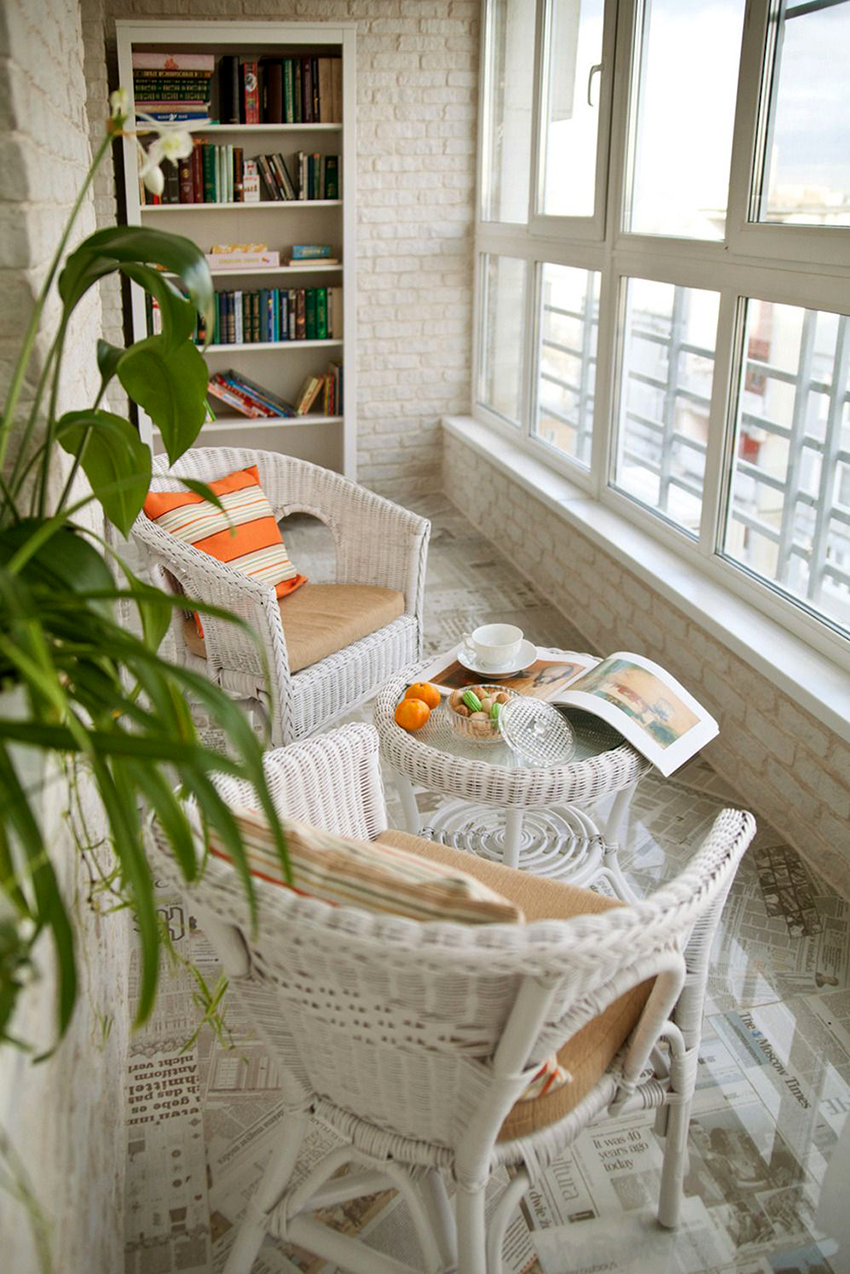
- Open shelves. They can be located both over the entire surface of the blank wall, and only in its upper part with a small room size, so that you can easily move around the balcony.
- Curbstone sofa.It is installed under the windowsill and is equipped with either double-wing hinged doors or a top cover. If you throw soft pillows upstairs, the structure will act as a great place to relax on sunny days.

A balcony is an integral part of an apartment, the area of which must be used as correctly as possible. The cabinet installed in this room will free up the area of living rooms from rarely used items. To make a cabinet yourself, it is not necessary to create complex structures. A large number of drawings and special programs are available on the network that will make the preparatory stage of work as easy as possible. Even a person without much experience can assemble a cabinet with the necessary parts.