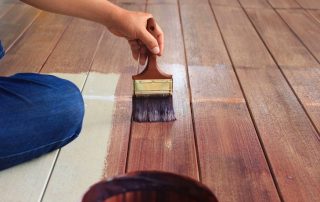
One of the most interesting, original, cheap and easy-to-apply options for surface cladding is considered to be textured plaster "bark beetle". With the help of this material, which is used for both exterior and interior decoration, you can create a unique, colorful and durable surface. The technology of applying plaster "bark beetle" is described in detail in this article.

The use of plaster "bark beetle" is one of the most popular methods of finishing both external walls and internal premises.
Content
Technology of applying plaster "bark beetle": preparation of the base
Plaster "bark beetle" can be applied to previously prepared brick, plasterboard, chipboard, concrete bases, sandwich panels and on a layer of insulation.

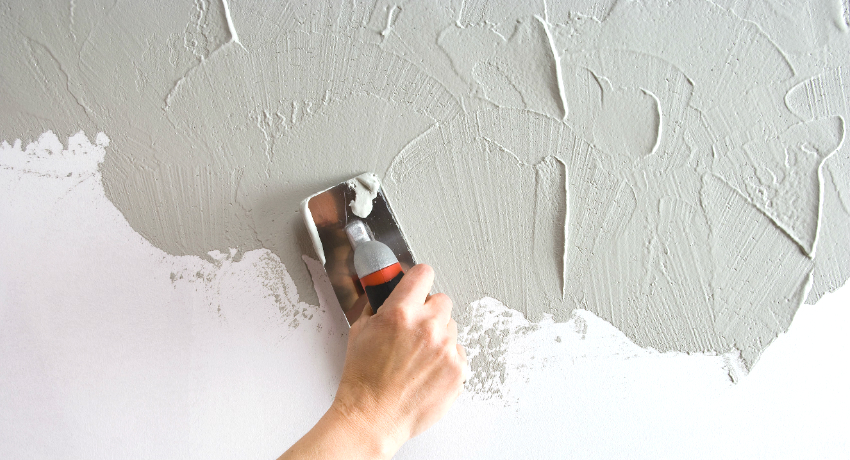
An important step when applying decorative plaster is surface preparation before final finishing.
Before performing tiling work, the surface should be thoroughly cleaned of old finish, oil stains, dirt and dust. If the base has significant unevenness and cracks, it should be leveled using gypsum, lime or cement mortar for plastering the walls. The proportions of the constituent components must be strictly observed in order to obtain a finishing material of the proper quality with the required strength characteristics.
Useful advice! To seal seams and large cracks, they must first be embroidered with a grinder, and then repaired with plaster putty.
If the wall cladding is performed in a room with a high level of humidity, then the surface must be treated with an antifungal compound that will prevent the formation of fungus and mold.
To create good adhesion between the base and the future plaster, the leveled surface should be primed using a roller, brush or spray gun... It will also regulate the absorbency of the prepared surface and ensure uniform drying of the decorative plaster layer. In order to prepare the future color shade of the surface, a coloring pigment of the required shade can be added to the primer.It is better to use a thick acrylic primer under the bark beetle plaster, which is able to prevent excessive absorption of moisture while working with this decorative mixture.

In order to improve the adhesive properties and protect the surface from harmful bacteria, a high-quality primer should be used.
Concrete and cement-lime external walls do not need to be ground. To create good adhesion, it will be enough to thoroughly moisten the surface with water one hour before starting the facing work using plaster.
On a dry layer of primer, which will take about 40 minutes to completely dry. at a temperature of 20 degrees, a base layer of plaster mixture with a thickness of no more than 2 mm should be applied. It should be compacted and rubbed at the same time. It will play the role of the basis for the future texture.
Description of the technology of facade plastering on insulation
Many owners of country and private houses strive to make the premises as warm as possible. For this, exterior wall decoration is very often performed with the help of insulation, which needs to create high-quality protection against the negative effects of the external environment. To do this, it is necessary to use facade plaster, which is applied over the thermal insulation material.

External wall cladding technology using decorative plaster bark beetle for insulation
The technology of plastering external walls involves the creation wet facade, which consists of insulation, reinforcing mesh and textured plaster.
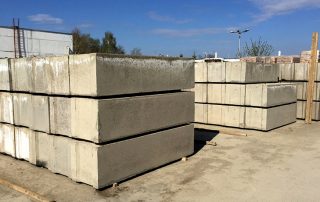
Expanded polystyrene or mineral wool can be used as insulation for walls outside the house under plaster. The first material is inexpensive and fairly easy to install. It is used for thermal insulation of concrete, slag concrete, expanded clay concrete and brick facades.
More durable, non-combustible and "breathing" insulation is considered to be mineral wool in the form of two-layer basalt or diabasalt slabs. It is advisable to use this material for walls made of expanded clay concrete, gas silicate, aerated concrete and wooden beams.
The technology of facade insulation under plaster with mineral wool or expanded polystyrene involves the use of a special adhesive, which is applied in a thin layer to the base of the insulation. Further, the slabs are attached to the wall surface according to the brickwork principle.

If you plan to finish the exterior walls of the building with decorative plaster, you should choose the right material for insulation, such as expanded polystyrene or mineral wool
After the adhesive has completely dried, the insulation plates should be additionally secured using an umbrella dowel. On top of the insulation, it is necessary to fix the fiberglass reinforcing mesh using plastic fasteners. After three days, you can start plastering the surface, the principle of which is the same as for finishing the interior with lighthouses. The cost of plastering walls outside the building is on average 400-500 rubles / m².
Here you can immediately use the "bark beetle" facade plaster, the video of the application technology of which will show in detail the sequence of actions.
Useful advice!After finishing the building facade with plaster "bark beetle", it must be protected for two days from direct exposure to UV rays and precipitation.

Reinforcing mesh is used to improve adhesion of the plaster to the wall and prevent cracking
Features of wall plastering on lighthouses. Price per m2
Prepare the base before finishing the surface. The main event is the leveling of the walls. One of the most popular and effective ways is to do wall plaster on lighthouses with your own hands. The video will clearly show the sequence of actions.
Before starting work, it is necessary to prepare special materials and tools.The first step is to buy beacons for wall plastering, which will act as limiters. They are metal or plastic profiles with holes. The depth of the product is 6 or 10 mm, which is selected depending on the deviation of the wall, the length is 3 m. T and L shaped products are distinguished by shape. The price of a lighthouse for plastering walls with a thickness of 6 mm is 18 rubles, and with a depth of 10 mm - 23 rubles.
If the walls are flat enough or have slight irregularities, you can plaster the walls without beacons.

Lighthouses are installed with the aim of high-quality leveling of walls for subsequent plastering
Also, you will need a building mixture for plastering the walls. You can buy ready-made material, or you can make a solution for plastering walls with your own hands. The proportions of all ingredients must be strictly observed. For the preparation of cement plaster, the ratio of cement to sand is 1: 2-3. For a lime mixture, it is necessary to take lime and sand in a ratio of 1: 2-4. The clay composition is obtained by mixing 1: 3-5 clay and sand. And to obtain a gypsum solution for plastering walls, the proportions of lime, gypsum and sand are 1: 1: 2.
As additional tools you will need:
- putty knife;
- plumb line;
- self-tapping screws;
- dowel;
- rule;
- roulette;
- scissors for metal;
- level;
- perforator for solution preparation.

Brick and concrete walls must first be leveled with rough plaster
Depending on the selected mixture and the proportions of the solution for plastering the walls with your own hands, you may need additional tools from various materials: wood, plastic or metal brushes.
How to choose plaster for walls
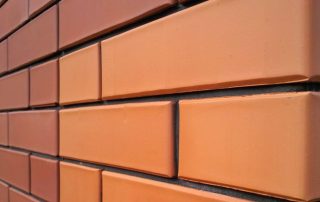
Wall plaster is selected depending on the type of base. For concrete surfaces, it is better to give preference to cement mortars or lime mixtures with the addition of cement, the amount of which affects the durability of the plaster. Any plaster is suitable for brick walls. However, for better adhesion of the concrete or brick base and the working mortar, a reinforcing mesh for plastering the walls should be installed. It must be installed when it is necessary to apply a layer of plaster more than 5 cm.
The finishing of wooden surfaces can be done with a gypsum-lime mixture, or with a solution with the addition of clay as a plasticizer. However, you should not exceed the permissible rate of this component, which can contribute to further formation of cracks on the wall surface. Plastering of a wooden surface is necessarily carried out using a reinforcing mesh for wall plastering, the price of which depends on the material of the product and averages 150 rubles / m².

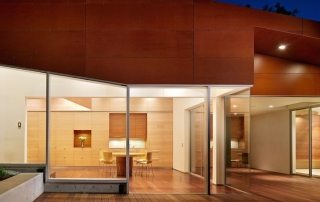
Decorative plaster "bark beetle»Is a durable and beautiful coating that can easily fit into any interior style
For finishing gypsum blocks, you can use gypsum or lime plaster ‒ gypsum plaster. Cement mortars are not compatible with gypsum surfaces. No additional mesh installation is required here.
The most problematic are foundations of foam and aerated blocks, which have very low adhesion. Therefore, in order to ensure a long-term and reliable adhesion of the base and the plaster, you should fill the mesh under the plaster of the walls and use solutions with special additives.
Many experts prefer the gypsum mixture, which has the best performance characteristics. It does not shrink, thereby preventing cracking. Also, this material creates additional heat and sound insulation. All the subtleties of working with this composition are detailed in the video "How to properly plaster walls with gypsum plaster".
Important! Gypsum plaster cannot be used for concrete substrates, the components of which react with the gypsum and repel it.Such plaster will fall off very quickly.

Gypsum plaster has good sound and thermal insulation properties, but requires additional protection from moisture
How to set up beacons for wall plastering?
To begin with, you should check the walls and using a level that is applied horizontally and vertically, and identify all the depressions and protrusions. Before installing beacons for plastering walls, you should mark the surface with a marker. You should start from the corner, stepping back about 30 cm on each side, marking the places for the extreme beacons. Draw a vertical line. The distance between adjacent beacons should be 160 cm. This is less than the length of the rule.
Useful advice! Do not divide the wall surface into unequal parts. If about 2 m remains, it is better to place the beacons at a distance of 1 m from each other.
To create a horizontal mark, it is necessary to retreat 15 cm from the floor level and draw a line perpendicular to the vertical marking. Make holes and hammer in dowels at the intersection of the lines. Next, you need to stretch a cord through them. Measure 235 cm from the resulting line (with a ceiling height of 2.65 cm) and create holes at the intersection with the vertical lines and hammer in the dowels.
Related article:
Textured plaster for walls: a spectacular surface transformation
Features of the material and the nuances of applying the decorative composition. Creation of various textures. DIY finishing material.
After marking, the surface should be thoroughly cleaned of dirt and dust and primed. This will create a good base for future plaster and prevent the formation of fungus and mold on the wall surface.

In order for the beacons to be installed correctly, it is necessary to constantly check their location using the building level
After the wall is dry, you should start installing beacons for wall plastering. Here you need to be extremely careful. The appearance of the finished surface will depend on this. The metal beacon must be attached vertically to the wall to the previously marked place. Next, the topmost screw is screwed in. A plumb line is attached to it, which will control the location of subsequent screws and, accordingly, the placement of the profile. The main task is to align the profile. It will pull away from the surface in places where there are depressions, and fit snugly on the bumps.
The procedure is shown in more detail in the video "How to install beacons for plastering walls." All of the above steps are performed for each beacon.
There is another way to display beacons:
- It is necessary to prepare a small part of the plaster mixture. It is better to choose a gypsum composition that sets quickly.
- Apply the solution to the wall in places of horizontal and vertical markings with a thickness exceeding the depth of the beacon profile.
- Attach the lighthouse vertically to the wall and press it into the plaster mixture, drawing a rule along it.

An example of installing beacons on a plaster mixture
More details about this method can be found in the video "How to Expose Beacons under Plaster Walls".
Plastering the surface
Now you need to prepare a working solution, strictly following the instructions on the packaging of the material. The mixture is applied between the beacons with a wide spatula with a slight surplus to avoid depressions. Now, using the rule established by the lighthouses, the plaster layer is leveled, moving from the bottom up and periodically shaking it from side to side, evenly distributing the solution along the wall. This manipulation must be performed several times to obtain a flat and smooth wall. The cost of plastering walls per 1 m2 depends on the type of surface to be treated and the area of the base.
For further decorative plastering of the walls, it is necessary to remove the beacon profiles.This can be done only a few hours after the base layer has grasped. The resulting voids are sealed with a wide trowel and plaster.

The correct consistency of the plaster will avoid defects - cracks, sagging and unevenness
The final step is to grout the plaster. This event should be performed before the mixture is completely dry. As a grout, a mixture that is more liquid in consistency is used. It is applied on a trowel and spread in a thin layer on a 1 m² wall. So every subsequent square is overwritten. The work is done without interruption.
Aligning the base in this way can be done independently, or you can resort to the help of a specialist. To date, the prices for plastering walls for lighthouses are in the range of 490-550 rubles / m².
The main subtleties of the preparation of plaster "bark beetle"
Bark beetle plaster can be purchased as dry or ready-mix. To prepare a working solution from dry material, the proportions of the ingredients, the temperature regime and the sequence of actions should be strictly observed. All information is detailed on the packaging.

When preparing a mixture for plaster, you can add color, but in this case it is necessary to correctly calculate the required amount for finishing the entire surface
First, you should measure the required amount of water, the temperature of which should be in the range of 21-23 degrees. For 1 kg of dry mix, you need about 250 ml of water. However, this directly depends on the components of the plaster and the manufacturer of the material. The working solution should be prepared in a container convenient for further work.
A measured amount of dry powder should be added to the water. Mixing of ingredients can be done manually with a trowel. But it is faster and more convenient to prepare the mixture using a construction mixer, which should be turned on at medium speed. Stirring should be carried out until the mass becomes homogeneous without residues of dry matter, lumps and excess moisture on the surface of the solution. The consistency of the working solution should be similar to thick sour cream.
If the mortar is too dry, it will create additional difficulties during application. It will constantly roll off the trowel, while increasing the consumption of the mixture. Too liquid solution will drain from the surface, leaving unpleasant streaks. In addition, with the help of a liquid solution, it will not be possible to create the necessary textured relief, characteristic of the plaster "bark beetle".

Before applying the final layer of plaster, followed by invoicing, it is necessary that the base coat dry a little
How to apply decorative plaster "bark beetle" to the walls?
Before performing the facing work, you should familiarize yourself in detail with the technology for applying decorative plaster to the surface, which must be prepared in advance (cleaned and leveled). The quality of the preliminary finishing will affect the degree of obtaining the textured pattern, characteristic of plaster "bark beetle".
Plastering the walls is carried out in a holistic manner, that is, one wall must be covered at a time, without waiting for the applied areas to dry. Only in this case it is possible to obtain a monolithic surface without seams and drops.
Useful advice!Before starting work, stick masking tape to all adjacent surfaces to protect them from plaster.

Manual application of plaster is used for finishing small surfaces, while for the whole facade of a building or other areas it is better to use a mechanized method
There are two ways to apply decorative plaster: manually and using special mechanisms.
Before applying the plaster "bark beetle" by hand, you should prepare the necessary tool.For work, a stainless steel spatula and a plastic float or trowel will be used to create a textured pattern. A small part of the mortar is applied to the spatula.
Work starts from the bottom right corner. The plaster is applied with a tool at an angle of 60 degrees. relative to the surface to be treated in rows, vertically or horizontally, covering the entire wall. The plaster is stretched to the thickness of the layer, which depends on the size of the largest grain in the mixture. This will be clearly visible when scratches and grooves begin to form on the surface. To make sure that the work is done correctly, you can watch the video "How to apply decorative plaster on the walls."
Useful advice!If the wall is large enough, then it must be divided in two using masking tape.

The technology of applying and creating texture "bark beetle" using colored decorative plaster
If the wall decoration is not finished, but there is a need for a break, then it is necessary to seal the place of the last plaster application with masking tape. When work is resumed, the tape is removed and the layer is trimmed slightly.
Before forming a textured pattern, it is necessary to let the surface dry a little so that the plaster does not stick to your hands. This will take about 20-40 minutes. depending on temperature conditions. A plastic float is used to create characteristic strokes. It should be held flat, slightly overlapping the surface to be treated. Depending on what actions will be performed using this tool, the appearance of the textured ornament will depend. If the surface begins to dry quickly, it can be sprayed with water. This procedure will provide additional time for grouting.
After finishing the formation of the pattern, without waiting for the plaster to dry completely, wipe the entire surface without pressure so that the butt areas are not visible.
The textured surface created with plaster "bark beetle" dries at a temperature of 10-30 degrees. and relative humidity no more than 80%. After the surface has completely dried, you can start painting it.

With the help of two colors of plaster and the method of imparting the texture "rain", you can get an interesting and durable coating that is easy to maintain.
Note! In 2017, the price of wall plaster per square meter starts from 500 rubles.
Pros and cons of mechanized wall plastering
When it is required to perform facing work on a large surface, it is advisable to use mechanized wall plaster, the price of which is determined by the size of the surface and the type of finishing material. So, to apply a primer, you must use a spray gun, and plaster can be applied using an automatic machine.
The nozzle of the machine should be as close to the wall as possible. It should be strictly perpendicular to the base. The operator distributes the high pressure mass evenly. Here you should be extremely careful and careful so as not to lead to the formation of marriage.
Consider the positive aspects of using the mechanized method of plastering walls:
- it is possible to achieve a minimum thickness of the plaster layer, which reduces material consumption;
- this method ensures uniform application of the composition, good adhesion to the wall and maximum strength of the finished surface;
- due to the fact that the solution is supplied continuously, a strong step-by-step adhesion of the mixture to the base is ensured;
- the mixture, which is applied mechanically, excludes the formation of air bubbles, the presence of dry lumps and foreign inclusions.

Process of mechanized method of applying plaster to walls
The price per m2 of mechanized wall plaster is 300-350 rubles.
The walls are aligned manually.You can get a textured pattern using a grinder with a fuzzy wheel. However, it is not always possible to obtain a pronounced surface relief.
Plastering walls by machine allows you to perform cladding work 4 times faster than by hand. Due to the distributed and short-term application of the solution to the surface, it solidifies evenly, which excludes the formation of cracks.
The main disadvantage of this method is the use of bulky equipment, which is not always easy to deliver to the destination.

The mechanized method of plastering the walls reduces the consumption of the mixture
Ways to create a textured surface
The appearance of the pattern on the finished surface will depend on the nature of the movements made by the float on the plastered wall. Let's consider in more detail the actions that help to achieve this or that relief.
To obtain the classic pattern of a tree eaten by a bark beetle, you should perform circular, arcuate uneven movements in different directions, slightly pressing the tool.
You can get an imitation of an uneven stone surface, the so-called "travertine" ornament, by making short, abrupt movements with a trowel, moving in different directions. To obtain the "cork" ornament, it is necessary to make intense circular movements in one direction with the help of a foam polystyrene trowel, which must have a small radius.

A textured surface is created using special tools, as well as improvised means
You can create an imitation of the fabric surface using the cross-shaped movements of the float. In this case, vertical strokes should be performed from bottom to top with a long slow pull, and horizontal strokes should be performed with an energetic short swing.
The "rain" pattern is obtained by making long continuous diagonal movements from top to bottom. You need to start from the upper right corner, moving down to the left.
With the help of plaster "bark beetle" you can create a drawing "map of the world". To do this, you need to apply the first layer of the material and grout it in any convenient way. After the layer has dried, it is necessary to apply another layer, but not evenly, but in the form of separate strokes in different directions, which must then be smoothed out with a Venetian trowel.
Before starting work, you can watch the video "How to apply textured plaster for walls."

The texture of the plaster "bark beetle" is created using a special float
Features of painting a plastered surface
There are two options for painting a decorative surface:
- Adding color pigment directly to the finished mixture.
- Painting on plastered and hardened walls.
The first option is more acceptable when using a ready-made mixture, to which a certain amount of dye must be added to obtain the desired shade. When a dry mix is used, it is very difficult to calculate the dosage of the color scheme. In this case, it is better to paint the finished base.
To paint the finished surface, use acrylic, silicate or water-based paint, which is applied with a brush or roller. The acrylic composition should be applied no earlier than two weeks from the date of finishing, and the silicate paint can be used after three days.

Textured plaster "bark beetle" can be painted with silicone, acrylic and silicate paints, which are well applied and dry quickly
Staining can be done in two stages. The first time, the entire surface is thoroughly covered, including the furrows of the texture. After the surface has dried, a second layer of a lighter or darker shade is applied, which involves painting only the upper part of the coating, excluding the ingress of paint into the grooves.This effect can be achieved using a semi-dry roller, which must first be rolled on plywood. Also, it is advisable to use special dyes with reflective properties.
Useful advice! If you do not stain the grooves, you can get the illusion of depth of coverage.
Instead of painting the surface, you can glaze the coating with acrylic varnish, to which you can add mother-of-pearl or color. This mixture should be applied with a steel trowel, completely filling all the grooves on the wall surface.

Surface application of paint to textured plaster allows you to get the effect of depth due to the fact that the grooves are not stained
Strict adherence to the sequence of actions when performing surface cladding with textured plaster "bark beetle" will allow you to get a high-quality, durable, attractive and aesthetic coating that will delight the eye for many years without losing its original appearance.