Plaster molding is always in fashion, and its use in decoration will make the interior unique and inimitable. Even in small quantities, if it is skillfully made and correctly applied, such a decor will become an exquisite addition and favorably emphasize the dignity of the room. In addition, stucco molding will help to visually correct the space and hide various irregularities on the surface of the ceiling and walls.

Plaster molding is always relevant and suitable for different styles
Content
Plaster decor: positive and negative characteristics
The use of plaster stucco decoration as a finishing material in a house or apartment will add originality, grace and luxury to the furnishings. Stucco molding will allow you to create unusual visual effects like volumetric recesses in the walls or the infinite length of the ceiling. If there are inaccuracies in the finish, it will close the joints and cracks, supplement the lines of joining various surfaces and materials, hide the technological equipment and communications: pipes, electrical wiring, ventilation holes.

Plaster decor is able to make any room elegant and effective
Also, as the positive qualities of plaster decor, it should be noted:
- clear relief and perfect edges;
- environmental safety;
- refractoriness;
- resistance to temperature extremes;
- hygroscopicity;
- long service life;
- maintainability;
- ease of processing and staining.
The gypsum product does not burn, does not crack from heat and cold, freely absorbs and releases moisture, serves for centuries, and is easily restored in case of damage. Given these qualities, you can also safely use plaster molded decor for decoration not only indoors, but also on the surface of facades.
There are not so many disadvantages as advantages, but you need to know them:
- vulnerability to mechanical damage;
- difficulty in installation;
- hygroscopicity;
- high price.

Gypsum is fireproof, environmentally friendly and has a long service life
Gypsum is not a building material, but a finishing material, therefore its strength is incomparable with the strength of brick, concrete or installation mortar. Plaster products are more vulnerable to damage. However, being decorative elements, they are not designed for high loads.At the same time, installation, due to the decent weight of the finished elements, is sometimes difficult, especially when installed overhead. This job requires certain skills and equipment.
Hygroscopicity is one of the important positive characteristics of gypsum products, at the same time it can be a disadvantage (conditional). Gypsum cannot be used in rooms with excessive humidity without the use of hydrophobization - coating with a moisture-proof composition. High cost, as a disadvantage, is also a conditional factor. Having shown imagination and creativity, it is quite possible to make small stucco parts from plaster with your own hands.
Types of plaster products and their purpose in the interior
The history of the creation of plaster moldings goes back to the times of Rome and Ancient Greece. This type of decor is rightfully considered one of the oldest, found application in various eras throughout history. A holistic picture of stucco molding can be obtained using it as a constructor, connecting various parts and elements. It should be noted that the seamless connection is one of the key positives.

There are many types of plaster products that are used in interior decoration.
What can be made of plaster? The main elements of stucco decoration are:
- ceiling cornice - used to overlap and decorate the junction of the walls with the ceiling;
- molding - a decorative insert for bridging gaps or separating finishing materials;
- socket - masks the hole itself, mounting fasteners, the place of supply and connection of electrical wiring;
- bas-relief - a convex image slightly protruding above the background plane;
- bracket - an element for attaching whole objects or parts thereof to walls and columns;
- column - a detail of architectural decor, which can also support the ceiling;
- niche - a recess of various shapes in the wall, which serves as a decorative element or a place for placing a shelf, shelf or cabinet.
Modern stucco more improved in terms of characteristics, and the process of its creation has little in common with the molding process of ancient architects. However, the splendor and overall visual impact are equally naturalistic. You can increase the uniqueness of decorative products by making them from plaster yourself. To do this, you just need to purchase special forms and a dry plaster mix. How to make a mold for plaster with your own hands in a home workshop will be discussed later in the article.
Useful advice! The manufacture and installation of gypsum elements is best done using special technology, rather than the advice of friends and acquaintances. This will ensure that the product does not deteriorate after a while.

Plaster columns can be used both for decoration and for supporting something.
Depending on the complexity of the decorative element, various technologies can be used: casting with a broach or pouring into a mold, modeling. All these methods can be mastered and successfully applied both at home and for business purposes. So, let's consider what you can do from plaster with your own hands, using various methods of sculpting decorative elements.
Manufacturing technology of smooth-drawn gypsum cornices
Most often, to create original forms of gypsum ceiling cornices, the broach casting method is used, which is also suitable for mass production. The main difference of this method from the classic injection molding is the surface profiling using a movable metal template.
It is convenient to make the template from sheet iron (tin). With metal scissors and other auxiliary tools, a hole is cut out in the shape of the profile of the future cornice. Using emery materials, the profile cut is brought to the final working condition. The finished template is fixed in a wooden rig, which can be moved along the guides.

As a rule, for the manufacture of plaster ceiling cornice use the broach casting method
The working surface is lubricated with a compound that facilitates easy sliding of the template and allows you to remove the finished product without effort. The lubricant composition, as a rule, is based on a mixture of stearin and kerosene, but in the absence of these, it is also possible to use machine or vegetable oil. The plaster solution is applied to the working surface in the direction of the template movement. The composition is selected empirically. In practice, to obtain a liquid gypsum solution, 1 kg of gypsum is added per 1 liter of water, for medium density - 1.5 kg, and for thick - 2 kg.
Then, the template moves slowly and smoothly over the gypsum solution laid and thickened to the consistency of sour cream to obtain the profile of the future product. This is repeated several times until the complete profile of the gypsum cornice is obtained. After hardening, the gypsum solution will slightly increase in volume. Therefore, it is necessary to additionally make a pre-final broach to cut off the excess. The final broach with a small amount of liquid solution will finally form a perfectly smooth and even surface.
Molding can be produced using the same technology. This insert can be used in combination with or instead of a cornice. As a rule, it is installed before finishing, and not after it.
Technology and materials for the manufacture of plaster rosettes
Plaster rosettes as decorative elements of the ceiling opening in the place of suspension of the central chandelier look harmoniously in various styles and can be used to decorate side lighting. In this case, the injection molding method is used. Manufacturing technology consists of several stages.

Most often, gypsum rosettes are used in the decoration of holes for placing a chandelier.
First of all, a model is made from an available material: cement mortar, clay, wood, plasticine, stone, etc. A finished factory product can also serve as a model. Then a cast (form) is removed from it - a kind of "negative" of the future product. With this mold, the required number of plaster casts are made.
The general basis for the manufacture of all types of products is high-strength finely ground gypsum, for example, GVVS-16. Like any other material, gypsum has its own characteristics - fast setting with slight heating and an increase in volume. To enhance the strength of castings, water emulsions of synthetic resins and other materials can be added to the gypsum "dough".
Useful advice! Gypsum mortar must be applied immediately after preparation, since it retains fluidity for only 2-3 minutes, and plasticity for 6-8 minutes. To slow down the setting, you can use skin glue or vinegar as an additive. The binding properties of the set gypsum mortar cannot be restored with water.
The rosette consists of two parts - a base and decorative elements on its surface. Therefore, it is possible to use both the casting method in its pure form, and the combination of casting and broaching, which we considered a little higher. You can also use a broach to create only the basis for the model of the future product, and already the entire rosette, if desired, is cast into a plaster mold.

To make a ceiling socket, the casting and broaching method is used.
First of all, to create the base, the working surface, as in the case of casting with a broach, is coated with a lubricant. Then, in the center on the axis, a radius ruler with a hammered nail is attached, through which the contour of the future product is applied. After that, the working surface is covered with plaster mortar and a template with a base profile for the socket is put on the central axis. The technology is similar to the previous one, but the profile does not move longitudinally, but in a circle. The technique is completely repeated.
After making the base of the socket, decorative elements must be made and fixed on it.Their variety can be limited only by fantasy and a sense of proportion. For them, the molding method is used for stucco molding. To make a template, you do not need highly professional equipment - an amateur home workshop is quite enough.
What and how to make a plaster mold for casting
To create a form, you need a template or an original product. What is noteworthy is that all technologies for working with plaster can be interconnected to create any of the decorative elements. For example, models of decorative rosettes and other types of stucco molding can be made by sculpting.

To create a plaster mold, you need a template or an original product
When creating a mold for plaster molding, used for decorative elements, which will then be attached to the base, it is quite enough to use rigid cardboard as a flask. For casting the entire outlet, it is better to use multi-layer plywood, which will not be damaged by a large mass of gypsum. It is convenient to use adhesive tape to fasten the walls when working with cardboard, and for plywood you will need nails and self-tapping screws. The cracks between the walls are coated with plasticine. The flask can consist of either one part or two halves, depending on the volume of the required product.
The model is coated with a lubricant and placed in the center of the investment ring on thin plastic supports or thread braces. Gypsum mortar is applied with a brush to difficult places (lines and depressions) and poured to the level of the intended joint of the flask halves. After thickening, check how well the model separates from the bottom half. Then its surface and upper part are covered with a lubricant, the upper half of the mold is poured.
Useful advice! Since the manufacture of the model, the preparation of the mold, the casting process and the operations for processing figures from plaster with their own hands are associated with the appearance of a large amount of dust, ventilation must be provided, and high-quality cleaning of the room is also necessary. Do not do this in residential areas. Also, the use of open flames should be avoided due to the explosiveness of a mixture of air and dust in a certain concentration.

In order for the stucco molding to turn out to be neat, the shape must be cleaned every time before pouring
When completely dry, the top half of the investment ring can be removed and the template removed. It will be useful to carefully examine everything and eliminate the shortcomings. Now the mold for plaster is ready with your own hands. Before pouring the working mixture, it must be covered with lubricant inside each time, and after filling it must be cleaned of debris. It may not work the first time. Like any other craft, making plaster products with your own hands requires skill and experience.
Related article:
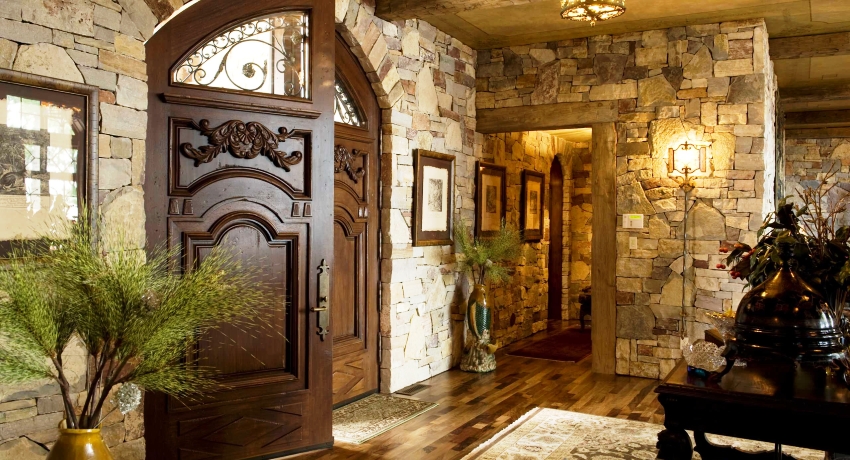
Decorative stone in the interior: stylish home decoration
Advantage of use, types of materials for interior decoration, decor options for different rooms with photo examples and ideas.
Plaster molding: bas-reliefs and materials for their manufacture
This technology is the most time-consuming way of creating stucco, but it also produces exclusive results that have charm and appeal. Contrary to popular belief about the indescribable complexity and high cost, creating paintings from plaster with your own hands is a completely affordable way of decorating, depending only on the patience and imagination of the master. For this, construction skills and art education are not even necessary.

To create bas-reliefs, you can use not only gypsum, but also polymer building mixtures
Plaster sculpting on the wall is perfect for spacious living spaces. In addition to the plaster for modeling traditionally used for these purposes, modern technologies also make it possible to use building mixtures with polymer additives (in everyday life - acrylic plaster).An even more sophisticated composition is very popular - a mixture of gypsum, acrylic plaster and PVA glue.
One of the most widespread decorative elements made using plaster molding technology is a bas-relief - a convex image, a sculptural relief protruding above the background plane by no more than half the volume. To increase the volume, bronze or gilding is used, and patina is used for the antiquity effect. Technologically, the bas-relief can be made either directly on the wall or in parts on the working surface, after which it is mounted on the wall.
It is easier for a novice master to make a prefabricated bas-relief, since it is possible to work on individual elements without affecting the whole picture. And plaster molding on the wall does not have to be a large product or a full-fledged bas-relief. These can be small and simple elements, for example, plaster flowers or a niche framing in the form of vines and floral patterns. Such a niche will perfectly serve to visually increase the volume of space.

The bas-relief can be done directly on the wall or on the work surface
Useful advice! You should not place the bas-relief on weak walls made of plasterboard or partitions made of foam concrete, since the supporting base must be stronger than the material from which the composition is made.
Modeling on the wall: tools and main stages of work
To work with plaster molding, a certain set of tools is required. With skill will come the need to use a set of various sculpting spatulas (palette knives), knives, brushes and pastry syringes with attachments. At the initial stage, it is quite possible to do with a couple of knives, a spoon and an indispensable attribute - a half of a rubber ball (for kneading the working mixture).
The wall must be leveled with an accuracy of 2 mm / m, primed and cleaned without fail. This is followed by a coating with a basic composition and a background plaster with a toning of the base. Relief application is carried out by direct molding or using prefabricated elements. If necessary, the dried relief is tinted and painted with special paints. After drying, the paints become faded, but the final coating with styrene-butadiene latex restores their brightness.

To create stucco, you will need special spatulas, which are called palette knives.
After preparing the wall, you need to make a sketch of the future composition. This will facilitate the work in general and will allow you to identify problem areas on the work surface. Repetitive parts can be applied using pre-prepared thick paper or cardboard stencils. And also plaster molding elements are made using the casting technology, which was discussed above.
The molded bas-relief is formed in layers. The working mixture for gypsum modeling is applied with a brush and a pastry syringe, and then leveled and shaped with palette knife knives. When creating a colored bas-relief, the batch of each layer is tinted with a pigment for gypsum with a decrease in concentration as the relief grows. Shaping is done on a still wet mixture with a brush and is brought over the dry mixture with sandpaper.
Subtleties in work in the manufacture and installation of plaster stucco
When creating a bas-relief with plant elements of a branch, depending on the thickness, it is most convenient to remove it with a confectionery or medical syringe. The thickness, in turn, is controlled by the pressure applied to the syringe plunger. The texture is applied with a brush, and the fractures are formed using a palette knife. Also, branches can be made from twine soaked in a thick working solution and then dried on a working surface. The finished products are then attached to the support wall.

The free cast method is used to create flower bas-reliefs
To create a bas-relief with round shapes (high relief), a wire frame or a thin metal mesh is often used.To make high floral bas-reliefs, the so-called free plastering method is used. The basis for this is artificial flowers or disposable napkins. Several times they are dipped in a liquid working solution and dried in the same position in which they will be located in the finished composition. The actions are repeated until a layer of gypsum is created (the photos clearly demonstrate this) of 1-1.5 mm.
Useful advice! Fastening bas-reliefs to the wall is best done with grooved nails with a bitten head, driven into plastic dowels. Depending on the massiveness of the bas-relief or its elements, nails of various lengths and thicknesses are used. The connection is made in places of the greatest relief height, but not less than 1-1.5 cm.
So, decorating the walls with plaster moldings with your own hands is not such a difficult idea. Fantasy, perseverance and application of the recommendations from this article will help to achieve success in this.