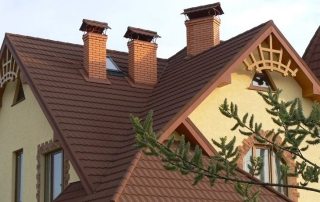
Metal roofing is a material that is used for roofing along with such popular materials as slate, shingles and galvanized sheet metal. Its excellent technical characteristics make it a great choice for any home. And although usually they prefer to invite professionals to carry out this kind, we will consider how to independently install metal tiles: step-by-step instructions and some recommendations from specialists.

The use of a metal tile is one of the most popular roof finishes.
Content
- 1 What are the advantages of installing a metal roof
- 2 Criteria for choosing a material for a metal roof: photo examples
- 3 Installation of metal tiles: step-by-step instructions for independent work
- 4 How to fix metal tiles: stages of preparatory work
- 5 Thermal insulation during the installation of a metal roof
- 6 Metal roofing device: basic rules of work
- 7 Installation of the valley at the roof with metal tiles
- 8 How to install metal tiles on a roof with a triangular or trapezoidal slope
- 9 Installation instructions for metal tiles "Monterrey"
- 10 How to properly care for metal roofing
- 11 Do-it-yourself common mistakes in the process of installing a metal roofing tile
- 12 Installation of snow holders on metal tiles: instructions and their varieties
- 13 Installation of a roof window in a metal tile
- 14 Installation of metal tiles: video instruction for beginners
What are the advantages of installing a metal roof
A tile roof, especially if it is made of metal, is one of the best options for decorating a home. Experts and users themselves note many positive aspects of using this material, including:
- light weight (4-6 kg / m²), which provides very little load on the roof;

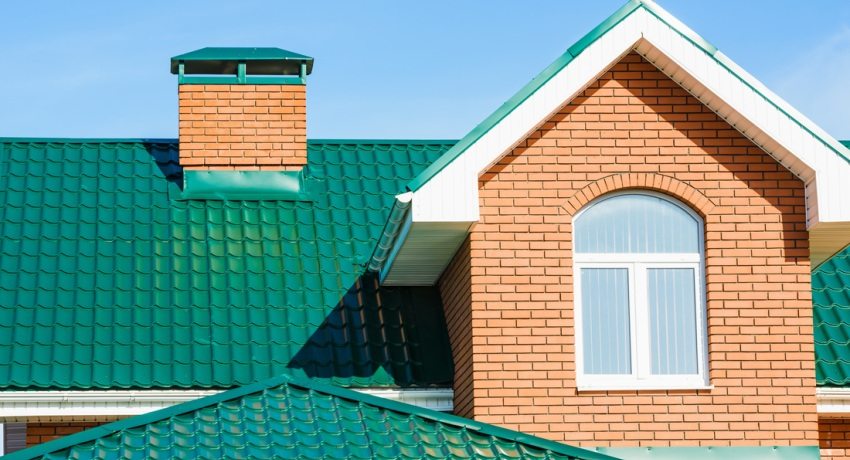
Metal roofing differs in democratic price, long service life and expressive appearance
- simple installation procedure and ease of repair work;
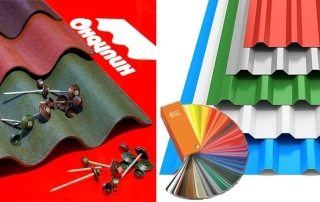
- a wide range of colors;
- the material is environmentally friendly and does not contain any harmful components;
- the coating is equipped with stiffening ribs, which makes it very durable.Provided that all installation recommendations are followed, the surface is able to withstand a load of 200 kg / m², even if sheets with a thickness of 0.5 mm were used;
- the material is extremely temperature resistant. He is not afraid of any drops, and the rate of thermal expansion is minimal.
There is practically no need to talk about the shortcomings of metal tiles, with the exception, perhaps, of an increased noise level on days when it rains. But it is quite possible to cope with this if you first lay a layer of glass wool.

The use of metal tiles as a roof for the roof of a private house is convenient by a simple installation technique and a high speed of work
Criteria for choosing a material for a metal roof: photo examples
Before you start considering the process of installing this roofing material, you need to decide how exactly the material should be used.
Viewing photos of roofs, on which metal tiles look attractive, is far from the best method in this case, since in the selection process you need to pay attention to the list of additional elements, as well as the marking provided by the manufacturer. Consider what the buyer needs to know.
First of all, you need to pay attention to the presence in the price list of such additional elements as:
- various types of skates: simple, curly and with aerators;
- special pass-through units for installing pipes, hatches, ventilation, antennas, as well as lighting windows;
- elements designed to ensure the safety of surface maintenance - walking bridges, ladders, snow holders;
- indoor and outdoor valleys;
- other necessary elements are wall profiles, pediments, eaves strips of metal tiles, the installation of which is an obligatory part of the roof arrangement.

Thanks to a wide range of colors of metal tiles, you can choose the most aesthetic option for a private house
Important! The presence of all the listed elements among the seller's proposals is an indicator of the level of the company that produces metal tiles, which may also indicate the quality of the products themselves.
In addition, it is worth paying attention to the study of the marking, which must be present on every certified material. Usually, in production, all the characteristics of the material itself are indicated, as well as the level of quality of the anti-corrosion coating that is applied over the sheet.
So, here's what information can be gleaned by reading the information provided on the back of a sheet of metal tile:
- the presence of polymers;
- how much zinc is there per 1 m² of sheet;
- the date of manufacture and the period of the warranty period for using the material;
- manufacturer's name;
- sheet thickness.

When buying metal tiles, it is important to pay attention to the manufacturer's quality certificates
In the process of visual inspection, you need to pay attention to the integrity of the protective layer, both on the front and on the wrong side of the sheet, as well as the presence of all mandatory markings.
Important! If we are talking about material purchased from a large manufacturer, then the marking will also contain information about the grade of steel used.
Installation of metal tiles: step-by-step instructions for independent work
Given the fact that the price of installing metal tiles has never been low, many people prefer to try to do everything they need on their own. Although initially it is worth familiarizing yourself with how much professional installation of metal tiles costs. The price of work per m2 starts from 250 rubles and may increase depending on the complexity.
The process of installing a roof made of metal tiles, the technology of which will be discussed below, consists of several stages, each of which has its own meaning and must be carried out properly.

The metal tile is an environmentally friendly material and does not contain harmful components
Laying metal tiles: preparatory stage and calculations
The first thing that needs to be done in the event that it was decided to independently carry out the procedure for laying metal tiles on the roof surface is preliminary calculations. This is necessary in order to determine how much of which materials will be required and, accordingly, avoid unnecessary costs.
Let's start by clarifying some basic concepts so that in the future the question of how exactly a metal roof is arranged does not arise. If you look at the roof, which has already been covered with this material, you can see that it consists of rows that run across the slope and waves. The distance from one row to another is called a step.
There is such a thing as a "model". This name means sheets of metal tiles, the step of which is 35 cm, and the number of waves is 6. On sale you can find sheets of modules 1, 3, 6 and 10.

Roofing pie installation scheme: 1. Rafter system, 2. Counter battens, 3. Waterproofing film, 4. Vertical battens, 5. Horizontal battens, 6. Horizontal battens, 7. Additional battens, 8. Wind board, 9. Gutter bracket, 10. Cornice strip, 11. Metal tile, 12. Roof ridge. 13. Ridge seal, 14. Dormer window, 15. Thermal insulation material, 16. Vapor barrier material, 17. Attic lining.
Helpful advice! In addition to purchasing sheets of standard sizes, you can consider the option of individual production of metal tiles to order. Of course, it will cost significantly more, but in this way you can get just such a material that is right for you. The main thing to remember is that the length of one sheet should not be less than 45 cm or more than 7 m.
In the process of choosing a suitable sheet size, you need to focus on the fact that after installation, the joints and waves converge in such a way as to form a single coating along the entire length of the slope. At the same time, it is quite simple to calculate the amount of material, taking into account the length of the roof and sheets.
When purchasing a metal tile, it is important to pay attention to some additional elements that are included in the kit and allow correct installation. This includes steel strips 2 m long, as well as steel sheets 200x125 cm, which should have the same color as the tiles.
In the process of purchasing metal tiles, you need to make sure that these auxiliary elements are available in sufficient quantity and meet all the requirements. For example, the standard plank incline is 30 degrees. Although other options are possible at the request of buyers - from 11 to 70 degrees.

Before choosing a metal tile as a roof, you should pay attention to the angle of inclination of the roof
Important! 11 degrees is the minimum slope at which the installation of metal tiles is permissible.
DIY materials and tools for laying metal tiles
In order to carry out the installation of metal tiles with your own hands, you need to take care of the availability of some tools and materials in advance that will allow you to carry out all the work as simply and efficiently as possible:
- screwdriver;
- electric drill;
- scissors for cutting metal;
- yardstick;
- a hammer;
- marker;
- mounting tape.
It is also worth taking care of the presence of a stepladder and means for personal protection of the face and hands (glasses, gloves).

The fastening of the metal tile to the crate is carried out using self-tapping screws and a screwdriver
As for the consumables that will be required for the preparation of the base and fastening the metal tile, this list includes: waterproofing material, roof strips, tiles, as well as an aero roller, strips for the ridge and ends, a guide board and boards 2.5x10 cm.Of course, you will also need fasteners - self-tapping screws and special sealing washers for them.
Helpful advice! To give an attractive appearance to the coating, it is worth using decorative overlays.
How to fix metal tiles: stages of preparatory work
The low weight of the metal tile allows a minimum amount of preparatory work before proceeding to laying. And nevertheless, you still have to prepare a suitable foundation. Since there is no need for a reinforced base, an ordinary wooden one is fine. lathingmade from slats.

In order to cover the roof with metal tiles, you first need to mount the crate
The procedure is extremely simple - based on the step of the selected metal tile, slats are located on the surface. It is important to maintain a uniform distance so that during the fastening of the roofing material you do not have to screw the screws into the void. Another important factor that should be taken into account when installing the battens is the location of the windows. It is highly undesirable to place the rafters directly above the windows.
Related article:
Dimensions of sheet metal for the roof: price and selection parameters, material installation
Features of material models, types of polymer coating. The subtleties of installing a roof made of metal.
Thermal insulation during the installation of a metal roof
When it comes to installing a roof made of metal tiles, the thermal insulation material is designed to solve two problems at once - to reduce heat loss, as well as to reduce the noise level produced by rain drops falling on the surface. To do this, a vapor barrier material is first laid on the rafters, and then a layer of thermal insulation. In this case, it is important that the layer thickness does not exceed 25 cm. An antioxidant film is attached from above, fixing it with wooden blocks directly to the rafters.
Important!In order to ensure that precipitation flows into the drain, the material must be fixed with a small allowance (about 2 cm). Due to such a small sagging, there will be no problems with water drainage.
Such a "pie" is the most effective roof insulation system, which is allowed by the technology of installing metal tiles. As for the choice of thermal insulation material, there are several options that depend on cost, quality and manufacturer.

Scheme of a roofing cake for metal tiles
Metal roofing device: basic rules of work
Before starting work related directly to the laying of metal tiles, you need to familiarize yourself with some rules and concepts that will prevent common mistakes and do everything necessary with the highest quality:
- There are two ways to lay sheets of metal tiles: from right to left and left to right. In the first case, each next sheet should be overlapped on the previous one, and in the second, the previous sheet should be superimposed.
- It is not necessary to immediately fasten each sheet fully. Before screwing on the metal tile, it is best to lay four sheets and lightly grab them with fasteners so that they hold. Then you need to make sure they are positioned as needed and trim if necessary. For the final fixing, one self-tapping screw is used, which passes through all the sheets.
- The service life of the entire roof is highly dependent on the quality of the fasteners used. Therefore, the choice of self-tapping screws must be given due attention. It is important that they are galvanized and must have special seals on the heads that will be able to tightly fill the holes when the self-tapping screw is completely screwed into the hole.
- In those places where several sheets were fixed at once with the help of one fastening element, one way or another, a seal will appear.In order to smooth it, it is necessary to cut off part of the corner, or you can straighten the capillary groove, which is located under the stamping line.

It is necessary to carry out finishing work using metal tiles in accordance with the rules for installing a roofing pie
Fixing scheme for metal tiles and other necessary elements
Certain rules exist for the installation of other required elements, without which no roof can do. Here are some recommendations regarding the installation scheme for metal tiles and other elements:
- the end strips should be fixed with an overlap, which should be about 2 cm. In this case, the size of the wave should be adjusted in accordance with the width of the slope. Otherwise, you may be faced with the fact that the ridge will fit on the pediment;
- for the curtain rod, it is also necessary to have an overlap of 10 cm on the lower bar of the sheathing, to which it is attached with nails;
- an additional layer of sealing material must be laid between the sheet of metal tile and the roofing strip;
- for arranging all the elements located below the ridge (pipes and windows), sheets with one module are used. Usually, 2 pieces are required for each structural element;
- if the roof slope is sloping, then it is necessary to additionally install an aero roller between the ridge strip and the material itself. This will avoid the penetration of atmospheric precipitation under the ridge;

Scheme of fastening sheets of metal
- the ridge should be fixed to the slats, which are located in the end part of the entire structure. In this case, the calculations should be carried out taking into account the required protrusion, which is 2-3 cm. Moreover, if you have to deal with a flat ridge, then the fastening is made with an overlap, and for semicircular elements according to the profile lines;
- it is necessary to study in advance the specifics of installing a drip under the metal tile, and clearly follow all instructions.
Helpful advice! If you have to work with a roof, the angle of inclination of which is more than 45 degrees, then it is worthwhile to carry out calculations in advance, which will determine whether it is possible to install a specific model of a ridge strip in this case. This must be done, since otherwise, it may even be necessary to completely replace the entire roofing.
It is worth paying attention to the fact that, if necessary, the ridge bar lends itself to some adjustment. That is, it may not be bent or unbent in order to ensure the most accurate repetition of the roof slope angle. You can learn more about such subtleties from the video instructions for installing metal tiles.

Scheme of fastening sheets of metal tiles and placing screws
Installation of the valley at the roof with metal tiles
Another extremely important element, the installation rules of which cannot be neglected, is the valley. For each such element, an additional board must be attached. In this case, fastening must be started from the bottom, gradually moving upward and not forgetting about the need for an overlap (in this case, 25-30 cm). Below the level of the eaves, the lower bar is necessarily cut off. Then comes the flanging, under which, as well as under the ridge, a seal is laid.
A gap of about 8-10 cm remains between the sheets and the axis. Then screws are screwed into the cut sheets at a distance of about 1.5 cm from the stamping line. In this case, the mount should be located 25 cm from the axis of the valley. If you follow this technology, then in the end the sheet, in the place of the fastener, will converge with the board on which the valley is located.
As for the installation of the valley below, it must be started before laying the roofing material. This is important in order to further ensure the flow of water directly into the additional element.

Installation diagram of the valley at the roof with metal tiles
Important! All errors in the process of calculations and measurements can lead to the appearance of gaps on the surface, and when heavy precipitation begins, the roof will most likely leak.
In order to cover those places where the cut sheets are visible, special decorative overlays are used. When installing them, you also need to remember a few simple rules:
- installation must be done from bottom to top;
- the seal between the cover and the tile is not needed;
- the linings must be overlapped at least 10 cm;
- fasteners (in this case, self-tapping screws) should not cause damage to the valley.
Very often you have to deal with situations when the beginning and end of the valleys are located directly on the roof slope. As an example, consider the case when a dormer is being installed. In such a situation, it is imperative to put a separate board, and a hole is made in the sheet of metal for the window itself. At the same time, the cornice cut is covered with a bar. And along the walls, a sealing material must be laid.

Scheme for calculating endova with metal roofing
How to install metal tiles on a roof with a triangular or trapezoidal slope
If there is a need to cover a triangular or trapezoidal roof with metal tiles, then you will definitely need to install two additional bars. They are installed along the roof bend line on both sides of the ridge. After that, the cornice board is mounted and the assembly of the lathing begins. The step of the lathing for metal tiles in this case is calculated in the same way as in the standard scheme. Then the eaves system is installed. They begin to lay the metal tile only after carrying out all these procedures, orienting and leveling the first sheet along the cornice bar.
Important! The distance between the corner sheets that were trimmed and installed near the "ridge" should not exceed 10 cm.
In order to install the ridge knots, you need to align the ridge strips relative to the ridge angle. In the case of using a straight ridge, it must be cut according to the available corners, and for a semicircular ridge, special plugs are provided. Moreover, it is best to use plastic models.

Ridge installation diagram for roofs with a triangular or trapezoidal slope
The ridge bar should be located strictly along the axis of the ridge. This is not too difficult if the angles of the ramp are the same. If they have different values, then the task becomes much more complicated. As an auxiliary material, bright polyurethane foam is used, which allows you to determine the quality of adhesion to the slopes.
Installation instructions for metal tiles "Monterrey"
A separate type of metal tile that is undoubtedly worthy of attention is monterrey. This option is very popular due to some exceptional characteristics:
- extremely high level of material resistance to both ultraviolet radiation and other external factors, such as moisture and temperature;
- due to a layer of polymer applied to the surface of the tile, it does not lose its appearance throughout the entire service life;
- the material is extremely durable and hard, so that it can withstand severe stress;
- multi-layer structure prevents corrosion;
- due to its low weight (one square meter of material weighs no more than 5 kg), the load on the rafter system is significantly reduced;
- using this option is a great savings as there is no need to take a large step between the bindings. Initially, the installation instructions for Monterrey metal tiles provide for 35 cm steps.

Metal tile "Monterrey" is a fairly durable material due to the presence of stiffeners
There are only two disadvantages of this material - a large amount of residues after installation, as well as the need for high-quality sound insulation.
As for the features that you need to know about before laying the Montrrey metal tile, the following aspects play a role here:
- for different models of this material, it is necessary to prepare a different crate. So, for Standard or Super metal tiles, a step of 35 cm will be enough, but for Lux or Maxi, the step should be 40 cm;
- in the most difficult places of the roof (usually these are internal corners, as well as the place where the chimney outlet is located), you need to make a continuous crate;
- on the junction strips, to exit the chimney, you need to install internal aprons;
- instructions for the installation of metal tiles "Monterrey" does not provide for the use of material, the length of which is more than 4 m;
- before installing the material, it is necessary to remove the protective covering, since it may not be possible to do this in the future.

When installing metal tiles "Monterrey", it is necessary to install high-quality sound insulation
It is categorically impossible to cut the sheet in the transverse direction, as this can lead to the profile crumbling. Also, in no case should you use a grinder or other tools with abrasive wheels for this purpose.
Interesting! The metal tile Cascade also looks great, the installation instructions for which are not too different from all others. But the appearance of such a roof is considered more aesthetic and original.
How to properly care for metal roofing
Having studied the step-by-step instructions for installing metal siding, you can carry out its high-quality installation. But in order for the material to serve for many years, you need to know how to care for it.

When cleaning a roof made of metal tiles, it is important not to damage the top layer, which consists of polymer material.
The top layer of the metal tile is a polymer material that is designed to protect against corrosive processes. But as a result of constant exposure to external factors: atmospheric precipitation, ultraviolet rays, as well as dust and dirt, this layer can begin to collapse, which will lead to the need to replace the coating. In order to avoid this phenomenon and extend the operational life of the roof, the following procedures must be carried out regularly:
- remove dirt, dust and dry leaves from the surface using a damp fluffy brush;
- when it comes to removing more complex dirt, it is permissible to use cleaning agents, but only those that are intended for polymer surfaces. It is strictly forbidden to use aggressive chemicals, as they destroy the protective layer and render the material unusable;
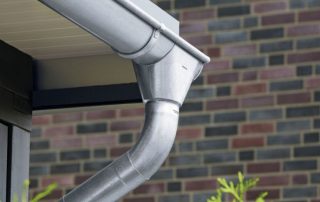
- cleaning of gutters is carried out using a stream of water, which should be directed from the ridge to the cornices;
- it is possible and necessary to clean the snow, but it should be done only with the use of such tools that are not capable of damaging the delicate coating.
Subject to these simple, but extremely important rules, a metal tile covering can properly serve as a roofing material for about 50 years.

If a metal roof is damaged, it is important to make urgent repairs in order to prevent the destruction of the lower layers of the roofing cake
Do-it-yourself common mistakes in the process of installing a metal roofing tile
Inexperienced craftsmen often make mistakes that can lead to the fact that the work will have to be partially, and sometimes completely redone. Such negligence can lead to additional expenses for the purchase of material and consumables, so it is better to familiarize yourself with common mistakes in advance in order to prevent them:
- the installation of metal tiles should be carried out exclusively in shoes with soft soles that cannot damage or scratch the coating;
- it is strictly forbidden to step on the crest of the wave, as this can cause deformation;
- moreover, it is generally not recommended to step on the sheets in full;
- when moving along the surface of the material, the leg must be placed parallel, and not perpendicular to the slope;
- you can take the material only with gloves.
Taking into account these simple rules, and also acting in accordance with the technology of laying metal tiles, you can independently make a beautiful and reliable roof.

Due to its low weight, the metal tile provides very little load on the roof and foundation of the building
Installation of snow holders on metal tiles: instructions and their varieties
A high level of safety is one of the main requirements that apply to a roof made of any material, including metal tiles. For this purpose, special designs are used, which are called snow retainers. And the main goal is to ensure safe snow removal from the roof and to prevent possible dangerous situations. In addition, they help to maintain the original shape of the structure, and do not allow it to deform under the weight of icy snow. And given that its weight in some cases may exceed the weight of the roof itself, this problem is quite urgent.
Important! The distribution of the load that snow exerts on the roof surface must be thought out even at the stage of laying the foundation. This factor must be taken into account in the calculations.
It is almost impossible to predict how the snow will be distributed on the roof surface. It depends on many factors, including the angle of inclination of the roof, wind direction, etc. Therefore, in order to make calculations, a special formula is used:
Q = G × s
In this case, Q is the load exerted by snow, G is the mass of snow on a flat roof surface, which can be found from a special table, and S is a correction factor that depends on the angle of inclination of the roof:> 25 ° - 1, if 25- 60 ° - 0.7. If the degree of inclination is more than 60, then this is not taken into account, since in this case precipitation on the surface will definitely not linger.

An important step in finishing a roof using metal tiles is the installation of all additional elements that not only protect the coating, but also hide non-aesthetic joints and edges
In order to determine the indicator G, it is necessary to refer to a special table that provides information on snow cover for each region of the country.
Installation of tubular snow holders on metal tiles: installation rules
As a rule, a pipe that is laid along the roof is used as the basis for the snow retainers. In the case of using metal tiles as a roofing material, fixation is made in the places where the roof and the load-bearing wall are connected.
It is strictly forbidden to fix these elements on the eaves strip for metal tiles, as this may lead to the destruction of all systems. Moreover, if you have to deal with a slope, the length of which is large enough, then the installation of snow guards on the metal tile must be done in several rows at once in order to ensure a more reliable fixation.

The process of installing tubular snow holders on metal tiles
The pipes themselves are attached to the roof either end-to-end or in a checkerboard pattern. Special attention should be paid to the installation of such a system if the house has an attic. In this case, the installation must be done in such a way that a snow guard is located above each window opening. As for the distance from the edge of the roof to the elements, 40-50 cm is quite enough.
Lattice snow holders for metal roofing: how to fix it correctly
Lattice snow holders are considered the most effective, so those users who are interested in the quality of the installed systems choose this option. There are two types of such structures - ordinary and "royal", although it should be admitted that there is not much difference between them, with the exception of the supports and the complexity of the gratings.
The high level of efficiency and safety of this type of snow holders is due to their considerable height, due to which they may not be useful not only in winter when it comes to keeping snow, but also in summer. Indeed, it is in the warm season that all kinds of repair work are most often carried out.

Lattice snow holders are considered one of the best options for metal roofing
Corner snow holders for metal tiles
Corner snow guards are thin steel sheets that are coated with a polymer coating that protects them from corrosion. This is one of the most budgetary options, which at the same time allows you to effectively prevent snow from rolling off the roof. It is very easy to choose a model that will fit the existing metal tile, since the range of colors is extremely large.
To fix the corner snow holders on the roof of the roof with metal tiles, self-tapping screws and ordinary metal corners are used. Fastening is performed on the upper wave of the sheet.
These are just a few of the design options that can be used to prevent snow from rolling off the roof. The metal tile is perfectly combined with many models and varieties of these elements, so there will definitely not be any problems with the choice and fixation.

An example of the location of corner snow holders on a roof covered with metal tiles
Installation of a roof window in a metal tile
It is believed that the installation of roof windows is not a task for beginners, and with this question it is best to contact specialists who have proper experience in this area. But this does not mean at all that it is unrealistic to do it yourself, especially if you use step-by-step instructions for dummies. Installation of metal tiles and installation of the window itself in this case may well go without any problems.
First of all, it is worth paying attention to the fact that the maximum possible width of such a window should be 80-120 mm less than the opening between the rafters. In cases where the rafter step is very small, two small windows are installed in adjacent niches.
The installation of the window is carried out after the roofing "pie" is completely made, then you need to install the mounting bar, for which I use the same boards as for the rafter system. Then the frame is installed and the sashes are mounted. It is very important to take care of high-quality waterproofing so that in the future the window does not become a source of precipitation into the house.

Installation of the roof window is carried out after all layers of the roofing cake have been laid
Of course, you have to make some changes in the process of installing the lathing under the metal tile, and pay special attention to the issue of installing the ridge of the metal tile if a roof window is planned. But all these difficulties are more than justified by the excellent result that awaits the owners as a result.
Installation of metal tiles: video instruction for beginners
For those who have never done such work before, it will be extremely useful to watch a video on how to fix metal tiles on the roof. A visual demonstration, as well as the recommendations of specialists, will allow you to avoid mistakes, and independently make a beautiful and reliable roof that will regularly serve for many years.