From this article you can learn how to make a do-it-yourself wood milling machine at home to perform basic operations with blanks. The text outlines a step-by-step technology for creating a tool: an analysis of the design features of the device and all the components necessary for its installation, dimensional drawings and detailed descriptions that will help create each of these elements and put them together.

Milling machines are often made to perform multiple functions in woodworking
Content
- 1 Do-it-yourself wood milling machine: design specificity
- 2 How to make a wood lathe with your own hands: drawings and technology
- 3 How to make a do-it-yourself wood milling machine: drawings, videos, instructions
- 3.1 Selection of materials for the manufacture of a woodworking machine with your own hands
- 3.2 How to make accessories for a router with your own hands
- 3.3 How to make a DIY milling machine
- 3.4 DIY table making technology for a router with drawings
- 3.5 DIY CNC machine manufacturing technology: drawings and assembly
- 3.6 DIY equipment for creating a CNC milling machine for wood
- 3.7 How much will it cost to buy a CNC milling machine: tool prices
- 4 Making a wood milling machine with your own hands: video instruction
Do-it-yourself wood milling machine: design specificity
Wood milling machines can have various purposes. Some devices are designed for just one operation, others are multifunctional. Buying a professional tool is an expensive pleasure, so many craftsmen resort to making a wood machine with their own hands. Most often, such a router is used in small furniture workshops.

With a milling machine, you can perform operations such as shaped edges, cutting grooves and through holes, etc.
Routers are usually used for processing wood along a straight or curved contour. The knife head acts as a working element in the structure, which carries out rotational movements. In most cases, this part is vertical. There are many varieties of routers, each with its own design features.
The most popular types of devices:
- standard single-spindle (vertical spindle);
- single-spindle designs, where the spindle or homemade milling table tilts;
- copy milling cutters with a spindle with top placement;
- copying structures with a spindle having a horizontal placement (the tool is designed for processing wood propellers).
Note! In all of the above structures, except for the last one, the material is fed manually.
Milling machine device: single-spindle designs
The design of a single-spindle machine includes a horizontal table with a pair of tongue-and-groove nests for fixing the guide rulers. It is mounted on a cast iron bed. Under the table there are sleds that move along guides. They have a spindle on a thrust bearing and a pair of bearings. In the upper part of this element there is another spindle - a plug-in. It is designed for mounting cutting parts.

A reinforced spindle must be used for processing large workpieces
The slide with the spindle can be raised if necessary. For this, a bevel gear with a handwheel or a screw is used. The belt drive allows the spindle to be driven. Moreover, for this, a counter drive, a motor or a motor shaft can be used.
To make such a wood router with your own hands, you need to take into account some of the nuances. In some cases, additional spindle reinforcement is indispensable. Such a need arises when it is required to process workpieces of great height or the part is subjected to serious loads. To do this, you need to install and fix the upper stop on the machine table. This element is fixed to the bracket. To control the movement of the workpiece during milling, it is advisable to use a guide ring or ruler.
Machines in which the spindle or table tilts allow you to do a wider range of DIY woodwork. In addition to standard operations, such designs allow obtaining a higher quality of processing, obtaining a clean and uniform surface. This can be achieved by machining the wood at an angle using very small diameter cutters. The tilting spindle is much safer and more comfortable.
The device of a home-made copying machine for wood with an upper spindle
These devices are used to perform copying works. This does not require high power. Such designs allow for milling and drilling to create openwork products.

Homemade copy milling machine for wood
The copier can replace three instruments at once:
- Fraser.
- Drilling machine.
- Jigsaw.
Wood processing is carried out using cutting mills. The spindle develops a large number of revolutions, due to which the machined surface is very clean.
A homemade woodworking machine can be used for various purposes:
- calibration of bosses;
- production of openwork frames;
- study of the walls of the ribs, etc.
A base made of cast iron is used as the basis for this design. Its upper part is curved in the shape of a sickle. This area is used for mounting an electric motor.

Having made a solid and reliable machine structure, it can be used to perform various operations with wood.
Note!The bed serves as a connecting link on which all the elements of a homemade wood milling machine are installed. The stronger and more reliable its design, the better.
The motor is mounted on rails. Due to the system of levers, it can move along these elements down and up. This section is set in motion by pressing the pedal, which is equipped with a special stopper. The rotor shaft of the motor is connected to the spindle, where the chuck with the tool is fixed. This cartridge can be self-centering or American.
In the lower area of the bed, a table is mounted on a movable arm. This design can be moved vertically along the guides using a handwheel. There are other options for making a home-made wood milling machine with your own hands, a drawing of such a design assumes vertical movement of the table even in the process of work by pressing the pedal. In these models, the electric motor and spindle remain stationary.
How to make a wood lathe with your own hands: drawings and technology
The easiest way to make a tool with your own hands at home is to construct a lathe or router from a drill or an electric motor removed from another tool. This process is not so difficult, so every master is able to cope with its implementation. This will require an electric motor, the power of which does not exceed 500 W, and improvised materials. A drill can also be used as a drive. Of course, it will take some skill to make a lathe.

Tailstock device of a homemade wood lathe
The following elements are required for the construction of the machine:
- metal bed;
- electric motor;
- handyman;
- tailstock.
It will not hurt to acquire a drawing that will help you navigate in size and correctly make all the structural elements for its subsequent assembly.
How to make a homemade drilling machine with your own hands with a motor
First you need to prepare the motor shaft. To do this, a faceplate is installed on it, a steel center with a thread is also suitable. The installation of the second center is carried out in the tailstock tube. To make the bed, you will need a pair of corners measuring 5x3 cm, their length is 15 cm. A motor is attached to the bed using a bolted connection.

An example of a homemade drilling machine
Note! The central part of the tailstock must necessarily coincide with the middle of the motor shaft.
At the next stage of making a homemade machine with your own hands, the headstock is assembled. This element is formed from a pair of horizontal and a pair of vertical corners. A pipe for the spindle is attached to it. You need to insert a bolt into it, the diameter of which is 1.2 cm. Previously, its head is sharpened at a right angle. Thus, the center of the spindle is designated. After that, the headstock is installed on the bed. On the upper rack, which is connected to the horizontal corners, it is necessary to fix the tube by welding.
To make a hand-hand, you need to take a steel rod with a chamfer. Also, this element must have a hole that will be used to secure the reference ruler. It is necessary to vertically weld the tube with the locking screw to the long elbow. Then the rod of the assistant is inserted into it.
The rotor of the motor, on which the faceplate is fixed, will be used as the spindle of the headstock. Several holes need to be made in it. The plug will be inserted in the central part. The holes in the edges are for fixing the part with screws.

Even with the help of simple tools, you can create interesting wooden products, for this you need to study the technology of working with the tool and practice
How to make a wood lathe with your own hands from a drill
Having at hand crafting table with a solid and level work surface, you can build a lathe without having to build a bed. An electric drill in this case will perform the function of a rotary drive and a headstock. According to the simplest drawing of the machine, it is enough to fix this tool on the surface of the workbench through the neck. Clamps and a clamp are suitable for fixing.
Next, you need to make an emphasis that will act as a tailstock.
This element is mounted opposite the drill.To create it, you can take two blocks of wood and an adjusting screw, sharpened at one end for a cone. If it is intended to use the machine for processing massive wooden blanks, then it is advisable to fix the emphasis on the table using clamps.
To make a tool with your own hands, inexpensive materials are enough. A drill-based lathe can be used to grind various parts:
- doorknobs;
- structural details of the stairs;
- decorative items, etc.

Using a workbench with a solid and even work surface, you can make a lathe from a drill with your own hands
Note! The machine with a wooden clamp is only suitable for processing wood blanks. It is not allowed to use such a tool for working with metal.
To expand the functionality of the tool, its design can be supplemented with attachments and other accessories that can improve the quality of work.
These improvements include:
- winding on transformers;
- applying a coloring composition over a rotating part to create patterns;
- application of spiral notches to the workpiece, etc.
Installing a special attachment in the form of a copier will allow using the machine to create a whole series of identical parts or products according to a template.

An example of a multifunctional homemade woodworking machine from a drill
How to make a do-it-yourself wood milling machine: drawings, videos, instructions
This category of instrument includes several varieties. Before making a milling machine, you need to think over all the details in advance:
- Decide on the type of construction, and what tasks the tool will perform.
- Decide on the materials that will be used for the construction of each element, and methods of fixation.
- Calculate the technical and operational parameters necessary for full functioning.
- Pick up drawings with the dimensions of all parts for a do-it-yourself CNC milling machine for wood.
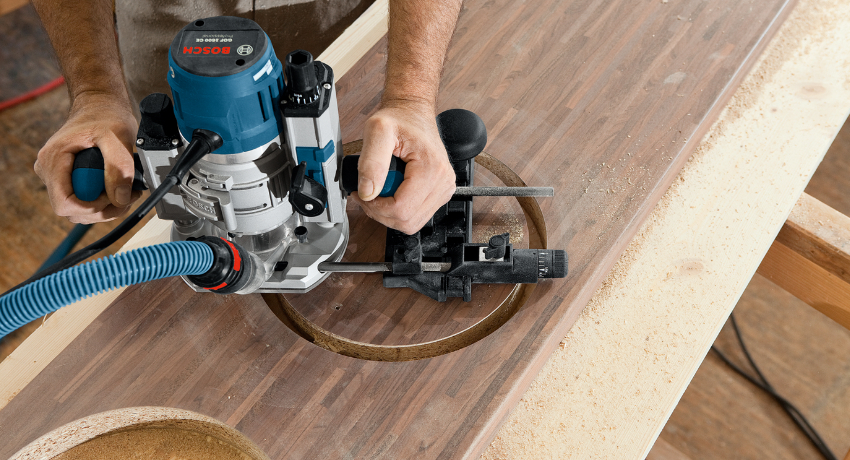
To work with complex elements, you will need a router with a high level of power and a large number of revolutions. Experts recommend giving preference to devices with manual spindle adjustment and automatic stabilization. Functions such as quick stop and soft start will be useful. Ideal designs do not require disassembly of the tool body to replace motor brushes.
Related article:
Manual wood router: features of the tool and its scope
Operating instructions. Completing parts. Recommendations for the selection of designs and an overview of the best models.
The router design consists of the following elements:
- countertops;
- bed;
- spindle;
- parallel stop;
- feed slide;
- vacuum cleaner.

The main components of the milling machine
Helpful advice! The recommended motor power for the machine is 2 kW or more. A tool with less performance will not be able to process hardwood blanks.
Selection of materials for the manufacture of a woodworking machine with your own hands
In order for the bed to be able to withstand high dynamic loads, it is desirable to use metal as the material for its manufacture. The most suitable option is a pipe with a square or rectangular section. The use of a massive metal corner is allowed.
The choice of such materials allows you to create a structure without using a welding machine. All elements are connected by bolts. The design is collapsible, which makes it easier to carry and transport. In addition, using the corresponding drawing of the milling table, you can create adjustable legs with your own hands. The movable supports will allow you to adjust the machine horizontally.
The following materials are suitable for the manufacture of countertops:
- multilayer plywood sheets;
- planed board;
- MDF, OSB or chipboard.

Woodworking equipment table
The table top must have a smooth surface. Any irregularities will affect the quality of work. In addition, it is necessary to exclude all factors that can cause scratches during the processing of workpieces.
When making a table for a router with your own hands, a flat surface can be achieved in several ways:
- finishing with plastic;
- careful fitting and grinding of planed boards;
- metal finishing.
To make a router with your own hands, you can use an asynchronous or collector motor. The first option is quite unpretentious in operation and does not impose restrictions on the size of the cutters used. Among the disadvantages is the high noise level. The brushed motor is more affordable, but its brushes wear out faster.

Scheme of a convenient table for a router with storage boxes
How to make accessories for a router with your own hands
Homemade wood cutters are capable of efficiently processing wood, but when in contact with hard materials, the cutting elements quickly become dull. Therefore, the range of application of such parts is significantly limited.
To make a wood cutter with your own hands, you need to take a cylindrical blank and cut off half of its diameter in the area where the cutting zone will be located. After that, it is necessary to smooth out the resulting transition. Another 1/4 of the diameter must be removed from the cut part of the workpiece and a similar operation must be performed. Then you should give the processed section of the cutter a rectangular shape. To do this, you need to cut off its lower part. The thickness of the resulting working area should be 2-5 mm.
Helpful advice! To cut a metal workpiece for a cutter, you can use a drill or grinder, adapting this tool for this task. The cutting edge can be produced using grinding machine.

Various cutters can be used to form various technological recesses, grooves, ridges, depressions
Recommendations for making homemade wood cutters:
- It is advisable to sharpen the cutting part at an angle of 7-10 °. A sharper edge will cut much worse and will quickly lose edge.
- With the help of an angle grinder, complete with metal discs, you can give the cutting part of the cutter the desired configuration. For these purposes, diamond-coated needle files are also suitable.
- If the cutter has a complex configuration, you can flatten or bend it.
How to make a DIY milling machine
The simplest milling machine can be made according to the same principle as the turning tool described earlier. There are several ways to design the leading center of a structure.
In the first case, a steel tube with thin walls is pushed onto the shaft. This method is considered the simplest, but it is not without its drawbacks. The operator will not be able to process workpieces with a diameter smaller than the inner section of the pipe. In addition, such a structure cannot be quickly dismantled, if the need arises.

Using a milling machine, you can securely fix both the tool and the workpiece, which will allow you to get the highest quality product
In the second case, the workpiece will be attached to the faceplate. To do this, you can use screws, for which you first need to make holes. This method also has disadvantages. The diameter of the workpieces being processed is limited by the size of the faceplate. To simplify this process, a special cartridge can be made, although in this case some limitations cannot be avoided.
The back center, which will be used for fixing long workpieces, must be installed on the tailstock. The electric motor is mounted on the frame. In general, the simplest designs of turning and milling tools are very similar.If you want to get a more functional device, you can make a CNC milling machine with your own hands, but this will require additional technical knowledge.
DIY table making technology for a router with drawings
There are several design options that can be used to install a desktop CNC router. Tables can be stationary or portable. In addition, there is also an aggregate variety. This design allows you to expand the surface of the table to use the router.
Most often, craftsmen give preference to stationary structures with a metal frame. Dutch plywood is suitable as a material for the countertop.

Scheme of the table design for the router
Note!When making a table for a hand router with your own hands, it is imperative to take into account the height of the person who will work behind it.
The list of required tools and materials includes:
- metal parts for the frame (pipe or corner);
- aluminum guides;
- axes for fixing the router;
- putty, as well as priming and coloring compositions;
- self-tapping screws;
- furniture bolts (60x6 mm);
- hex adjusting bolts with nuts (4 pcs.);
- Finnish film faced plywood with moisture resistant properties (sheet thickness 1.8 cm);
- material for the manufacture of a parallel stop (plywood or boards);
- drill and drill set;
- screwdriver and electric jigsaw;
- welding machine;
- auxiliary devices (brushes, rags, spatula).

A portable hand router table allows you to machine small pieces of wood
Having everything you need, you can easily make the design of a milling table with your own hands, video reviews of the technology, of which there are many on the network, will help you visually familiarize yourself with this process.
DIY CNC machine manufacturing technology: drawings and assembly
A CNC router differs from a conventional tool in the presence of a program that controls its operation. In many videos, homemade machines are made on the basis of a rectangular beam, which is fixed on guides. The CNC router is no exception. During the installation of the supporting structure, it is advisable not to use welded joints; it is better to fix it with bolts.
The fact is that the welds are vulnerable to vibration, which will cause the frame to gradually deteriorate over time. As a result of a change in geometric dimensions, the equipment will lose its accuracy and processing quality. It is desirable that the drawing of the table provides for the ability to move the tool vertically. A helical gear is suitable for these purposes. The rotational motion will be transmitted by the toothed belt.
The vertical axis is the most important structural element. For its manufacture, you can use an aluminum plate. In this case, it is very important that the dimensional parameters of the axis correspond to the dimensions of the future machine.

Scheme of a CNC machine on round guides
Helpful advice! Using a muffle furnace, the vertical axis can be cast from aluminum according to the dimensions shown in the drawing.
The assembly of the machine should begin with the installation of two electric motors of the stepping type. They are installed behind the vertical axis directly on the body. One motor will control the horizontal movement of the milling head, the other vertically. Then you need to proceed to the installation of the remaining structural units.
The rotary motion will be transmitted to the nodal elements of the tool by means of belt drives. Before connecting the software control to the finished mill, it is imperative to check its operability and, if any, eliminate them. Many craftsmen use video reviews to assemble the machine with their own hands, where this process is discussed in detail.
DIY equipment for creating a CNC milling machine for wood
To create a CNC milling machine at home, it is imperative to use stepper motors. They provide the ability to move the tool in 3 planes. To create a homemade machine, the electric motors present in a dot matrix printer are ideal. Make sure that the motors have sufficient power. In addition to the motors, steel rods are required.

CNC router made of metal profiles using a small size router
A dot matrix printer has only a couple of motors, and it takes three to create a router. Therefore, several old printing devices will be required. It is desirable that the motors have 5 control wires. This increases the functionality of the tool.
Other engine parameters are also important:
- degree of rotation in one step;
- winding resistance;
- voltage level.
A stud and nut are required to assemble the drive. The size of these parts is selected based on the drawing. A thick rubber wrap from an electrical cable can be used to secure the motor shaft and stud. A nylon bushing will work as a retainer and a screw should be inserted into it. A drill and file can be used as an auxiliary tool.
The tool will be controlled by software. An indispensable element of the machine is the LPT port, which provides connection of the control system to the router through electric motors. The quality of the components used to assemble the machine determines its service life and the quality of the technological operations performed. Therefore, the choice of parts should be approached thoroughly. When all the electronic components of the machine are installed and connected, all that remains is to download the drivers and software.

A CNC milling machine can be made from scrap materials using MDF, steel fasteners and old parts from the printer
How much will it cost to buy a CNC milling machine: tool prices
If almost any master can handle the manufacture of a hand router and a stationary table, then assembling a CNC machine for many will seem an impossible task. Moreover, homemade designs do not have the capabilities that a factory-made tool can offer.
Helpful advice! If you intend to use a router to perform complex woodwork, it is better to give preference to factory designs that are precisely calibrated and have many functions.
The prices for them vary depending on the functionality, table size, power, manufacturer and other parameters.
Average prices for factory-made CNC milling machines:
| Machine name | Table length, mm | price, rub. |
| LTT-K0609 (LTT-K6090A) | 900 | 228970 |
| WoodTec MH-6090 | 246780 | |
| LTT-P6090 | 329120 | |
| RJ 1212 | 1300 | 317000 |
| WoodTec MH-1212 | 347350 | |
| RUIJIE RJ 1200 | 399200 | |
| WoodTec MH 1325 | 2500 | 496350 |
| WoodTec MH-1625 | 540115 | |
| WoodTec VH-1625 | 669275 | |
| RJ 2040 | 3000 | 1056750 |
| WoodTec VH-2030 | 1020935 | |
| WoodTec VH-2040 | 1136000 |
Assembling a machine tool with software is a rather complicated process that requires certain skills and knowledge. This work cannot be done without a suitable drawing and the necessary parts. Items such as signal loops, stepper motors, and microprocessor boards can be removed from legacy equipment or purchased online. Many online stores offer ready-made kits for assembling milling machines for home workshops.