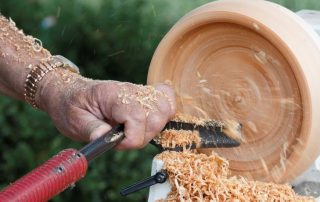
"I have long dreamed of having a circular at home ..." - many posts in social networks begin with these or approximately the same words. And then follows information about how the circular was made with your own hands. Quite a logical sequence of actions. An artisan person who is ready to use such a tool on his own is able to assemble it. How to do this - in the materials of this article.

A hand-made saw has several advantages
Content
- 1 The scope of the homemade circular saw
- 2 Structural elements of a DIY wood sawing machine
- 3 Determining the parameters of a do-it-yourself circular at home
- 4 Do-it-yourself stationary circular from a manual circular
- 5 Parallel stop for circular do-it-yourself
- 6 Diy circular table (with drawings)
- 7 Diy circular: safety of use
The scope of the homemade circular saw
In the process of building a new home, when wood material is used in large quantities, a homemade circular will not be enough. And the functionality of such a device will require a wider one. But when performing repairs, a home circular machine becomes an indispensable technical assistant.

A hand-made circular saw allows safe work and accelerates the construction process
Quite often, the dimensions of wooden elements are determined directly in the course of work. The ability to independently provide the process with the necessary materials significantly saves time and money. And often the quality of wood blanks is guaranteed to be higher.
On a home-made home circular, you can dissolve the boards into bars, make planks, slats, rip off workpieces, cut slabs of wood materials into fragments of the required size.
Using a homemade circular, you can make such types of furniture as a table, shelf, rack. A similar stationary home tool is applicable when creating wooden sports equipment, making containers, etc.
When installed on a saw blade with certain technical characteristics, the mechanism can be used as a circular for metal. It is allowed to saw soft aluminum and sheets of other types of metal, the thickness of which does not exceed 2 mm.When working with thicker material, the mechanism will overheat, provoking an automatic shutdown.

For cutting firewood and simply cutting pieces of wood, a firmly fixed table with a saw slot is enough
How to make a circular with your own hands: preparatory stages of work
Before you put an end to the question of the advisability of making your own circular, you need to personally get acquainted with several similar devices, watch videos on the Internet. During observations and views, special attention should be paid to the main elements, details, fastening methods. To understand how to make a circular, you need at least theoretical knowledge.
The manufacturing process can be implemented in two ways:
- a set of elements of the future design is available, it is only necessary to complete the assembly;
- the components of the circular must be purchased.
In the case of the latter option, the task becomes somewhat more complicated, since parts and mechanisms are most often bought in different places, but they must correspond in terms of technical and functional characteristics.

Diy circular making scheme
Helpful advice! It is necessary to acquire elements for the future design of the circular only after a detailed drawing of the installation has been developed.
Without a drawing, it is impossible to take into account the dimensions of the elements and select a complete set. Quite often, this stage (drawing work) is omitted by home craftsmen due to the lack of execution skill. This is not worth doing, since it is quite enough to draw a saw. At a minimum, this will make it possible to visualize the future unit. It is extremely important to imagine what will happen in the end.
Only after the drawing or sketch and all the necessary elements are available, you can proceed directly to the assembly process.
Structural elements created do-it-yourself wood sawing machine
To make a stationary machine for sawing materials at home, you first need to know what structural elements it consists of. Whether it is a do-it-yourself machine made from a manual circular, a grinder, or a tool assembled from disparate elements, the set of basic parts is the same.

The surface of the table must be made even, for a better product at the exit
The main elements of stationary circular installations are:
- Table for connecting and securing mechanisms. If the circular is powerful and massive, it is better to use a metal table. Options from chipboard, wood, plywood are suitable, the main thing is that the surface is smooth.
- Shaft. The most important detail. When making it, use a lathe separately. The dimensions should be calculated accurately, this will avoid beating.
- Casing. This element ensures safe use of the circular saw.
- Engine. When using a grinder or circular saw, it is part of the power tool.
Helpful advice! If the design is supposed to be a prefabricated one, then when creating a circular with your own hands, an engine from a washing machine will be the most successful option.
In the design of the circular, there must be moving parts of the drives, and a button must be installed in the power supply circuit to stop the engine in emergency situations.

Circulars of any fixed type consist of main parts
Determining the parameters of a do-it-yourself circular at home
The primary task is to choose the capacity of the future stationary circular. Usually, devices with a power of up to 850 watts are recommended for home use. If it is not supposed to carry out repair work, but to build, for example, a bath or a summer house, as a result of which you will need to saw a lot of material, then you can use a 1250 W motor.A device with a higher index is not recommended, since such powerful circulars require not only a solid table-stand, but also fixing the latter to the floor by fixing or concreting.
The cutting depth is an important characteristic. In household devices, it should not exceed 8 cm. In fact, this figure is quite enough for sawing boards, plywood or wood-based panels.
When making do-it-yourself mini circulars or a full-scale sawing structure, be sure to take into account the speed. If it is supposed to simply cut boards for the manufacture of certain wooden elements, then you can limit yourself to a motor with a low or medium frequency. If you need perfectly straight and clean cuts, then it is better to use a high-speed motor. The optimal indicator for a household power tool is considered to be a frequency of 4500 rpm.

For circular, you can use the engine from the washing machine
Be sure to take into account the height at which the start button will be located. The place of its placement should be convenient for pressing.
Important! The control panel of a homemade circular saw must be accessible.
Rscientific circular as the basis for a homemade construction
One of the most popular tools on the basis of which homemade saw designs are created at home is a circular saw (hand circular). This electromechanical mechanism makes straight cuts in wood materials as well as in soft and thin metal using a circular disc. The tool is quite simple, it has all the basic elements that allow you to make a circular saw out of a circular saw with your own hands.
The circular saw consists of the following parts:
- electric motor;
- one or two handles;
- protective casing;

Hand circulars make straight cuts in wood materials as well as soft and thin metal
- holding platform (for the possibility of exposing the disc);
- riving knife (prevents the saw blade from getting stuck in the wood).
Hand-held circulars stand out among other similar instruments and some technical features. For example, the depth and angle of the cut can be changed directly during work. Plunge-cut saws provide special opportunities. They can be used to make insulated fragment cuts of the required size.
Accuracy and quality of circular sawing depend on the number of teeth on the disc and on their sharpening angle. With a large number of teeth, the quality is higher, but productivity is slightly reduced.
When making a circular with your own hands from a hand-held circular saw, you need to pay special attention to the engine power. This is very important when intending to carry out significant amounts of work. The total weight of the saw is also important. Lightweight models are suitable for occasional cuts.

The depth and angle of the cut can be changed directly during the operation of the circular
Do-it-yourself stationary circular from a manual circular
The operational capabilities of a hand-held circular saw are significantly increased if it turns into a stationary tool. To understand how to make a stationary circular from a manual circular, it is first of all worth understanding the methods of rigidly attaching the power tool.
As a stand, you can use trestles made of metal or wood. It can be either one or two products (if the dimensions are small), interconnected by boards with a thickness of at least 50 mm or bars with a similar section. Next, you need to attach a tabletop to the top of the stand, which will act as a bed.
For these purposes, it is convenient to use thick plywood (at least 10-12 mm) or two sheets of thinner material joined together, which together will give the same thickness. Chipboard blades or metal are also suitable.If the metal is thin, it is best to attach it to a wooden base.
Install the hand saw from below. Previously, a gash necessary for extending the disc is made in the tabletop.

You need to attach a tabletop to the top of the stand, which will act as a bed
Important! It is necessary to fix the tool so that the saw blade is located strictly parallel to the cutting lines, that is, at the same distance from the sides. Otherwise, it will not be possible to correctly install the additional devices and achieve high-quality sawing.
Using the above technical methods, you can make a circular saw from a grinder. But this hand-held power tool has certain differences, so a slightly different assembly scheme will be required.
Related article:
Wood milling machine, its characteristics. How to choose a tool
Existing types of structures, classification of tools based on functionality, prices. Councils for the choice of equipment.
Features of assembling a circular with your own hands from a grinder
A circular saw is not found in every home workshop, but almost any owner who does certain work in the household with his own hands has a grinder. To create a stationary saw installation, you will also need a workbench or a special table, the tool will be mounted from below, like a circular saw.

Attachment to the grinder is performed using bolts
But then the assembly process is somewhat more complicated. To make a circular out of a grinder with your own hands, as practice shows, it is necessary to think carefully about the option of attaching a hand tool to the bed. It could be the following way:
- A metal band clamp is pulled on the grinder, the tie of which should be at the bottom.
- A double-folded metal strip is attached to the holes for the sliding stop.
- Holes are made in the gearbox of the power tool. Previously, the body is disassembled, drilling sites are outlined.
- With the help of the holes made, an additionally made axial handle is attached.
The handle can be made from a metal tube or rod. The workpiece needs to be shaped like a staple. In those places with which it will be attached to the gearbox, it is also necessary to make holes. A big and serious help for making a circular from a grinder with your own hands - drawings. They will allow you to correctly calculate the size and number of elements, to prevent mistakes when calculating the attachment points. If it is difficult to complete the diagram of the future unit yourself, you can use ready-made drawings offered on the Internet.

To make a circular out of a grinder, you need to think carefully about the option of attaching the tool to the bed
Possible options for small hand-made circular saws
Any stationary circular, even a homemade one, requires a fairly spacious workshop. The space should allow not only to install the unit itself, but also to place the workpieces intended for cutting in the desired position. If the task is not to dissolve large wood, but simply, if necessary, you need to independently make a rail or bar for repairing furniture, etc., it would be more rational to get a table circular mini-saw.
Such a device can be done by hand, using basically the same principles as when creating stationary machines from a grinder or circular saw. Only the stand will not be the goats, the support of which is the floor, but the bed, on which a small table with a fixed hand tool is installed.
Helpful advice! When performing a circular of this type, it is important to take into account the overall height of the structure, that is, the plane on which the material intended for sawing will be located.Overestimation or understatement of the level will cause significant inconvenience.

The miniature machine is more functional and safer to use
If you need to create a circular mini-saw with your own hands for making workpieces of very small sizes (aircraft, ship modeling), you can assemble a tool by using a PVC pipe as a body and borrowing an engine from children's toys. In such a pipe, it is easy to make a hole for the shaft. A glue gun can be used as a joint material. Such a circular can be powered both from the mains and from a battery. To ensure autonomy of operation, it is necessary to provide a special compartment for batteries in the case.
Making a carriage for a circular do-it-yourself
The functionality and high-quality work of a stationary circular is largely influenced by the availability of devices. One of these is the carriage. It is completely easy to do it at home, but the implementation of facing and sawing off material at an angle of 45 ° will be much easier.
You can make this device for circulars from a sheet of plywood as follows:
- plywood is cut out a bit wider than the circular table;

The carriage for the circular can be made with your own hands
- in the lower part, guide bars are attached to it with glue or screws, the distance between which should be equal to the width of the table;
- from above in a similar way, using screws or glue, stop bars are fixed.
With the help of guides, the carriage is fed along the table onto the saw blade, which makes a through cut on the device. The height of the sides, which should be larger than the protruding saw blade, allows you to maintain the integrity and rigidity of the carriage. If the task is to cut at an angle of 45 °, it is necessary to use an additional bar, which in this device is a removable element. Sawing is done by pressing the workpiece against an angled bar.
In order for the plywood surface of the carriage to be easily cleaned of sawing waste, it must be varnished in several layers.

The plywood should be slightly wider than the circular table
How to make a do-it-yourself circular shaft
In the general design of the circular shaft, the shaft is the main element that forms the whole machine. To make it, you will need steel round timber of grade 45. But you can only make this important detail yourself only if you have your own lathe available or you can access it. The diameter of the workpiece must match the dimensions of the saw blades to be used.
The main standard sizes of the disc bore:
- 16 mm;
- 20 mm;
- 22 mm;
- 30 m;
- 32 mm;
- 50 mm.
From the above indicators, the size of the shaft for the circular is selected.

To make a shaft, you need steel round timber of grade 45
The most common hole is 32 mm. It is such a seat that discs with different sizes of outer diameter have. Alternatively, you can make a thinner shaft to be able to perform "jewelry" work. Then an adapter will be used to use large discs. To complicate the design of a home circular in this way is only worthwhile in cases when it will be used by a professional.
The saw blades are installed between two flanges and pressed with a nut that is screwed onto the thread on the edge of the shaft working surface.
Important! The thread must be left-handed. During the inevitable jerk when starting the circular, the nut will tighten in this position, and not vice versa.
Bearing seats are determined taking into account the dimensions of the latter. The middle part of the shaft has the largest diameter. If the indicator is significant, an additional load on the belt will be created during rotation.Reaming will help to get rid of the problem, which will lighten the heavy part of the shaft.

The diameter of the workpiece must match the dimensions of the saw blades
Which discs should be used for circular
The performance and quality of work to a large extent depend on a properly selected disc for a do-it-yourself circular from a grinder, a hand saw or assembled from separate mechanisms. It should be remembered that discs for wood and metal differ. Even if thin, soft aluminum is to be cut, the blade must be fitted appropriately. Cutting wheels have smaller teeth. There are universal disc options that are applicable to both wood and metal.
There are differences and discs designed for longitudinal and cross-cutting wood. Rip sawing is carried out with a cutting attachment with large sparse teeth. But the transverse cutting will be of better quality if discs with fine, frequent teeth are used.
As for the material and method of manufacturing discs, they can be monolithic and carbide. Monolithic are made from a single piece of high-carbon steel. Such nozzles are inexpensive, but at the same time have a significant drawback: they quickly become blunt and need sharpening and wiring.

Circular discs can be for wood and metal
Carbide wheels are manufactured from cobalt and tungsten-tipped tool steel. They are more durable, but the price for such products is much higher.
The outer diameter of the discs for a homemade circular is limited by the size of the protective casing. The standard disc thickness is 3.2 mm. There are thinner and thicker saw blades. Thin ones are used when working with valuable wood species to make a clean cut. For rougher work, thicker discs are recommended.
Parallel stop for circular do-it-yourself
A parallel stop is a mandatory device on a circular table; without it, it is almost impossible to make an even cut. You can make it yourself as follows:
- Of the three strips of laminated chipboard, a U-shaped profile should be made; inserts must be placed and fixed inside, which will give rigidity. The result is a square section.
- A guide channel is made of two parallel rails, which is bolted to the end of the table in a position perpendicular to the saw blade.
- Then an inverted T-shaped structure is made from MDF, which is screwed to the stop and inserted into the channel.

Parallel stop for circular can be made independently
Important! The width of the channel should be such that the side of the T-shaped element fits snugly into it.
To fix the stop with a self-made homemade circular, it is convenient to use original slots. Threaded bolts, nuts and wooden washers are suitable as a locking mechanism; you will need a hole in the lower plane of the stop. Tightening the bolt helps to securely press the stop against the table top. This design allows you to quickly and easily set the required cut sizes.
Diy circular table (with drawings)
This section offers a model of a universal table, on which you can place a circular having any technical characteristics and dimensions. For the manufacture of the structure, you will need the following materials:
- plywood sheet, preferably with a laminated topcoat, at least 10 mm thick and 800x800 mm in size;
- 4 sheets of laminated chipboard 16 mm thick (400x784 mm);
- bars 50x50 mm;
- bolts and screws.

To make a homemade circular saw and table, you need drawings
The production of a circular table can be performed in the following sequence:
- The upper part of the future table is assembled from laminated chipboard sheets, which is a box without a bottom.The sides are fastened to each other with bars, the length of which is much greater than the height of the sheets.
- The manufactured structure is turned over, the bars-legs of the future table in the lower part are fastened with additional jumpers.
- A tabletop is cut out of plywood, in which a longitudinal hole is made using a jigsaw - a saw blade will be inserted into it.
On the Internet, it is easy to find a drawing of a similar design, which will greatly simplify the manufacture. You can modernize the above version of the circular table with your own hands by replacing the bars with a metal corner or by making a so-called box made of boards. It's a good idea to make a shelf at the bottom of the structure.
Do-it-yourself circular trimming
Laying a wooden floor, replacing platbands, cladding the facade with planken, clapboard, creating landscape design elements require a dimensional board. The process of preparing such a board is called facing. That is, the ends of the material are cut off in order to obtain the desired size of the workpiece and make the cuts aesthetically pleasing.

Do-it-yourself trimming makes work faster and more economical
To make a trimming from a manual circular with your own hands, you will need an improvised material and a used tool. The standard characteristics that the future trimming should have are:
- maximum cutting length - 350 mm;
- optimal engine revolving power - 4500 rpm;
- insignificant weight.
The upper part of the power tool is attached to the pivot using a large bearing - 150 mm (it will not be difficult to purchase it on the market.) On the outside, ears are attached to the bearing. They are used to fasten the tool to the surface of the bed using M6 screws.
The main devices for do-it-yourself circulars are automobile shock absorbers (they are convenient to use as a broach), a soft start button and additional protection that is attached to the power tool and the bed.

The upper part of the facing is attached to the pivot using a bearing
Important! Before assembling the structure, the shock absorbers must be disassembled, oil drained and air holes made.
The advantages of a homemade miter saw include the following:
- The structure is easily disassembled, and the power tool can be used for its intended purpose.
- Low cost. Excluding the price of the instrument (used), the costs will be no more than 500 rubles.
Among the significant disadvantages, it is worth highlighting the high noise level. It is almost impossible to eliminate this drawback. In addition, it is necessary to make a trial cut (selection and fixing of the rod) in order to ensure a good quality of subsequent work.
Diy circular: safety of use
If we take into account how much a circular costs (from 16,000 rubles - the most modest model), and compare the price with the costs of independent production (this is 60-90% less), then the difference is significant. But no savings will be justified if work safety is not ensured.

Before starting work on the circular, be sure to wear glasses and gloves
In order to avoid traumatic situations, you should adhere to the following recommendations:
- do not use wood with metal inclusions (nails, corners, bolts, etc.) as raw materials;
- sawing boards larger than 200 cm must be done by two people;
- working on a circular, you can not make sudden movements;
- before starting work, be sure to wear glasses and gloves;
- wood waste from the surface of the circular should be removed, as they can provoke a short circuit.
It is strictly forbidden to work on a homemade circular machine:
- if the guide is not completed;
- there is no casing;
- no fuses holding fingers;
- the riving knife is above the saw blade.

To avoid traumatic situations when working with a circular, you should adhere to safety precautions
A solid tool makes it possible to enjoy your work. And the result pleases with a high level of quality. Making a tool with your own hands will allow you to get the desired parameters and the necessary performance characteristics. It is impossible to limit oneself to superficial knowledge in any kind of activity, especially in a technical direction. It is worth taking on the independent assembly of the circular only after thorough theoretical preparation and a complete understanding of the practical part of the process.