Before starting the repair of an electronic device or assembling a circuit, it is worth making sure that all the elements that will be installed are in good condition. If new parts are used, make sure they are working properly. The transistor is one of the main components of many electrical circuits, so it should be ringed first. This article will tell you in detail how to check a transistor with a multimeter.
Content
What is a transistor
The main component in any electrical circuit is a transistor, which, under the influence of an external signal, controls the current in an electrical circuit. Transistors are divided into two types: field-effect and bipolar.
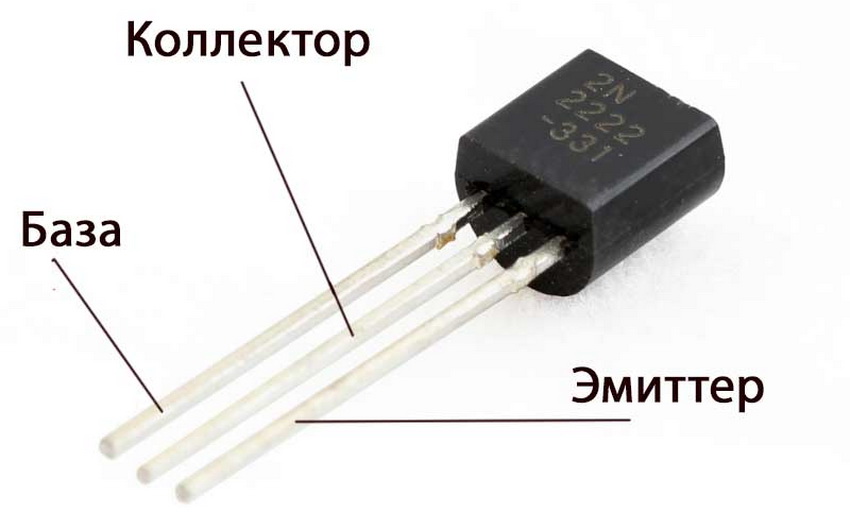
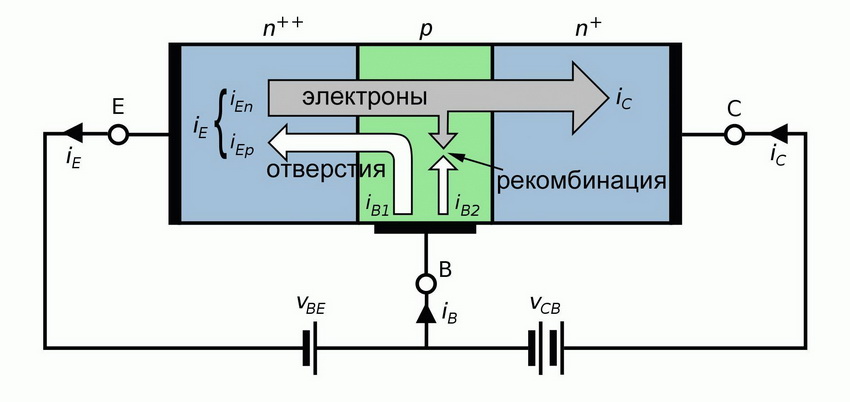
A bipolar transistor has three leads: base, emitter, and collector. A small current is applied to the base, which causes a change in the emitter-collector resistance zone, which leads to a change in the flowing current. The current flows in one direction, which is determined by the type of transition and corresponds to the polarity of the connection.
A transistor of this type is equipped with two pn junctions. When electronic conductivity (n) prevails in the extreme region of the device, and hole (p) prevails in the middle, the transistor is called n-p-n (reverse conductivity). If on the contrary, then the device is called a pnp (forward conduction) transistor.
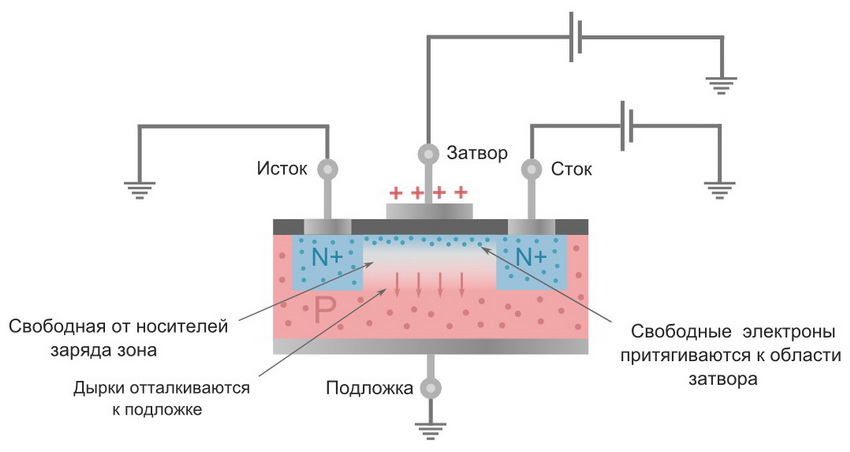
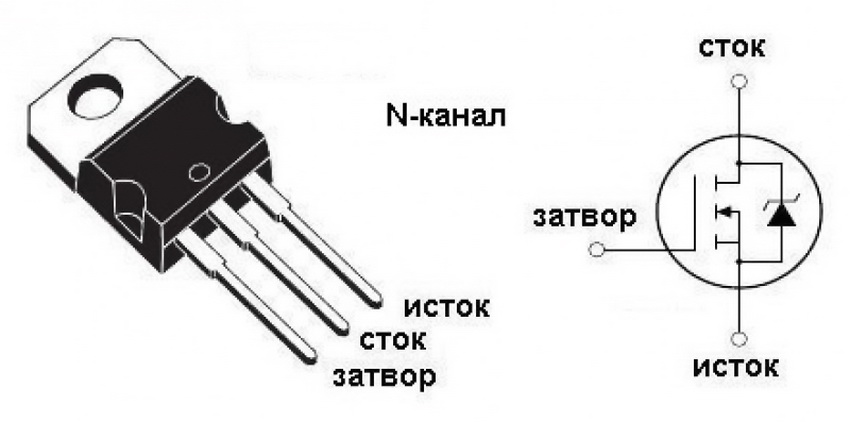
Field-effect transistors have characteristic differences from bipolar ones. They are equipped with two working leads - source and drain and one control (gate). In this case, the voltage acts on the gate, and not the current, which is typical for the bipolar type. Electric current flows between source and drain at a certain intensity, which depends on the signal. This signal is generated between gate and source or gate and drain. A transistor of this type can be with a control pn junction or with an insulated gate. In the first case, the working leads are connected to a semiconductor wafer, which can be p- or n-type.
The main feature of field-effect transistors is that they are controlled not by current, but by voltage. The minimum use of electricity allows it to be used in radio components with quiet and compact power supplies. Such devices can have different polarities.
How to check a transistor with a multimeter
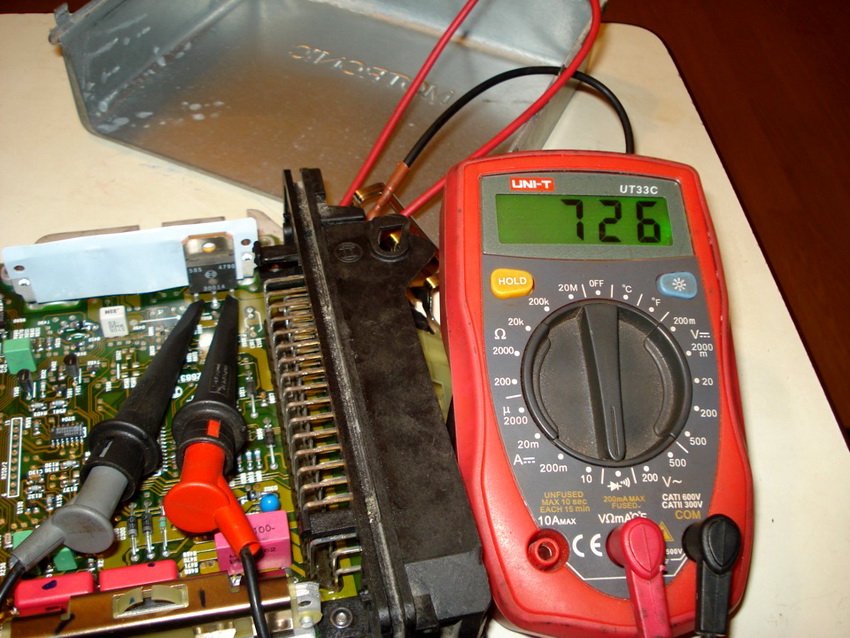
Many modern testers are equipped with specialized connectors that are used to test the performance of radio components, including transistors.
To determine the operating state of a semiconductor device, each element must be tested. The bipolar transistor has two pn junctions in the form of diodes (semiconductors), which are oppositely connected to the base. From here, one semiconductor is formed by the collector and base leads, and the other to the emitter and base.
When using a transistor to assemble a circuit board, you need to clearly know the purpose of each pin. Incorrect cell placement may result in burnout. With the help of a tester, you can find out the purpose of each pin.
Important! This procedure is possible only for a working transistor.
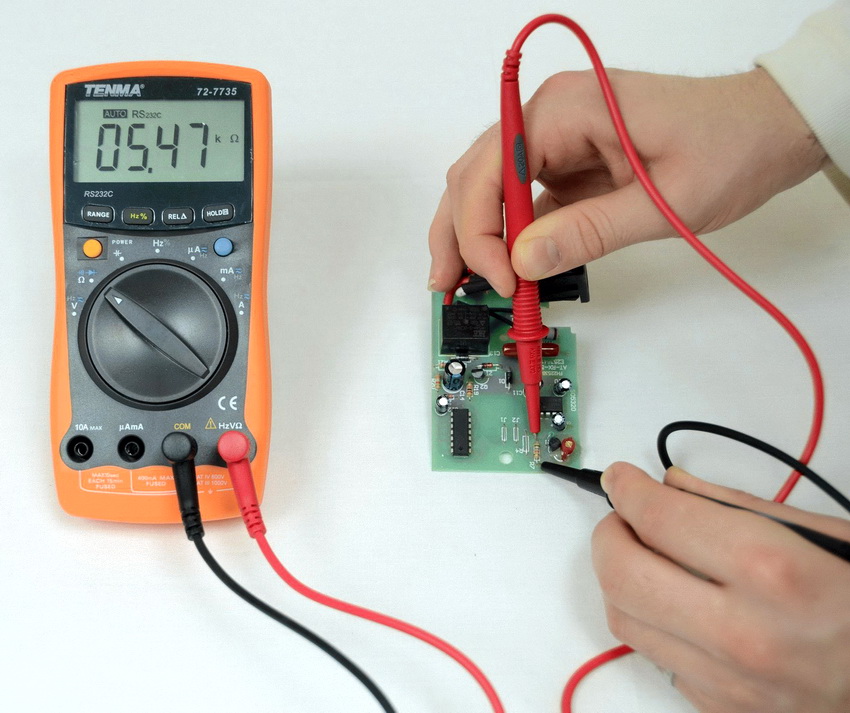
For this, the device is switched to the resistance measurement mode at the maximum limit. With a red probe, touch the left contact and measure the resistance at the right and middle terminals. For example, the display reads 1 and 817 ohms.
Then the red probe should be moved to the middle, and using the black one, measure the resistance on the right and left terminals. Here the result could be: infinity and 806 ohms. Transfer the red probe to the right contact and measure the remaining combination. Here, in both cases, the display will show a value of 1 ohm.
Drawing a conclusion from all measurements, the base is located on the right output. Now, to determine other leads, you need to install the black probe on the base. One pin showed the value of 817 Ohm - this is an emitter junction, the other corresponds to 806 Ohm, a collector junction.
Important! The resistance of the emitter junction will always be greater than that of the collector junction.
How to ring a transistor with a multimeter
To make sure that the device is in good condition, it is enough to know the forward and reverse resistance of its semiconductors. To do this, the tester is switched to the resistance measurement mode and is set to the limit of 2000. Next, ring each pair of contacts in both directions. This is how six measurements are made:
- the base-collector connection must conduct electric current in one direction;
- the base-emitter connection conducts electric current in one direction;
- The emitter-collector connection does not conduct electrical current in any direction.
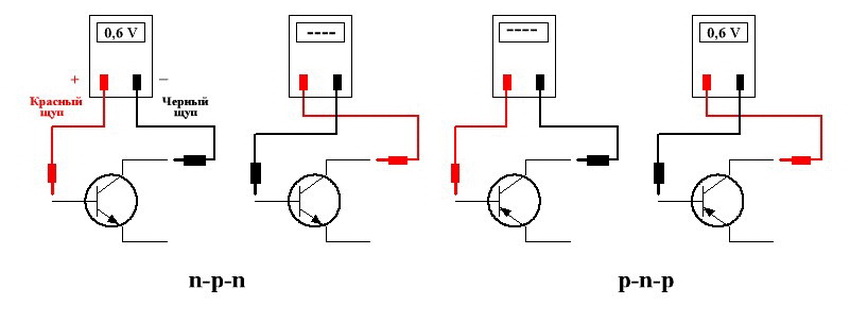
How to ring out transistors with a multimeter, the conductivity of which is p-n-p (the arrow of the emitter junction is directed to the base)? To do this, touch the base with a black probe, and touch the emitter and collector junctions with the red one. If they are in good condition, then the tester will display a direct resistance of 500-1200 ohms.
To check the reverse resistance, touch the base with the red probe, and alternately with the black ones to the emitter and collector leads. Now the device should show a large resistance value at both transitions, displaying "1" on the screen. This means that both transitions are in good order, and the transistor is not damaged.
This technique allows you to solve the question: how to check the transistor with a multimeter without soldering it from the board. This is possible due to the fact that the device junctions are not shunted by low-resistance resistors. However, if during the measurements the tester shows too small values of the forward and reverse resistance of the emitter and collector junctions, the transistor will have to be removed from the circuit.
Before checking the n-p-n transistor with a multimeter (the arrow of the emitter junction is directed from the base), the red test lead of the tester for determining the forward resistance is connected to the base. The operability of the device is checked by the same method as a pnp transistor.
The failure of the transistor is evidenced by the breakage of one of the junctions, where a large value of forward or reverse resistance is detected. If this value is 0, the junction is open and the transistor is faulty.
This technique is only suitable for bipolar transistors. Therefore, before checking, you need to make sure that it does not belong to a composite or field device. Next, you need to check the resistance between the emitter and the collector. There should be no closures here.
If it is necessary to use a transistor with an approximate current gain to assemble an electrical circuit, a tester can determine the required element. For this, the tester is switched to hFE mode. The transistor is connected to the appropriate connector for the specific type of device located on the device. The multimeter should display the value of the parameter h21.
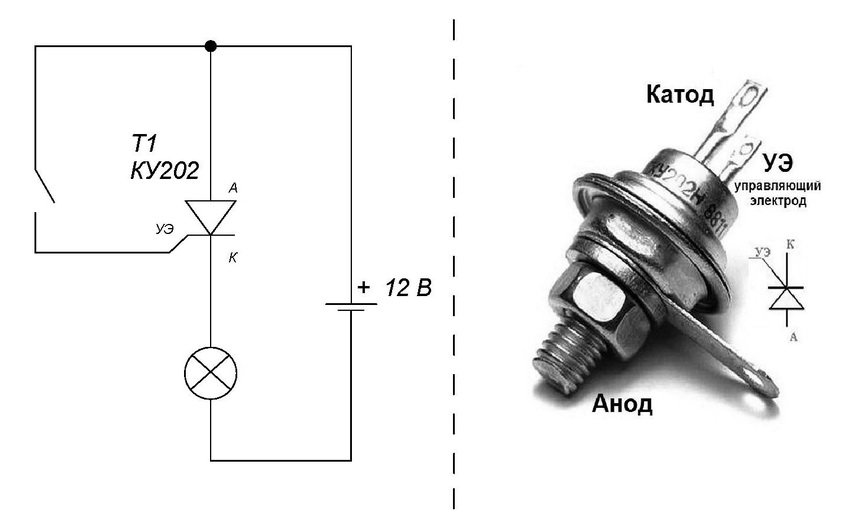
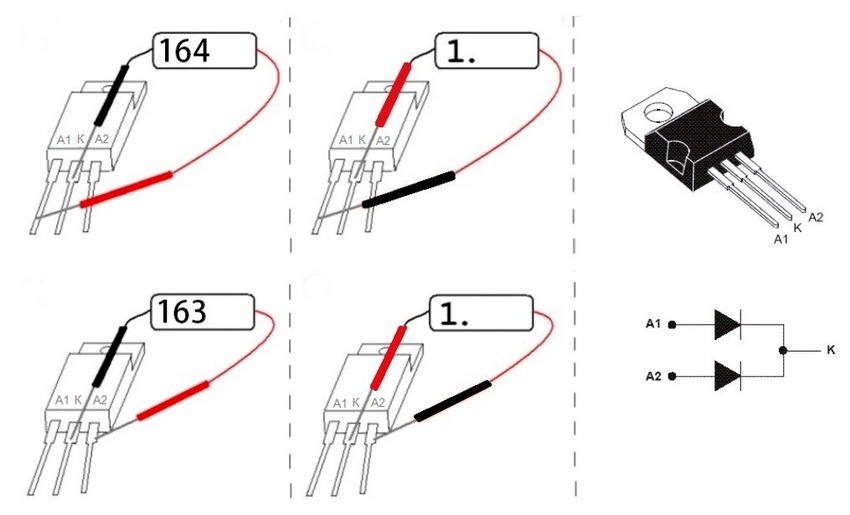
How to check a thyristor with a multimeter? It is equipped with three pn junctions, which is different from a bipolar transistor. Here the structures alternate with each other in the manner of a zebra. The main difference between it and the transistor is that the mode remains unchanged after the control pulse hits. The thyristor will remain open until the current in it drops to a certain value, which is called the holding current. The use of a thyristor allows you to assemble more economical electrical circuits.
The multimeter is set to the resistance measurement scale in the 2000 Ohm range. To open the thyristor, the black probe is connected to the cathode and the red one to the anode. It should be remembered that the thyristor can open with a positive and negative pulse. Therefore, in both cases, the device resistance will be less than 1. The thyristor remains open if the control signal current exceeds the holding threshold. If the current is less, then the key will close.
How to test an IGBT transistor with a multimeter
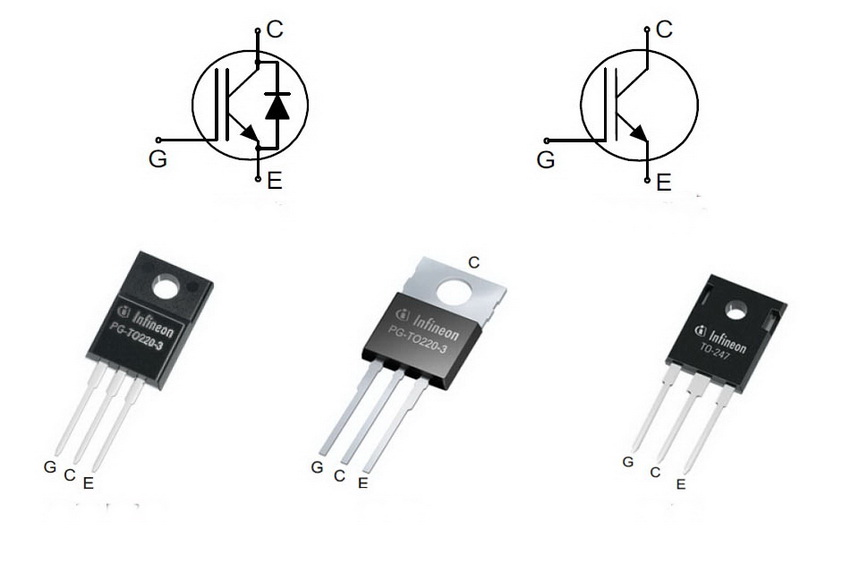
An insulated gate bipolar transistor (IGBT) is a three-electrode power semiconductor device in which two transistors are connected in a cascade principle in one structure: field-effect and bipolar. The first forms the control channel, and the second forms the power channel.
To test the transistor, the multimeter must be put into semiconductor test mode. After that, using probes, measure the resistance between the emitter and the gate in the forward and reverse directions to detect a short.
Now connect the red wire of the device to the emitter, and briefly touch the shutter with the black one. This will charge the gate with a negative voltage, allowing the transistor to remain off.
Important! If the transistor is equipped with a built-in anti-parallel diode, which is connected by the anode to the emitter of the transistor and the cathode to the collector, then it must be ringed accordingly.
Now you need to make sure the functionality of the transistor. First, charge the gate-emitter input capacitance with a positive voltage. To this end, simultaneously and briefly, the red probe should touch the shutter, and the black one - the emitter. Now you need to check the collector-emitter junction by connecting the black probe to the emitter and the red one to the collector. The multimeter should display a slight voltage drop of 0.5-1.5 V. This value should remain stable for a few seconds. This indicates that there is no leakage in the input capacitance of the transistor.
Useful advice! If the voltage of the multimeter is not enough to open the IGBT transistor, then a constant voltage source of 9-15 V can be used to charge its input capacitance.
How to check a field-effect transistor with a multimeter
Field-effect transistors are highly sensitive to static electricity, therefore, grounding is required first.
Before you start checking the field-effect transistor, you should determine its pinout. Imported fixtures usually have labels that identify the connection points. The letter S stands for the source of the device, the letter D stands for the drain, and the letter G stands for the shutter. If there is no pinout, then you must use the documentation for the device.
Related article:
Electric multimeter: tester for various electrical measurements
Tester for measuring electrical performance. Using the device for the car and at home. The principle of measuring electrical characteristics.
Before checking the good condition of the transistor, it is worth considering that modern radio components of the MOSFET type have an additional diode located between the source and drain, which is necessarily applied to the device circuit. The polarity of a diode depends entirely on the type of transistor.
Useful advice! You can protect yourself from the build-up of static electricity by using an anti-static wrist grounding strap or by touching the battery with your hand.
The main task of how to check a field-effect transistor with a multimeter without soldering it from the board consists of the following steps:
- It is necessary to remove static electricity from the transistor.
- Switch the meter to semiconductor test mode.
- Connect the red probe to the "+" connector of the device, and the black "-".
- Touch the red wire to the source, and the black to the drain of the transistor. If the device is in working condition, the display of the measuring device will show a voltage of 0.5-0.7 V.
- Connect the black probe to the source of the transistor, and the red one to the drain. The screen should display infinity, which indicates that the device is in good condition.
- Open the transistor by connecting the red probe to the gate and the black probe to the source.
- Without changing the position of the black wire, connect the red probe to the drain. If the transistor is good, then the tester will show a voltage in the range of 0-800 mV.
- By changing the polarity of the wires, the voltage reading should remain unchanged.
- Close the transistor by connecting the black probe to the gate, and the red one to the source of the transistor.
You can talk about the good condition of the transistor based on how it can open and close using a constant voltage from the tester. Due to the fact that the field-effect transistor has a large input capacitance, it will take some time to discharge it. This characteristic is significant when the transistor is first opened with the help of the voltage generated by the tester (see item 6), and measurements are taken for a short amount of time (see items 7 and 8).
Checking the operating state of the p-channel field-effect transistor with a multimeter is carried out in the same way as the n-channel one. Just start measurements by connecting the red probe to the minus, and the black one to the plus, that is, change the polarity of the tester wires to the opposite.
The health of any transistor, regardless of the type of device, can be checked with a simple multimeter. To do this, you should clearly know the type of element and determine the marking of its conclusions. Further, in the mode of diode continuity or resistance measurement, find out the forward and reverse resistance of its transitions. Based on the results obtained, judge the good condition of the transistor.
