The days when LEDs were used only as indicators for turning on devices are long gone. Modern LED devices can completely interchange incandescent lamps in household, industrial and street lamps... This is facilitated by various characteristics of LEDs, knowing which you can choose the right LED analogue. The use of LEDs, given their basic parameters, opens up an abundance of possibilities in the field of lighting.

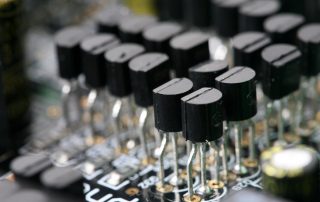
The LED is based on an artificial semiconductor crystal
Content
What are the LEDs
LED (denoted by LED, LED, LED in English) is a device based on an artificial semiconductor crystal. When an electric current is passed through it, the phenomenon of emission of photons is created, which leads to a glow. This glow has a very narrow spectral range, and its color depends on the semiconductor material.

LEDs may well replace conventional incandescent bulbs
LEDs with red and yellow glow are made from inorganic semiconductor materials based on gallium arsenide, green and blue ones are made on the basis of indium gallium nitride. To increase the brightness of the luminous flux, various additives are used or a multilayer method is used, when a layer of pure aluminum nitride is placed between semiconductors. As a result of the formation of several electron-hole (p-n) transitions in one crystal, the brightness of its luminescence increases.
There are two types of LEDs: for indication and lighting. The former are used to indicate the inclusion of various devices in the network, as well as sources of decorative lighting. They are colored diodes placed in a translucent case, each of them has four leads. Devices emitting infrared light are used in devices for remote control of devices (remote control).
In the field of lighting, LEDs emitting white light are used. LEDs with cold white, neutral white and warm white glow are distinguished by color. There is a classification of LEDs used for lighting by the method of installation. SMD LED marking means that the device consists of an aluminum or copper substrate on which a diode crystal is placed. The substrate itself is located in the housing, the contacts of which are connected to the contacts of the LED.

The use of LED lighting in the interior of the kitchen
Another type of LED is designated OCB. In such a device, a plurality of crystals coated with a phosphor are placed on one board. Thanks to this design, a high brightness of the glow is achieved. This technology is used in the production LED lamps with a high luminous flux in a relatively small area. This, in turn, makes the production of LED lamps the most affordable and inexpensive.
Note! Comparing lamps on SMD and COB LEDs, it can be noted that the former can be repaired by replacing a failed LED. If the COB LED lamp does not work, you will have to change the entire board with diodes.
LED characteristics
When choosing a suitable LED lamp for lighting, the parameters of the LEDs should be taken into account. These include supply voltage, power, operating current, efficiency (light output), glow temperature (color), radiation angle, dimensions, degradation period. Knowing the basic parameters, it will be possible to easily select devices for obtaining a particular illumination result.

LED technologies are used in the design of the board of airports and train stations
LED current consumption
Typically, conventional LEDs have a current of 0.02A. However, there are LEDs rated at 0.08A. These LEDs include more powerful devices, in which four crystals are involved. They are located in the same building. Since each of the crystals consumes 0.02A, in total one device will consume 0.08A.
The stability of the LED devices depends on the current value. Even a slight increase in current strength contributes to a decrease in the radiation intensity (aging) of the crystal and an increase in the color temperature. This ultimately leads to the fact that the LEDs begin to cast blue and fail prematurely. And if the indicator of the current strength increases significantly, the LED immediately burns out.
To limit the current consumption, current stabilizers for LEDs (drivers) are provided in the designs of LED lamps and luminaires. They convert the current, bringing it to the value required by the LEDs. In the case when it is required to connect a separate LED to the network, current-limiting resistors must be used. The calculation of the resistance of the resistor for the LED is performed taking into account its specific characteristics.
Useful advice! To choose the right resistor, you can use the LED resistor calculator located on the Internet.

The LED string can be used as a room decor
LED voltage
How do I know the voltage of the LEDs? The fact is that LEDs do not have a supply voltage parameter as such. Instead, the LED voltage drop characteristic is used, which means the amount of voltage at the output of the LED when the rated current is passed through it. The voltage value indicated on the package reflects exactly the voltage drop. Knowing this value, you can determine the voltage remaining on the crystal. It is this value that is taken into account in the calculations.
Given the use of different semiconductors for LEDs, the voltage for each of them can be different. How to find out how many Volts the LED is? It can be determined by the color of the glow of the devices. For example, for blue, green and white crystals, the voltage is about 3V, for yellow and red crystals - from 1.8 to 2.4V.
When using parallel connection of LEDs of identical rating with a voltage value of 2V, you may encounter the following: as a result of the spread of parameters, some emitting diodes will fail (burn out), while others will glow very weakly. This will happen due to the fact that with an increase in voltage even by 0.1V, an increase in the current passing through the LED is observed by 1.5 times. Therefore, it is so important to ensure that the current corresponds to the LED rating.

100W incandescent lamp is equivalent to 12-12.5W LED lamp
Light output, angle and power of LEDs
Comparison of the luminous flux of diodes with other light sources is carried out, taking into account the strength of the radiation they emit. Devices about 5 mm in diameter give 1 to 5 lm of light. While the luminous flux of a 100W incandescent lamp is 1000 lm. But when comparing, it must be borne in mind that the light of a conventional lamp is diffused, and that of an LED is directional. Therefore, the scattering angle of the LEDs must be taken into account.
The scattering angle of different LEDs can be from 20 to 120 degrees. When illuminated, LEDs give a brighter light in the center and reduce illumination towards the edges of the scattering angle. Thus, LEDs illuminate a specific space better while using less power. However, if it is required to increase the illumination area, diffusing lenses are used in the design of the luminaire.
How to determine the wattage of LEDs? To determine the power of an LED lamp required to replace an incandescent lamp, a factor equal to 8. So, you can replace a conventional 100W lamp with a LED device with a power of at least 12.5W (100W / 8). For convenience, you can use the data from the table of correspondence between the power of incandescent lamps and LED light sources:
| Incandescent lamp power, W | Corresponding power of LED luminaire, W |
| 100 | 12-12,5 |
| 75 | 10 |
| 60 | 7,5-8 |
| 40 | 5 |
| 25 | 3 |
When using LEDs for lighting, the efficiency indicator is very important, which is determined by the ratio of luminous flux (lm) to power (W). Comparing these parameters for different light sources, we find that the efficiency of an incandescent lamp is 10-12 lm / W, luminescent - 35-40 lm / W, LED - 130-140 lm / W.
Color temperature of LED sources
One of the important parameters of LED sources is the glow temperature. The units of this quantity are degrees Kelvin (K). It should be noted that all light sources are divided into three classes according to their glow temperature, among which warm white has a color temperature of less than 3300 K, day white - from 3300 to 5300 K, and cold white over 5300 K.
Note! Comfortable perception of LED radiation by the human eye directly depends on the color temperature of the LED source.
The color temperature is usually indicated on the labeling of LED lamps. It is denoted by a four-digit number and the letter K. The choice of LED lamps with a specific color temperature directly depends on the characteristics of its application for lighting. The table below shows the options for using LED sources with different glow temperatures:
| LED color | Color temperature, K | Lighting use cases | |
| White | Warm | 2700-3500 | Lighting of household and office premises as the most suitable analogue of an incandescent lamp |
| Neutral (daytime) | 3500-5300 | Excellent color rendering of such lamps allows them to be used to illuminate workplaces in production | |
| Cold | over 5300 | It is mainly used for street lighting, and also applied in the device of hand lamps | |
| Red | 1800 | As a source of decorative and phyto-lighting | |
| Green | — | Illumination of surfaces in the interior, phyto-illumination | |
| Yellow | 3300 | Lighting design of interiors | |
| Blue | 7500 | Illumination of surfaces in the interior, phyto-illumination | |
The waveform nature of color allows the color temperature of LEDs to be expressed using wavelength.The marking of some LED devices reflects the color temperature precisely in the form of an interval of different wavelengths. Wavelength is designated λ and is measured in nanometers (nm).
Standard sizes of SMD LEDs and their characteristics
Considering the size of SMD LEDs, the devices are classified into groups with different characteristics. The most popular LEDs with standard sizes 3528, 5050, 5730, 2835, 3014 and 5630. Characteristics of SMD LEDs vary depending on the size. So, different types of SMD LEDs differ in brightness, color temperature, power. In the LED marking, the first two digits indicate the length and width of the fixture.

SMD 5630 LEDs on LED strip
Main parameters of SMD 2835 LEDs
The main characteristics of 2835 SMD LEDs include an increased radiation area. Compared to the SMD 3528, which has a round working surface, the radiation area of the SMD 2835 has a rectangular shape, which contributes to a higher light output with a lower element height (about 0.8 mm). The luminous flux of such a device is 50 lm.
The body of SMD 2835 LEDs is made of heat-resistant polymer and can withstand temperatures up to 240 ° C. It should be noted that the degradation of radiation in these elements is less than 5% during 3000 hours of operation. In addition, the device has a fairly low thermal resistance of the crystal-substrate junction (4 C / W). The operating current at the maximum value is 0.18A, the crystal temperature is 130 ° C.
By the color of the glow, warm white is distinguished with a glow temperature of 4000 K, day white - 4800 K, pure white - from 5000 to 5800 K and cold white with a color temperature of 6500-7500 K. It should be noted that the maximum luminous flux is for devices with cold white glow, minimal - for LEDs of warm white color. The design of the device has increased contact pads, which contributes to better heat dissipation.
Useful advice! SMD 2835 LEDs can be used for any type of installation.

Dimensions of SMD 2835 LED
Characteristics of SMD 5050 LEDs
The SMD 5050 case design contains three similar LEDs. LED sources of blue, red and green colors have technical characteristics similar to SMD 3528 crystals. The operating current of each of the three LEDs is 0.02A, therefore the total current of the entire device is 0.06A. In order to prevent the LEDs from being damaged, it is recommended not to exceed this value.
LED devices SMD 5050 have a forward voltage of 3-3.3V and a luminous efficiency (network flux) of 18-21 lm. The power of one LED is the sum of three values of the power of each crystal (0.7W) and is 0.21W. The glow color emitted by the devices can be white in all shades, green, blue, yellow and multicolor.
The close arrangement of LEDs of different colors in one SMD 5050 package made it possible to realize multi-color LEDs with separate control for each color. To regulate luminaires using SMD 5050 LEDs, controllers are used, so that the glow color can be smoothly changed from one to another after a given amount of time. Typically, such devices have several control modes and can adjust the brightness of the LEDs.

Dimensions LED SMD 5050
Typical Characteristics of SMD 5730 LED
SMD 5730 LEDs are modern representatives of LED-devices, the case of which has a geometric dimensions of 5.7x3 mm. They belong to ultra-bright LEDs, the characteristics of which are stable and qualitatively different from the parameters of their predecessors. Manufactured using new materials, these LEDs are characterized by increased power and highly efficient luminous flux. In addition, they can operate in high humidity conditions, are resistant to temperature extremes and vibration, and have a long service life.
There are two types of devices: SMD 5730-0.5 with a power of 0.5W and SMD 5730-1 with a power of 1W.A distinctive feature of the devices is the ability to operate on a pulsed current. The value of the rated current of SMD 5730-0.5 is 0.15A, during pulsed operation, the device can withstand current strength up to 0.18A. This type of LED provides a luminous flux of up to 45 lm.
SMD 5730-1 LEDs operate at a constant current of 0.35A, in pulse mode - up to 0.8A. The light output efficiency of such a device can be up to 110 lm. Thanks to the heat-resistant polymer, the device case can withstand temperatures up to 250 ° C. The scattering angle of both types of SMD 5730 is 120 degrees. The luminous flux degradation rate is less than 1% for 3000 hours of operation.

Dimensions LED SMD 5730
Characteristics of Cree LEDs
The Cree company (USA) develops and produces superbright and most powerful LEDs. One of the groups of Cree LEDs is represented by the Xlamp series of devices, which are divided into single-chip and multi-chip. One of the features of single-chip sources is the distribution of radiation along the edges of the device. This innovation has made it possible to produce luminaires with a large beam angle using a minimum of crystals.
In the series of LED sources XQ-E High Intensity, the angle of illumination is from 100 to 145 degrees. Having small geometric dimensions of 1.6x1.6 mm, the power of super-bright LEDs is 3 Volts, and the luminous flux is 330 lm. This is one of the newest developments of the Cree company. All LEDs, the design of which is developed on the basis of a single crystal, have high-quality color rendering within the CRE 70-90 range.
Related article:
How to make or fix an LED garland yourself. Prices and basic characteristics of the most popular models.

Cree has released several versions of LED multichip products with the latest power types from 6 to 72 volts. Multichip LEDs are divided into three groups, which include devices with high voltage, power up to 4W and above 4W. In sources up to 4W, 6 crystals are collected in MX and ML packages. The scattering angle is 120 degrees. You can buy Cree LEDs of this type with white warm and cold glow colors.
Useful advice! Despite the high reliability and quality of light, you can buy powerful MX and ML LEDs at a relatively low price.
The group over 4W includes LEDs from several crystals. The largest in the group are 25W devices presented by the MT-G series. The company's novelty is the LEDs of the XHP model. One of the large LED devices has a 7x7 mm housing, its power is 12W, and the luminous efficiency is 1710 lumens. High voltage LEDs combine small size and high light output.
")
LED lamps of the XQ-E High Intensity series manufactured by Cree (USA)
LED connection diagrams
There are certain rules for connecting LEDs. Taking into account that the current passing through the device moves only in one direction, for a long and stable operation of LED devices, it is important to take into account not only a certain voltage, but also the optimal current value.
Diagram of connecting the LED to a 220V network
Depending on the power source used, there are two types of schemes for connecting LEDs to 220V. In one of the cases, driver with limited current, in the second - special Power Supplystabilizing voltage. The first option takes into account the use of a special source with a certain current strength. A resistor is not required in this circuit, and the number of connected LEDs is limited by the driver's power.
Two types of pictograms are used to indicate LEDs in the diagram. Above each schematic of them are two small parallel arrows pointing up. They symbolize the bright glow of the LED device.Before connecting the LED to 220V using a power supply, you must include a resistor in the circuit. If this condition is not met, this will lead to the fact that the working life of the LED will be significantly reduced or it will simply fail.

Diagram of connecting LEDs to a 220V network using a quenching capacitor C1
If you use a power supply when connecting, then only the voltage will be stable in the circuit. Given the low internal resistance of the LED device, turning it on without a current limiter will result in the device burning. That is why a corresponding resistor is introduced into the LED switching circuit. It should be noted that resistors come in different ratings, so they should be calculated correctly.
Useful advice! The negative aspect of the circuits for switching on the LED to a 220 Volt network using a resistor is the dissipation of high power when it is required to connect a load with increased current consumption. In this case, the resistor is replaced with a quenching capacitor.
How to calculate resistance for an LED
When calculating the resistance for an LED, they are guided by the formula:
U = IхR,
where U is voltage, I is current strength, R is resistance (Ohm's law). Let's say you need to connect an LED with the following parameters: 3V - voltage and 0.02A - current. So that when the LED is connected to 5 Volts on the power supply, it does not fail, you need to remove the extra 2V (5-3 = 2V). To do this, it is necessary to include a resistor with a certain resistance in the circuit, which is calculated using Ohm's law:
R = U / I.

Resistors with different resistance values
Thus, the ratio of 2V to 0.02A is 100 ohms, i.e. this is exactly what a resistor is needed.
It often happens that given the parameters of the LEDs, the resistance of the resistor has a non-standard value for the device. Such current limiters cannot be found at point of sale, for example, 128 or 112.8 ohms. Then you should use resistors, the resistance of which is the nearest greater value than the calculated one. In this case, the LEDs will not function at full strength, but only by 90-97%, but this will be invisible to the eye and will positively affect the resource of the device.
There are many options for calculators for calculating LEDs on the Internet. They take into account the main parameters: voltage drop, rated current, output voltage, number of devices in the circuit. By setting the parameters of LED devices and current sources in the form field, you can find out the corresponding characteristics of the resistors. Online resistor calculations for LEDs are also available to determine the resistance of color-coded current limiters.
Parallel and Series LED Diagrams
When assembling structures from several LED devices, circuits for switching LEDs into a 220 Volt network with a serial or parallel connection are used. In this case, for correct connection, it should be borne in mind that when the LEDs are connected in series, the required voltage is the sum of the voltage drops of each device. While when the LEDs are connected in parallel, the current is added.

Diagrams of parallel connection of LEDs. In option 1, a separate resistor is used for each circuit of diodes, in option 2 - one common for all circuits
If the circuits use LED devices with different parameters, then for stable operation it is necessary to calculate the resistor for each LED separately. It should be noted that no two LEDs are exactly alike. Even devices of the same model have slight differences in parameters. This leads to the fact that when you connect a large number of them in a series or parallel circuit with a single resistor, they can quickly degrade and fail.
Note! When using a single resistor in a parallel or series circuit, only LED devices with identical characteristics can be connected.
The discrepancy in the parameters when several LEDs are connected in parallel, say 4-5 pcs., Will not affect the operation of the devices. And if many LEDs are connected to such a circuit, this will be a bad decision. Even if LED sources have a slight variation in characteristics, this will lead to the fact that some devices will emit bright light and quickly burn out, while others will glow dimly. Therefore, when connecting in parallel, always use a separate resistor for each device.
As for the series connection, there is an economical consumption, since the entire circuit consumes an amount of current equal to the consumption of one LED. In a parallel circuit, the consumption is the sum of the consumption of all LED sources included in the circuit included in the circuit.

LED daisy chain diagram
How to connect LEDs to 12 Volts
In the design of some devices, resistors are provided even at the manufacturing stage, which makes it possible to connect LEDs to 12 Volts or 5 Volts. However, such devices are not always available commercially. Therefore, in the circuit for connecting LEDs to 12 volts, a current limiter is provided. The first step is to find out the characteristics of the connected LEDs.
Such a parameter as the forward voltage drop for typical LED devices is about 2V. The rated current of these LEDs is 0.02A. If you need to connect such an LED to 12V, then the "extra" 10V (12 minus 2) must be extinguished with a limiting resistor. Ohm's law can be used to calculate the resistance for it. We get that 10 / 0.02 = 500 (Ohm). Thus, a 510 ohm resistor is needed, which is the closest in the E24 range of electronic components.
For such a circuit to work stably, it is also necessary to calculate the power of the limiter. Using the formula, based on which the power is equal to the product of voltage and current, we calculate its value. A voltage of 10V is multiplied by a current of 0.02A and we get 0.2W. Thus, a resistor is required with a standard power rating of 0.25W.

Wiring diagram for RGB LED strip to 12V
If it is necessary to include two LED devices in the circuit, then it should be borne in mind that the voltage falling on them will already be 4V. Accordingly, for the resistor, it remains to extinguish not 10V, but 8V. Therefore, further calculation of the resistance and power of the resistor is done based on this value. The location of the resistor in the circuit can be provided anywhere: from the side of the anode, cathode, between the LEDs.
How to check an LED with a multimeter
One way to check the working status of LEDs is to test with a multimeter. Such a device can diagnose LEDs of any design. Before checking the LED with a tester, the switch of the device is set in the "dialing" mode, and the probes are applied to the terminals. When the red probe is closed to the anode, and the black one to the cathode, the crystal should emit light. If the polarity is reversed, the display should show the reading "1".
Useful advice! Before testing the LED for operability, it is recommended to dim the main lighting, since during testing the current is very low and the LED will emit light so weakly that you might not notice it under normal lighting.

LED test circuit with a digital multimeter
You can test LED devices without using probes. For this, in the holes located in the lower corner of the device, the anode is inserted into the hole with the "E" symbol, and the cathode - with the "C" indicator. If the LED is operational, it should light up. This test method is suitable for LEDs with sufficiently long solder-free pins. The position of the switch is irrelevant for this test method.
How to check LEDs with a multimeter without unsoldering? To do this, you need to solder pieces from a regular paper clip to the tester probes. As insulation, a textolite gasket is suitable, which is laid between the wires, after which it is processed with electrical tape. The output is a kind of adapter for connecting probes. Staples are springy and securely fixed in the connectors. In this form, you can connect the probes to the LEDs without desoldering them from the circuit.
What can be done from LEDs with your own hands
Many radio amateurs practice assembling various structures from LEDs with their own hands. Self-assembled products are not inferior in quality, and sometimes even surpass those of production manufacture. It can be color music devices, flashing LED designs, DIY running lights on LEDs, and much more.

Using LEDs to Create Stage Costumes
DIY current stabilizer assembly for LEDs
In order for the LED resource not to run out earlier than the due date, it is necessary that the current flowing through it has a stable value. It is known that red, yellow and green LEDs can handle increased current loads. While blue-green and white LED-sources, even with a slight overload, burn out in 2 hours. Thus, for the LED to work properly, it is necessary to resolve the issue with its power supply.
If you assemble a chain of LEDs connected in series or in parallel, it is possible to provide them with identical radiation if the current passing through them has the same strength. In addition, reverse current pulses can negatively affect the life of LED sources. To prevent this from happening, it is necessary to include a current stabilizer for LEDs in the circuit.
The quality features of LED lamps depend on the driver used - a device that converts the voltage into a stabilized current with a specific value. Many radio amateurs assemble a power supply circuit for LEDs from 220V with their own hands based on the LM317 microcircuit. Elements for such an electronic circuit are inexpensive and such a regulator is easy to design.

Wiring diagram of a powerful LED using an integrated voltage regulator LM317
When using a current stabilizer on the LM317 for LEDs, the current is regulated within 1A. A rectifier based on LM317L stabilizes the current up to 0.1A. The device uses only one resistor in the circuit. It is calculated using the online LED resistance calculator. Available devices are suitable for power supply: power supplies from a printer, laptop or other consumer electronics. It is not profitable to assemble more complex schemes on your own, since it is easier to purchase them ready-made.
DIY LED DRL
The use of daytime running lights (DRL) on cars significantly increases the visibility of the car in daylight by other road users. Many motorists practice self-assembly of DRLs using LEDs. One of the options is a DRL device of 5-7 LEDs with a power of 1W and 3W for each unit. If you use less powerful LED sources, the luminous flux will not meet the standards for such lights.
Useful advice! When making DRL with your own hands, take into account the requirements of GOST: the luminous flux is 400-800 Kd, the glow angle in the horizontal plane is 55 degrees, in the vertical plane - 25 degrees, the area is 40 cm².

Daytime running lights improve vehicle visibility on the road
For the base, you can use an aluminum profile board with pads for mounting LEDs. The LEDs are fixed to the board with a heat conductive adhesive. Optics are selected in accordance with the type of LED sources. In this case, lenses with a glow angle of 35 degrees are suitable. Lenses are installed on each LED separately. The wires are brought out in any convenient direction.
Next, a housing for the DRL is made, which simultaneously serves as a radiator. To do this, you can use a U-shaped profile. The finished LED module is placed inside the profile, fastened with screws. All free space can be filled with transparent silicone based sealant, leaving only the lenses on the surface. Such a coating will serve as moisture protection.
The DRL is connected to the power supply with the obligatory use of a resistor, the resistance of which is pre-calculated and checked. Connection methods may vary depending on the car model. Connection diagrams can be found on the Internet.

DRL connection diagram with control unit
How to make the LEDs flash
The most popular off-the-shelf flashing LEDs are potential-controlled devices. Blinking of the crystal occurs due to a change in the power supply at the terminals of the device. Thus, a two-color red-green LED device emits light depending on the direction of the current passing through it. The flashing effect in an RGB LED is achieved by connecting three separate control pins to a specific control system.
But you can make an ordinary one-color LED blinking, having a minimum of electronic components in your arsenal. Before making a blinking LED, you need to choose a working circuit that is simple and reliable. A flashing LED circuit can be used, which will be powered from a 12V source.
The circuit consists of a low-power transistor Q1 (silicon high-frequency KTZ 315 or its analogs are suitable), a resistor R1 820-1000 Ohm, a 16-volt capacitor C1 with a capacity of 470 μF and an LED source. When the circuit is turned on, the capacitor is charged to 9-10V, after which the transistor opens for a moment and gives the accumulated energy to the LED, which starts blinking. This scheme can be implemented only when powered from a 12V source.

Flashing LEDs are used, for example, in a Christmas tree garland
A more advanced circuit can be assembled, which works by analogy with a transistor multivibrator. The circuit includes transistors KTZ 102 (2 pcs.), Resistors R1 and R4 of 300 Ohm each to limit the current, resistors R2 and R3 of 27000 Ohm to set the base current of the transistors, 16-volt polar capacitors (2 pcs. With a capacity of 10 μF) and two LED sources. This circuit is powered by a 5V constant voltage source.
The circuit works on the principle of "Darlington pair": capacitors C1 and C2 are alternately charged and discharged, which causes a particular transistor to open. When one transistor gives energy to C1, one LED lights up. Further, C2 is smoothly charged, and the base current VT1 decreases, which leads to the closing of VT1 and opening of VT2 and another LED lights up.
Useful advice! If you use a supply voltage higher than 5V, you will need to use resistors with a different rating to prevent damage to the LEDs.

LED flash pattern
DIY assembly of color music on LEDs
To implement fairly complex color music schemes on LEDs with your own hands, you must first figure out how the simplest color music scheme works. It consists of one transistor, resistor and LED device. Such a circuit can be powered from a source with a rating of 6 to 12V. The operation of the circuit is due to cascade amplification with a common emitter (emitter).
The VT1 base receives a signal with varying amplitude and frequency. In the event that the signal fluctuations exceed a predetermined threshold, the transistor opens and the LED lights up. The disadvantage of this scheme is the dependence of the blinking on the degree of the sound signal. Thus, the effect of color music will appear only at a certain degree of sound volume. If the sound is increased. the LED will be on all the time, and when decreasing, it will flash slightly.
To achieve a full-fledged effect, they use a color music scheme on LEDs with a division of the sound range into three parts. The circuit with a three-channel sound transducer is powered by a 9V source. A huge number of color music schemes can be found on the Internet at various radio amateur forums. These can be color music schemes using a single-color strip, RGB-LED strip, as well as schemes for smoothly switching on and off LEDs. Also on the network you can find diagrams of running lights on LEDs.

Diagram for assembling color music with your own hands
DIY LED voltage indicator design
The voltage indicator circuit includes a resistor R1 (variable resistance 10 kOhm), resistors R1, R2 (1 kOhm), two transistors VT1 KT315B, VT2 KT361B, three LEDs - HL1, HL2 (red), HL3 (green). X1, X2 - 6-volt power supplies. In this circuit, it is recommended to use LED devices with a voltage of 1.5V.
The operation algorithm of the homemade LED voltage indicator is as follows: when voltage is applied, the central LED source is green. In the event of a voltage drop, the red LED on the left turns on. Increasing the voltage causes the red LED on the right to light up. With the resistor in the middle position, all transistors will be in the closed position, and the voltage will go only to the central green LED.
The opening of the transistor VT1 occurs when the slider of the resistor is moved up, thereby increasing the voltage. In this case, the voltage supply to HL3 is stopped and it is supplied to HL1. When you move the slider down (lowering the voltage), the transistor VT1 is closed and VT2 is opened, which will power the LED HL2. With a slight delay, LED HL1 will go out, HL3 will flash once and HL2 will light up.

Diy LED voltage indicator assembly diagram
Such a circuit can be assembled using radio components from obsolete technology. Some people assemble it on a textolite board, observing a 1: 1 scale with the dimensions of the parts so that all the elements can fit on the board.
The unlimited potential of LED lighting makes it possible to independently design various lighting devices from LEDs with excellent characteristics and fairly low cost.